Model Context Protocol (MCP) finally gives AI models a way to access the business data needed to make them really useful at work. CData MCP Servers have the depth and performance to make sure AI has access to all of the answers.
Try them now for free →Build a Singer.io Tap for Snowflake using CData Python Connector
Singer.io is a free and open-source ETL framework that connects data sources to data destinations, using standardized JSON-based Taps (extractors) and Targets (loaders). It works by extracting data from a source (like a CRM or database) through a Tap and loading it into a Target system (like Snowflake) for analysis — all while maintaining data integrity and structure.
CData Python Connectors enhance this process by providing reliable, high-performance connections to hundreds of data sources and destinations, ensuring smooth, optimized data movement without complex coding.
In this article, we'll build a Tap for Snowflake using a CData connector with Singer.io in Python, then move the data from Snowflake to the Singer.io CSV target target-csv. We'll use a Free Community License for the CData Python Connector for Snowflake along with VSCode. We'll also explore how to dynamically retrieve schema and metadata using CData's sys_tables system tables to simplify data extraction and improve pipeline efficiency.
Let's begin!
PREREQUISITES
- CData Python Connector for Snowflake. Request a Free Community Edition License here (download links included). If you already have a license, you can download the CData Python Connector for Snowflake here.
- Python distribution. Download the latest version for your machine here. Make sure to check the "Add Python to PATH" option during installation.
- Visual Studio Code. Download it here.
GETTING STARTED
OVERVIEW
Here's an overview of the steps we are going to follow:
- Install: Install and configure the CData Connector, Singer.io, and the Singer CSV Target (target-csv).
- Connect: Establish the connection to Snowflake and retrieve the metadata and schema information.
- Build: Build the Snowflake Tap to move and replicate the data.
You're going to be interacting with a lot of files and subfolders. It's a good idea to create a dedicated folder for this project — for example: Singer-Snowflake — and place all the project files in it.
STEP 1: Installation Setup
1.1 Install CData Python Connector for Snowflake
Follow these steps to install and configure the CData Python Connector for Snowflake:
Dependencies Note: The Python connector supports Python versions 3.8, 3.9, 3.10, 3.11, and 3.12. If you're using a version of Python outside these, you may need to create a virtual environment.
- Extract the downloaded connector ZIP to your desired location.
-
Open the terminal or command prompt and navigate to the corresponding installation directory or
open the terminal directly in the directory where the .whl file is located.
For example:
C:\Users\Public\Downloads\CDataPythonConnectorforSnowflake\CData.Python.Snowflake\win\Python312\64
-
For Windows: Install the .whl file using pip. Use the appropriate version for your Python version and architecture.
Example command:
pip install cdata_snowflake_connector-24.0.9111-cp312-cp312-win_amd64.whl
-
For Linux or macOS: Install the .tar.gz file using pip. Example command:
pip install cdata_snowflake_connector-24.0.####-python3.tar.gz
- Confirm that the installation was successful by running pip list. If cdata-snowflake-connector is listed, the installation was successful.
1.2 Install the License for the CData Connector
This is an optional step. A Free Community Edition license for your machine should already be installed when you install the connector using the .whl file.
However, in some cases, if you don't see the license or if you're using a trial version of the CData Connector, you can install your Free Community Edition license using the license key that was sent to your email.
If you didn't receive it, you can request a Community License for the CData Snowflake Connector here.
On Windows
- Download and extract the ZIP file containing the license.
- Open a terminal or command prompt.
- Navigate to the license installer location, typically: C:\Users\Username\AppData\Local\Programs\Python\Python312\Lib\site-packages\cdata\installlic_snowflake
- Or, if you downloaded it separately: C:\Downloads\cdata\installlic_snowflake
- Run the installer with:
.\license-installer.exe [YOUR LICENSE KEY HERE]
- Enter the name and email registration prompted on the screen to complete the installation.
On macOS/Linux
- Download and extract the ZIP file containing the license.
- Open a terminal inside the extracted directory. Example:
cd ~/Downloads/CData-Python-Snowflake
- Navigate to the license installer location, typically: /usr/local/lib/python3.12/site-packages/cdata/installlic_snowflake
- Run the installer:
./license-installer [YOUR LICENSE KEY HERE]
- Enter the name and email registration prompted on the screen to complete the installation.
1.3 Install Singer.io and target-csv
-
Install Singer.io with pip by running:
pip install singer-python
-
Install target-csv by creating a virtual environment:
For Windows:
python -m venv %USERPROFILE%\target-csv
%USERPROFILE%\target-csv\Scripts\activate
pip install target-csv
deactivate
For macOS/Linux:
python3 -m venv ~/.virtualenvs/target-csv
source ~/.virtualenvs/target-csv/bin/activate
pip install target-csv
deactivate
-
Conflict: In Python 3.10 and later, the MutableMapping class was moved from
collections to collections.abc, which may cause an AttributeError
in your target-csv virtual environment. To fix:
- Open target_csv.py in a text editor from ~\target-csv\Scripts.
- Replace:
import collections
from collections.abc import MutableMapping
- Update this line:
isinstance(v, collections.MutableMapping)
isinstance(v, MutableMapping)
STEP 2: Connect, Configure, and Query
Now that you've installed the necessary components, it's time to establish a successful connection to Snowflake and retrieve metadata and schema information. This will help you build your schema to move or replicate data efficiently.
2.1 Establish Connection
- In your project folder, create a new Python file named meta_snowflake.py, and open the file.
- Import the following statements at the beginning of your file:
import singer
import cdata.snowflake as mod

import sys
import os
import time
from datetime import date, datetime
- Create a connection function and replace the placeholder values with your actual Snowflake details:
def create_connection(): conn = mod.connect( "AuthScheme=Password;" "url=YourSnowflakeURL.snowflakecomputing.com;" "user=Your_Username;" "password=Your_Password;" "Database=Your_DB;" "Warehouse=Your_WH;" ) return conn - Run the script to check if the connection works without any errors.
- If you're using advanced authentication methods like OAuth, SSO, or Proxy, update AuthScheme= accordingly. You can find the complete documentation in the HTML help file located in your downloaded connector folder: ~\SnowflakePythonConnector\CData.Python.Snowflake\help\help.htm.
2.2 Retrieve Metadata by Querying
You can retrieve metadata and schema information from your Snowflake warehouse using System Tables in CData's connectors. With system_table, the connector automatically retrieves all the table details, including column names, data types, and row counts, giving you a complete overview of your Snowflake schema. Check out the help file for your Connector for more info.
Paste the following code below the connection properties, save it, and run it. Make sure to update YOUR_TABLE_NAME with the name of your preferred table in your Snowflake database schema:
conn = create_connection()

table_count = conn.execute("SELECT COUNT(*) FROM sys_tables").fetchone()[0]
account_columns = conn.execute(
    """
    SELECT ColumnName, DataTypeName
    FROM sys_tablecolumns
    WHERE TableName = 'YOUR_TABLE_NAME'
    """
).fetchall()

print(f"Tables: {table_count}, Columns in 'YOUR_TABLE_NAME': {len(account_columns)}\n")
print("\n".join(f"{col[0]} ({col[1]})" for col in account_columns))

conn.close()
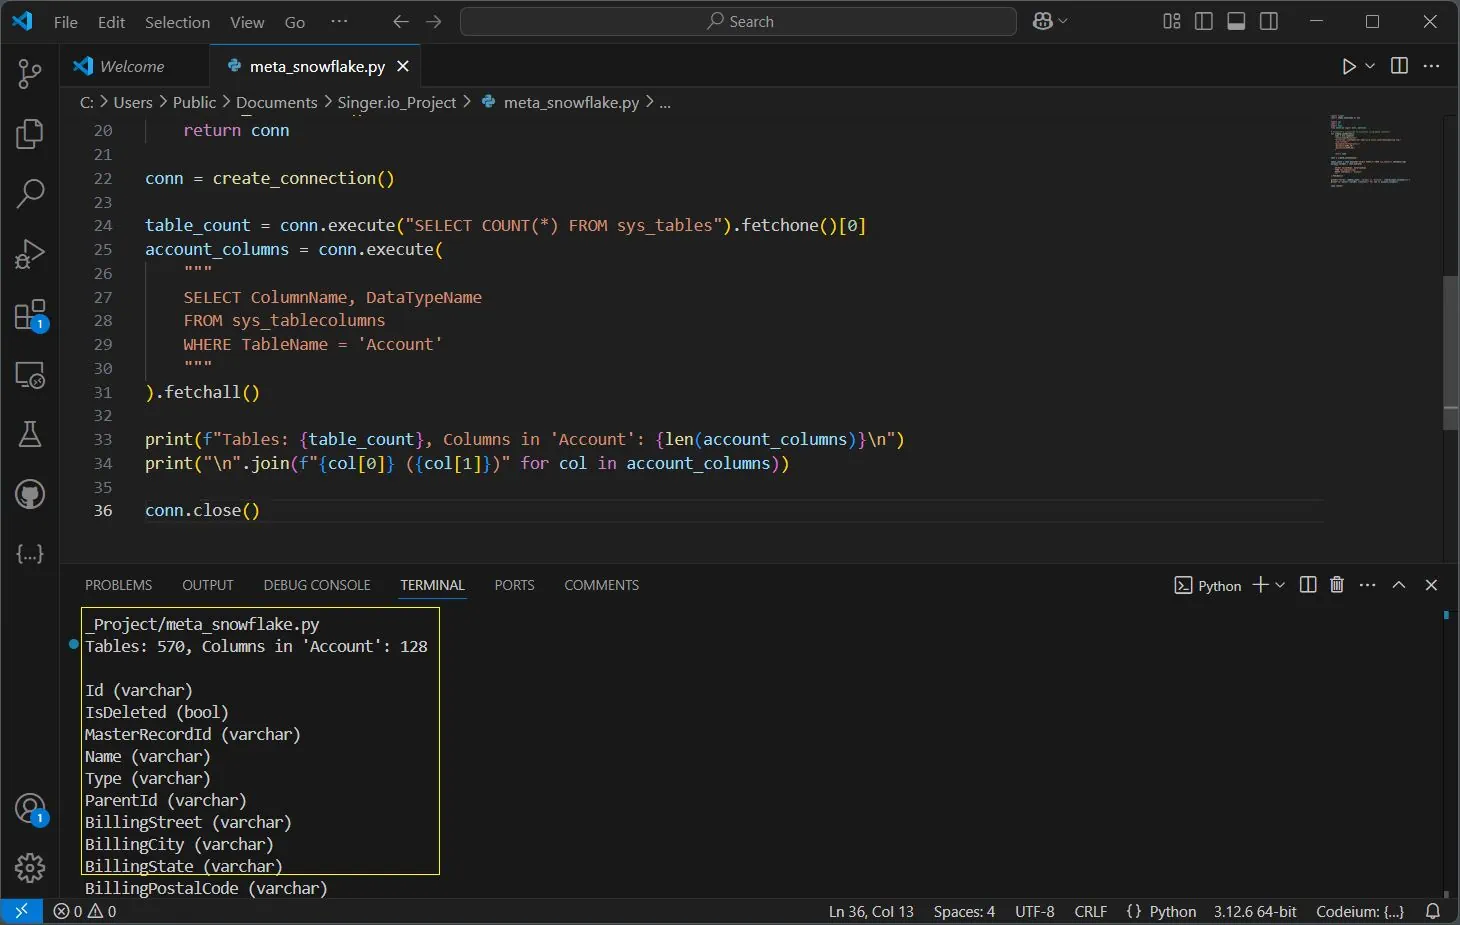
This will display the total number of tables in your database and the total number of columns in YOUR_TABLE_NAME, along with a detailed list of all columns and their respective data types. This helps in understanding the schema structure and enables better data management.
You can use this metadata to build schemas, map table structures, and migrate data efficiently between systems. This approach ensures you have the necessary schema insights before performing operations such as ETL (Extract, Transform, Load) processes, data validation, or analytics.
For our example, we will create a schema using the following columns:
{
    'Id': {'type': 'string'},
    'Name': {'type': 'string'},
    'BillingCity': {'type': 'string'},
    'AnnualRevenue': {'type': 'number'}
}
STEP 3: Building the Tap
Now that you've connected to your Snowflake warehouse and retrieved the schema metadata, it's time to build the tap by defining your schema for data replication. Follow these steps to create your tap, configure it, and export the data to a CSV file:
-
Create a new file in your project directory called tap_snowflake.py, and add the previous import statements and connection properties. Then, paste the following code after the connection setup. Make sure to define and map the schema according to your table structure and update the path for the execution log file at with open("YOUR_PATH").
# Define schema for the Account table schema = { 'properties': { 'Id': {'type': 'string'}, 'Name': {'type': 'string'}, 'BillingCity': {'type': 'string'}, 'AnnualRevenue': {'type': 'number'} } } # Fetch Account data from Snowflake def fetch_sf_data(): conn = create_connection() try: query = 'SELECT "Id", "Name", "BillingCity", "AnnualRevenue" FROM "DEMO_DB"."CRM"."Account"' return conn.execute(query).fetchall() except Exception as e: sys.stderr.write(f"Error fetching data: {e}\n") return [] finally: conn.close() # Write schema, records, and log performance def write_records(): start_time = time.perf_counter_ns() singer.write_schema('account', schema, ['Id']) records = fetch_sf_data() for record in records: singer.write_record('account', { 'Id': record[0] or 'N/A', 'Name': record[1] or 'Unknown', 'BillingCity': record[2] or '', 'AnnualRevenue': record[3] or 0 }) duration_ms = (time.perf_counter_ns() - start_time) / 1_000_000 with open("YOUR_PATH/execution_log_snow.txt", "w") as log_file: log_file.write(f"Execution Time: {duration_ms:.3f} ms\nTotal Records: {len(records)}\n") # Main guard if __name__ == "__main__": write_records() -
The target-csv tool accepts an optional JSON config file for customization. Create a file named my-config.json and configure it as needed. Here's a basic example:
{ "delimiter": "\t", "quotechar": "'", "destination_path": "YOUR/PATH/FOR/CSV/OUTPUTS", "disable_collection": true } -
Open your terminal, navigate to your project directory, activate the target-csv virtual environment with:
~\target-csv\Scripts\activate. -
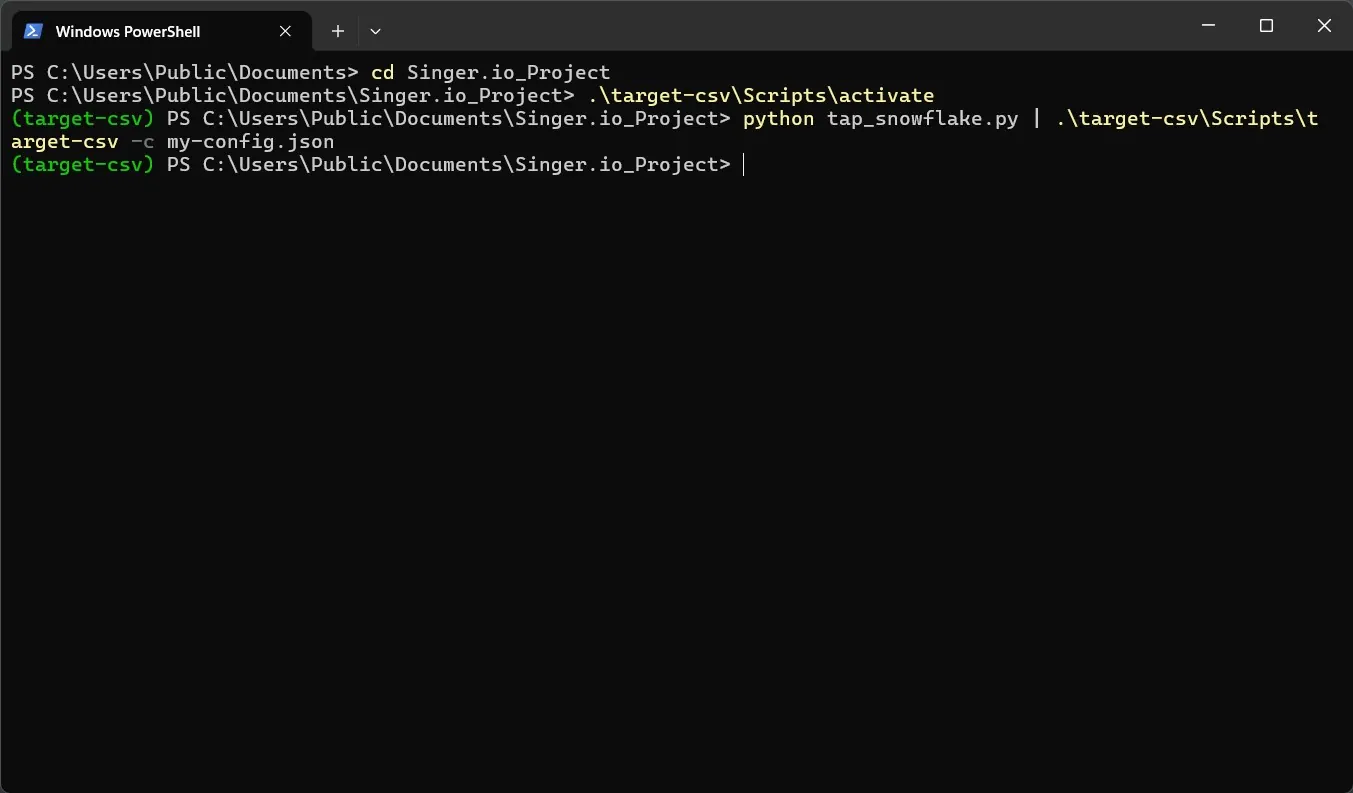
Then, run the following command to execute the tap and pipe the output to CSV:
python tap_snowflake.py | .\target-csv\Scripts\target-csv -c my-config.json

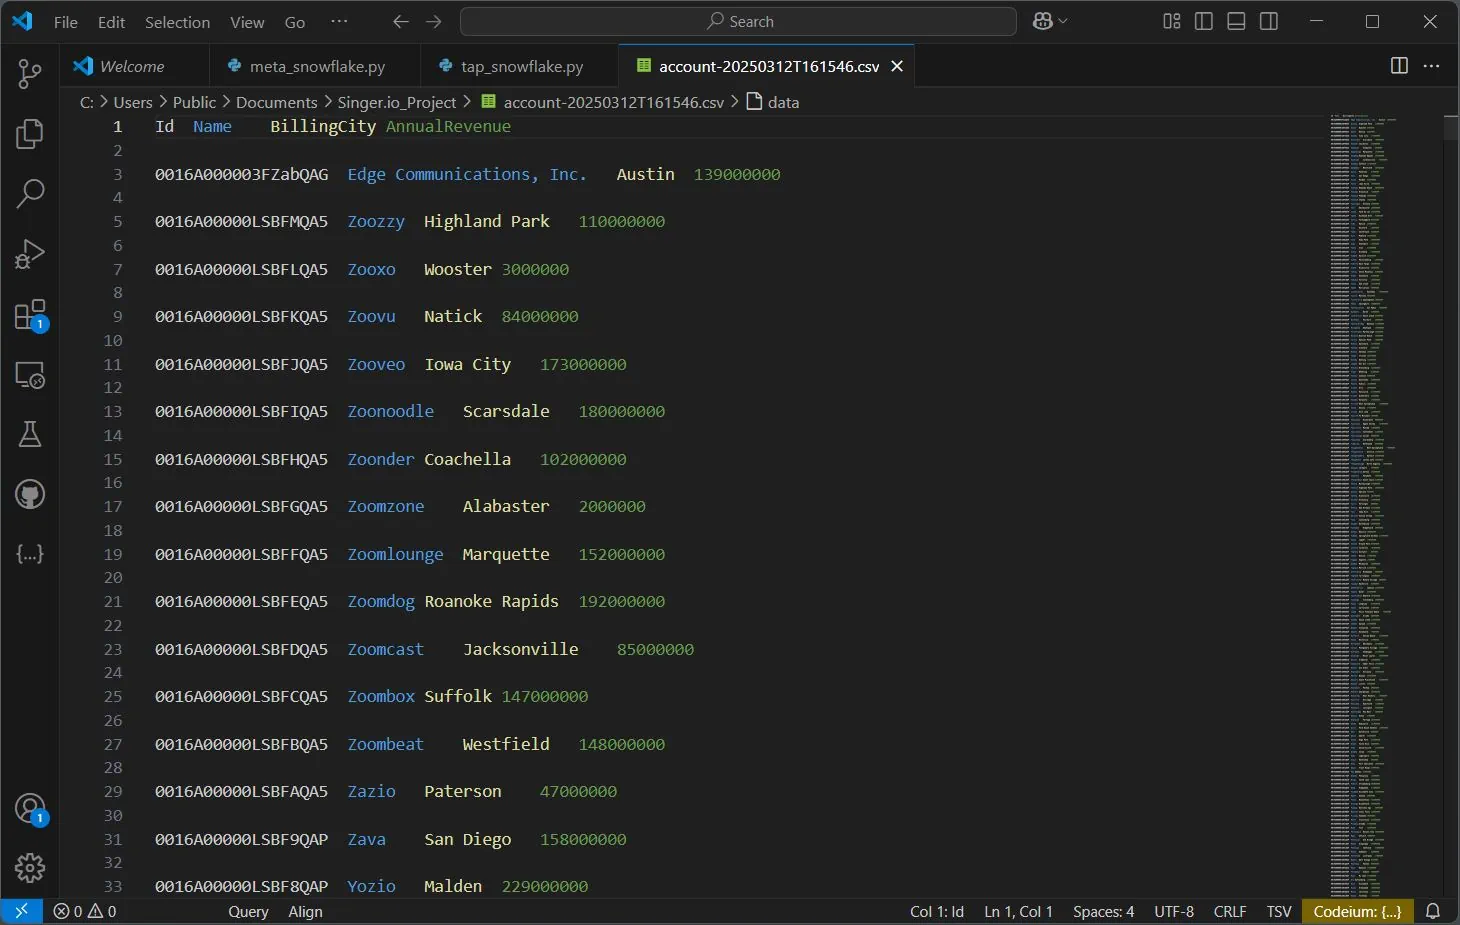
You have now successfully built a Singer Tap for Snowflake. This will output your defined schema to a CSV file using the target-csv target. You can check the exported CSV file in your project folder or in the location defined in your my-config.json.
Feel free to review the execution_log_snow.txt file in your defined location in the code to verify the number of records moved/replicated and the total execution time (in milliseconds).

Target Ahead
You've successfully built a Singer Tap for Snowflake and moved your data. But this is just scratching the surface of what's possible with CData Python Connectors. You can explore further with the following:
- Build Taps for Other Sources: Extend your setup by creating taps for databases like PostgreSQL, MySQL, or APIs like Salesforce and HubSpot to unify data pipelines.
- Incorporate Incremental Data Loads: Modify your tap to track and load only new or updated records, improving efficiency for large datasets.
- Transform Data Mid-Stream: Add preprocessing steps to clean, format, or enrich data before it reaches the target destination.
- Integrate with Other Targets: Expand beyond CSV — push data to cloud warehouses like BigQuery, Redshift, or even live dashboards.
For more info on this, check out the documentation and tutorial guides at our Developer Resource Center.
Full Code
For meta_snowflake.py
import singer
import cdata.snowflake as mod

import sys
import os
import time
from datetime import date, datetime

# Create Snowflake connection
def create_connection():
    conn = mod.connect(
        "AuthScheme=Password;"
        "url=YourSnowflakeURL.snowflakecomputing.com;"
        "user=Your_Username;"
        "password=Your_Password;"
        "Database=Your_DB;"
        "Warehouse=Your_WH;"
    )
    return conn

# Fetch table count and column metadata
conn = create_connection()

table_count = conn.execute("SELECT COUNT(*) FROM sys_tables").fetchone()[0]
account_columns = conn.execute(
    """
    SELECT ColumnName, DataTypeName
    FROM sys_tablecolumns
    WHERE TableName = 'YOUR_TABLE_NAME'
    """
).fetchall()

# Output metadata
print(f"Tables: {table_count}, Columns in 'YOUR_TABLE_NAME': {len(account_columns)}\n")
print("\n".join(f"{col[0]} ({col[1]})" for col in account_columns))

conn.close()
For tap_snowflake.py
import singer
import cdata.snowflake as mod

import sys
import os
import time
from datetime import date, datetime

# Create Snowflake connection
def create_connection():
    conn = mod.connect(
        "AuthScheme=Password;"
        "url=YourSnowflakeURL.snowflakecomputing.com;"
        "user=Your_Username;"
        "password=Your_Password;"
        "Database=Your_DB;"
        "Warehouse=Your_WH;"
    )
    return conn

# Define schema for the Account table
schema = {
    'properties': {
        'Id': {'type': 'string'},
        'Name': {'type': 'string'},
        'BillingCity': {'type': 'string'},
        'AnnualRevenue': {'type': 'number'}
    }
}

# Fetch Account data from Snowflake
def fetch_sf_data():
    conn = create_connection()
    try:
        query = 'SELECT "Id", "Name", "BillingCity", "AnnualRevenue" FROM "DEMO_DB"."CRM"."Account"'
        return conn.execute(query).fetchall()
    except Exception as e:
        sys.stderr.write(f"Error fetching data: {e}\n")
        return []
    finally:
        conn.close()

# Write schema, records, and log performance
def write_records():
    start_time = time.perf_counter_ns()

    singer.write_schema('account', schema, ['Id'])
    records = fetch_sf_data()

    for record in records:
        singer.write_record('account', {
            'Id': record[0] or 'N/A',
            'Name': record[1] or 'Unknown',
            'BillingCity': record[2] or '',
            'AnnualRevenue': record[3] or 0
        })

    duration_ms = (time.perf_counter_ns() - start_time) / 1_000_000
    with open("YOUR_PATH/execution_log_snow.txt", "w") as log_file:
        log_file.write(f"Execution Time: {duration_ms:.3f} ms\nTotal Records: {len(records)}\n")

# Main guard
if __name__ == "__main__":
    write_records()
