Model Context Protocol (MCP) finally gives AI models a way to access the business data needed to make them really useful at work. CData MCP Servers have the depth and performance to make sure AI has access to all of the answers.
Try them now for free →Automate Tasks in Power Automate Using the CData API Server and AlloyDB ADO.NET Provider
Automate actions like sending emails to a contact list, posting to social media, or syncing CRM and ERP.
Power Automate (Microsoft Flow) makes it easy to automate tasks that involve data from multiple systems, on premises or in the cloud. With the CData API Server and AlloyDB ADO.NET Provider (or any of 200+ other ADO.NET Providers), line-of-business users have a native way to create actions based on AlloyDB triggers in Power Automate; the API Server makes it possible for SaaS applications like Power Automate to integrate seamlessly with AlloyDB data through data access standards like Swagger and OData. This article shows how to use wizards in Power Automate and the API Server for AlloyDB to create a trigger -- entities that match search criteria -- and send an email based on the results.
Set Up the API Server
Follow the steps below to begin producing secure and Swagger-enabled AlloyDB APIs:
Deploy
The API Server runs on your own server. On Windows, you can deploy using the stand-alone server or IIS. On a Java servlet container, drop in the API Server WAR file. See the help documentation for more information and how-tos.
The API Server is also easy to deploy on Microsoft Azure, Amazon EC2, and Heroku.
Connect to AlloyDB
After you deploy, provide authentication values and other connection properties by clicking Settings -> Connections in the API Server administration console. You can then choose the entities you want to allow the API Server access to by clicking Settings -> Resources.
The following connection properties are usually required in order to connect to AlloyDB.
- Server: The host name or IP of the server hosting the AlloyDB database.
- User: The user which will be used to authenticate with the AlloyDB server.
- Password: The password which will be used to authenticate with the AlloyDB server.
You can also optionally set the following:
- Database: The database to connect to when connecting to the AlloyDB Server. If this is not set, the user's default database will be used.
- Port: The port of the server hosting the AlloyDB database. This property is set to 5432 by default.
Authenticating with Standard Authentication
Standard authentication (using the user/password combination supplied earlier) is the default form of authentication.
No further action is required to leverage Standard Authentication to connect.
Authenticating with pg_hba.conf Auth Schemes
There are additional methods of authentication available which must be enabled in the pg_hba.conf file on the AlloyDB server.
Find instructions about authentication setup on the AlloyDB Server here.
Authenticating with MD5 Authentication
This authentication method must be enabled by setting the auth-method in the pg_hba.conf file to md5.
Authenticating with SASL Authentication
This authentication method must be enabled by setting the auth-method in the pg_hba.conf file to scram-sha-256.
Authenticating with Kerberos
The authentication with Kerberos is initiated by AlloyDB Server when the ∏ is trying to connect to it. You should set up Kerberos on the AlloyDB Server to activate this authentication method. Once you have Kerberos authentication set up on the AlloyDB Server, see the Kerberos section of the help documentation for details on how to authenticate with Kerberos.
You will also need to enable CORS and define the following sections on the Settings -> Server page. As an alternative, you can select the option to allow all domains without '*'.
- Access-Control-Allow-Origin: Set this to a value of '*' or specify the domains that are allowed to connect.
- Access-Control-Allow-Methods: Set this to a value of "GET,PUT,POST,OPTIONS".
- Access-Control-Allow-Headers: Set this to "x-ms-client-request-id, authorization, content-type".
Authorize API Server Users
After determining the OData services you want to produce, authorize users by clicking Settings -> Users. The API Server uses authtoken-based authentication and supports the major authentication schemes. You can authenticate as well as encrypt connections with SSL. Access can also be restricted by IP address; access is restricted to only the local machine by default.
For simplicity, we will allow the authtoken for API users to be passed in the URL. You will need to add a setting in the Application section of the settings.cfg file, located in the data directory. On Windows, this is the app_data subfolder in the application root. In the Java edition, the location of the data directory depends on your operation system:
- Windows: C:\ProgramData\CData
- Unix or Mac OS X: ~/cdata
[Application]
AllowAuthtokenInURL = true
Add AlloyDB Data to a Flow
You can use the built-in HTTP + Swagger connector to use a wizard to design a AlloyDB process flow:
- In Power Automate, click My Flows -> Create from Blank.
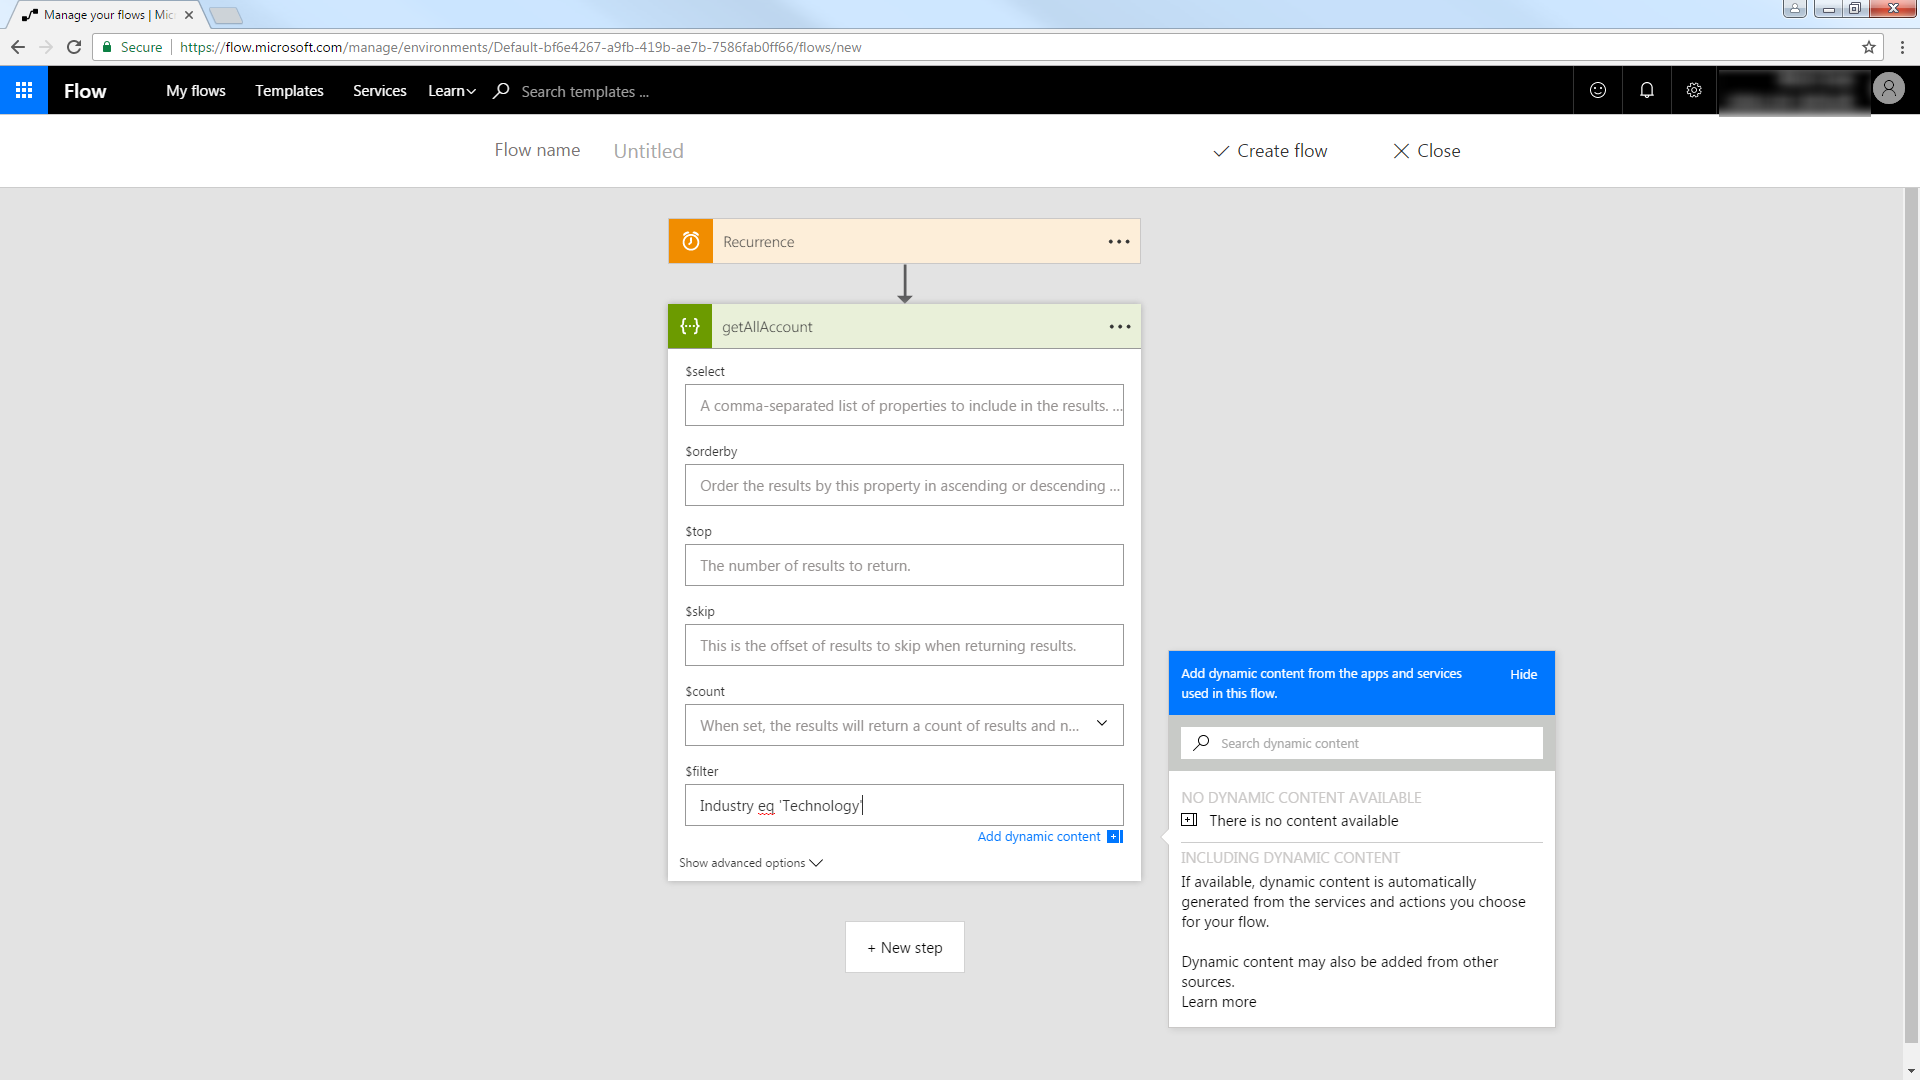
- Select the Recurrence action and select a time interval for sending emails. This article uses 1 day.
- Add an HTTP + Swagger action by searching for Swagger.
- Enter the URL to the Swagger metadata document:
https://MySite:MyPort/api.rsc/@MyAuthtoken/$oas - Select the "Return Orders" operation.
Build the OData query to retrieve AlloyDB data. This article defines the following OData filter expression in the $filter box:
ShipCountry eq 'USA'
See the API Server help documentation for more on filtering and examples of the supported OData.

Trigger an Action
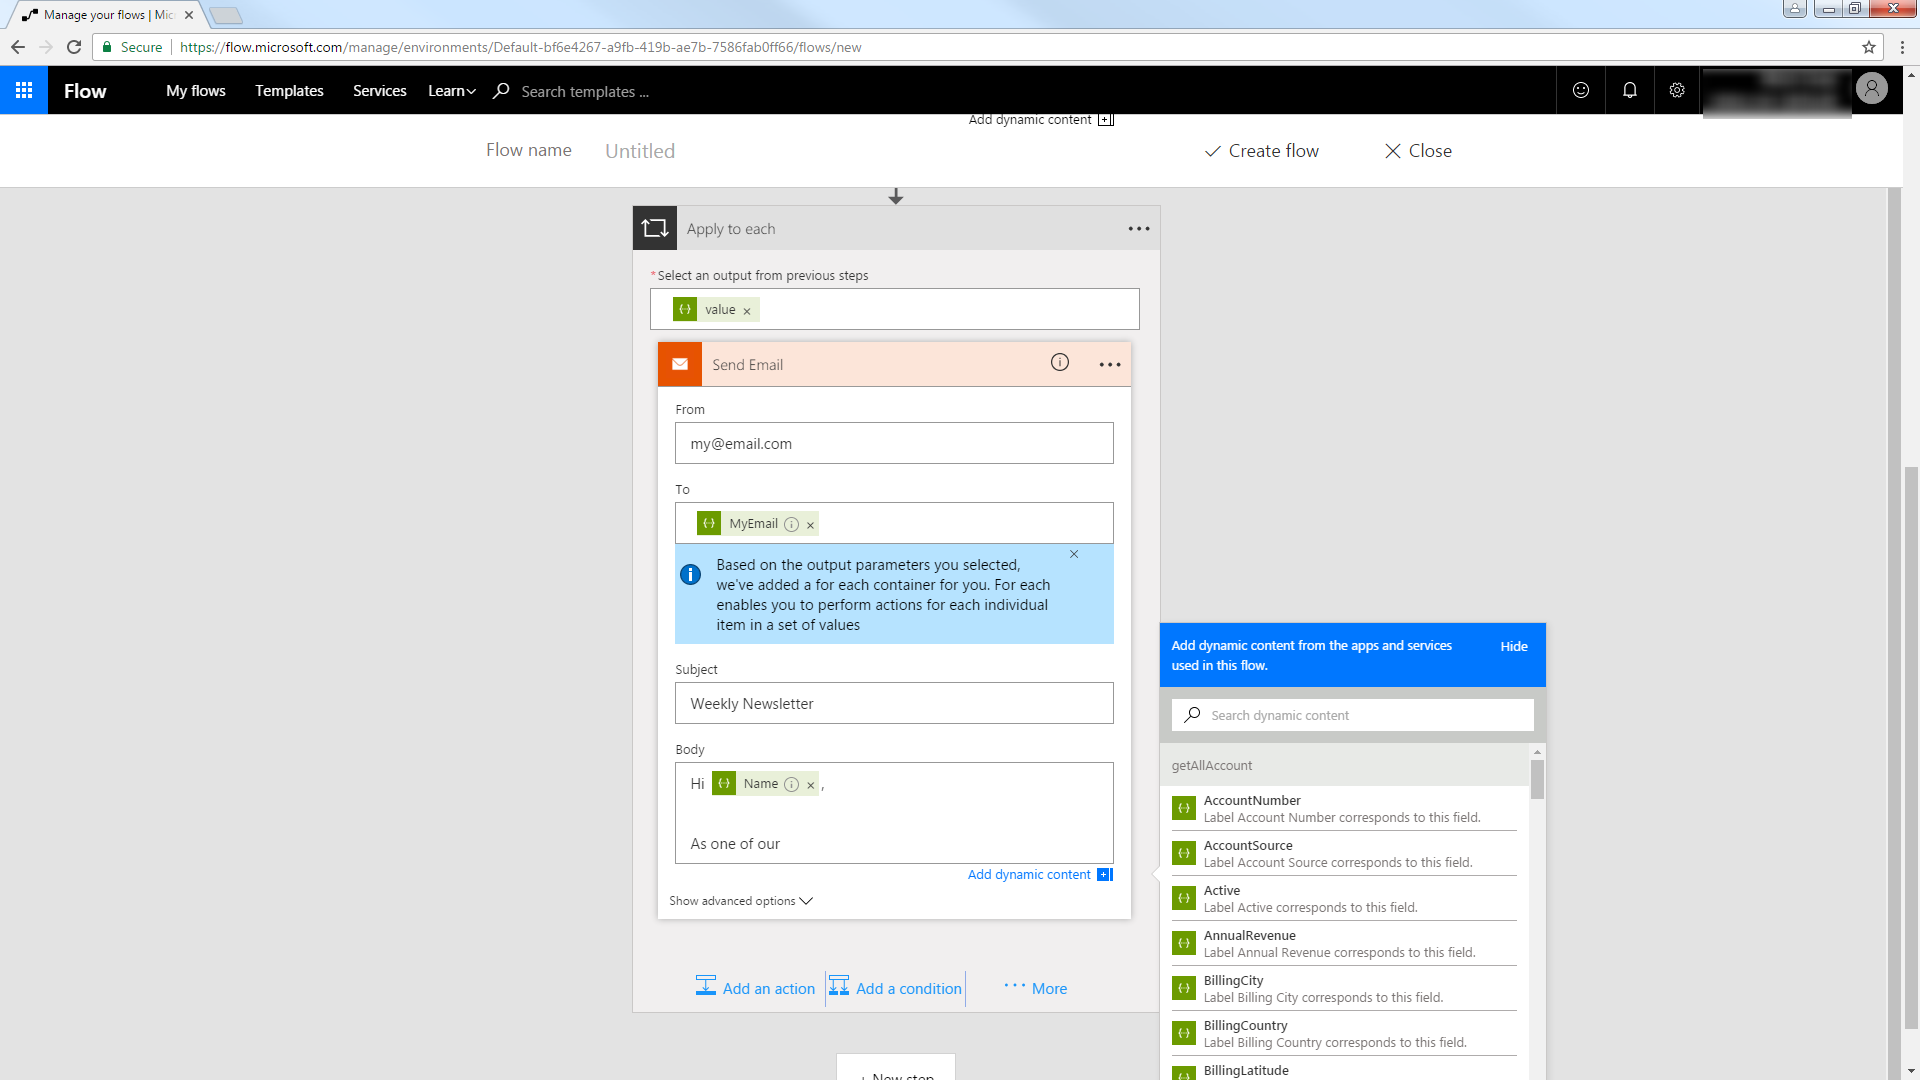
You can now work with Orders entities in your process flow. Follow the steps to send an automated email:
- Add an SMTP - Send Email action.
- Enter the address and credentials for the SMTP server and name the connection. Be sure to enable encryption if supported by your server.
- Enter the message headers and body. You can add AlloyDB columns in these boxes.

