Model Context Protocol (MCP) finally gives AI models a way to access the business data needed to make them really useful at work. CData MCP Servers have the depth and performance to make sure AI has access to all of the answers.
Try them now for free →Seamlessly Bring HCL Domino Data into Retool Using CData Connect Cloud
Integrate HCL Domino data into Retool with CData Connect Cloud to build smarter apps and streamline workflows with real-time data access.
Retool enables the rapid creation of custom internal tools using a low-code or no-code approach. By integrating HCL Domino into Retool with CData Connect Cloud, you can access live data from HCL Domino in real time, enabling you to build more efficient apps and streamline workflows.
This guide walks you through the simple steps to connect HCL Domino to Retool via CData Connect Cloud using OpenAPI or the Virtual SQL Server API. You can securely connect to your HCL Domino data, ensuring seamless integration and real-time updates, empowering you to create smarter apps and enhance operational efficiency. Let's get started!
Overview
Here is an overview of the steps:
- Configure: (Optional) Set up your HCL Domino data source in CData Connect Cloud, add a Workspace to Virtual Datasets, add assets to your Workspace, and generate a Personal Access Token (PAT).
- Connect: Link Retool to CData Connect Cloud using OpenAPI or the Virtual SQL Server API.
- Explore: Use your connected data to build smarter apps and explore advanced integrations.
Prerequisites
Ensure you have the following before starting:
- An active HCL Domino account and credentials.
- A CData Connect Cloud account. Log in or sign up for a free trial here.
- A Retool account. Sign up here.
STEP 1: Configure the HCL Domino Connectivity for Retool (in CData Connect Cloud)
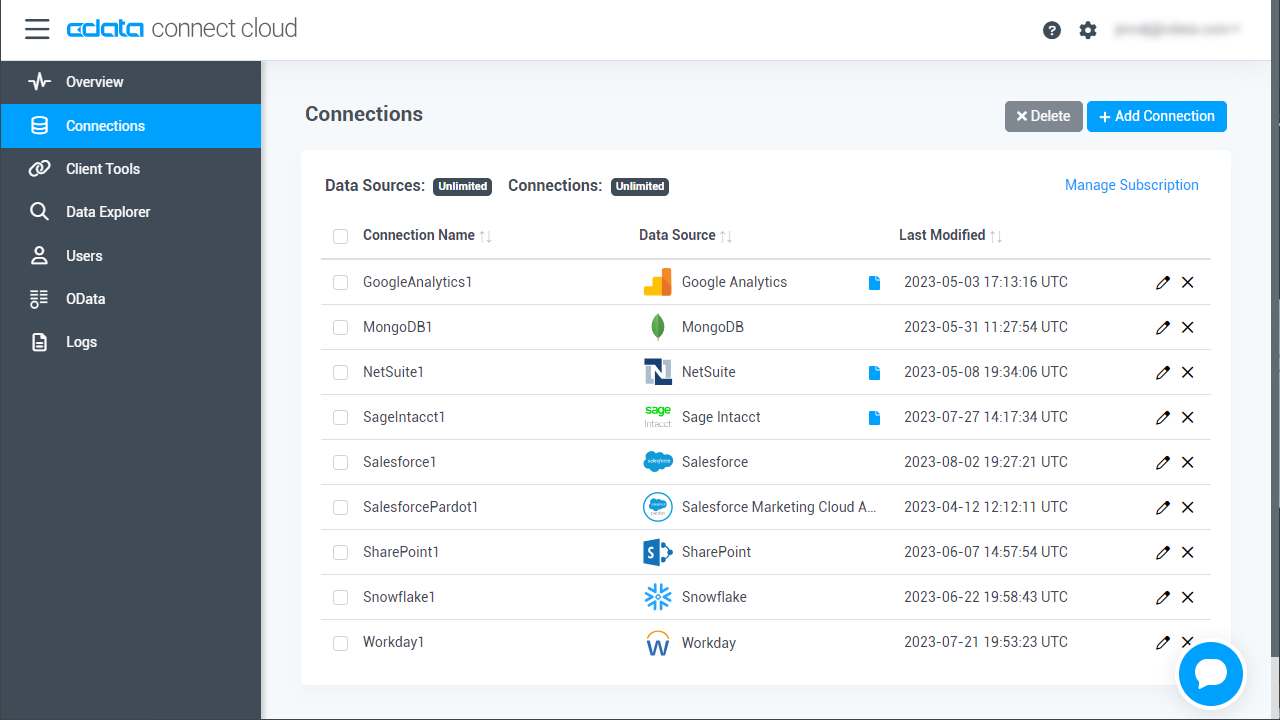
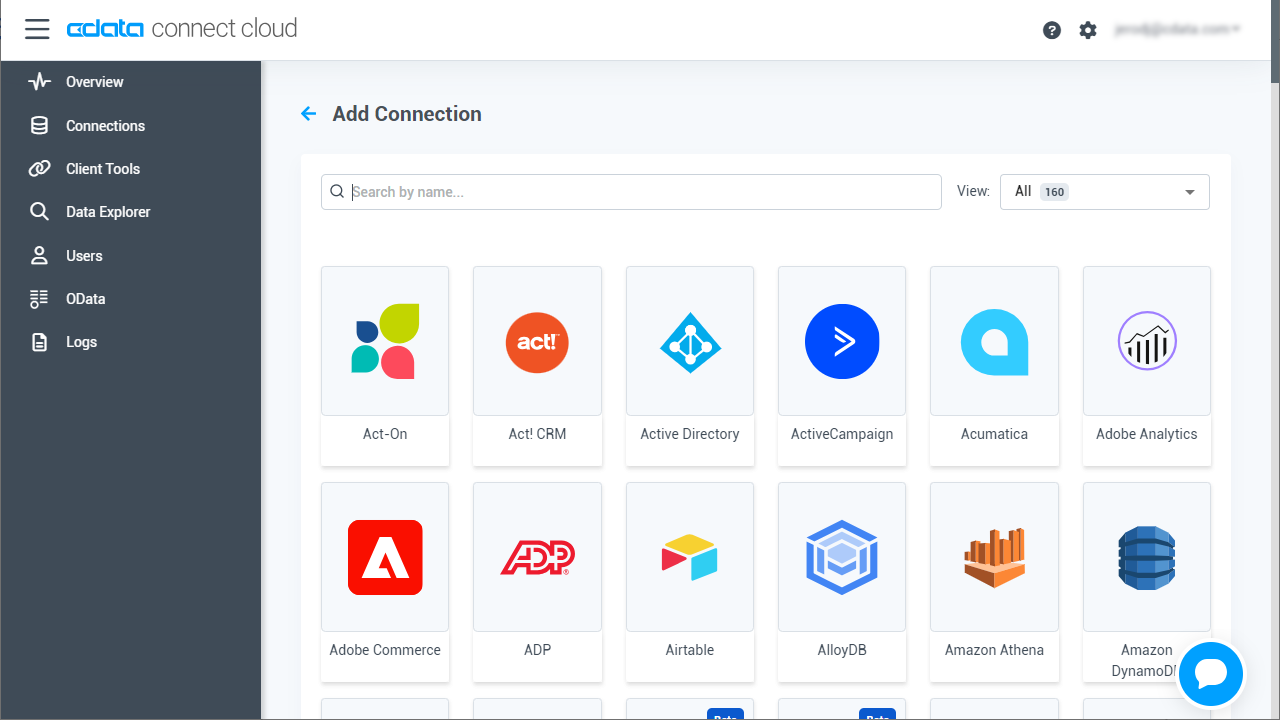
Add a HCL Domino connection in CData Connect Cloud to integrate it with Retool.
Note: This step is optional and can be skipped if you have already connected to the HCL Domino data source.
Connecting to Domino
To connect to Domino data, set the following properties:
- URL: The host name or IP of the server hosting the Domino database. Include the port of the server hosting the Domino database. For example: http://sampleserver:1234/
- DatabaseScope: The name of a scope in the Domino Web UI. The driver exposes forms and views for the schema governed by the specified scope. In the Domino Admin UI, select the Scopes menu in the sidebar. Set this property to the name of an existing scope.
Authenticating with Domino
Domino supports authenticating via login credentials or an Azure Active Directory OAuth application:
Login Credentials
To authenticate with login credentials, set the following properties:
- AuthScheme: Set this to "OAuthPassword"
- User: The username of the authenticating Domino user
- Password: The password associated with the authenticating Domino user
The driver uses the login credentials to automatically perform an OAuth token exchange.
AzureAD
This authentication method uses Azure Active Directory as an IdP to obtain a JWT token. You need to create a custom OAuth application in Azure Active Directory and configure it as an IdP. To do so, follow the instructions in the Help documentation. Then set the following properties:
- AuthScheme: Set this to "AzureAD"
- InitiateOAuth: Set this to GETANDREFRESH. You can use InitiateOAuth to avoid repeating the OAuth exchange and manually setting the OAuthAccessToken.
- OAuthClientId: The Client ID obtained when setting up the custom OAuth application.
- OAuthClientSecret: The Client secret obtained when setting up the custom OAuth application.
- CallbackURL: The redirect URI defined when you registered your app. For example: https://localhost:33333
- AzureTenant: The Microsoft Online tenant being used to access data. Supply either a value in the form companyname.microsoft.com or the tenant ID.
The tenant ID is the same as the directory ID shown in the Azure Portal's Azure Active Directory > Properties page.
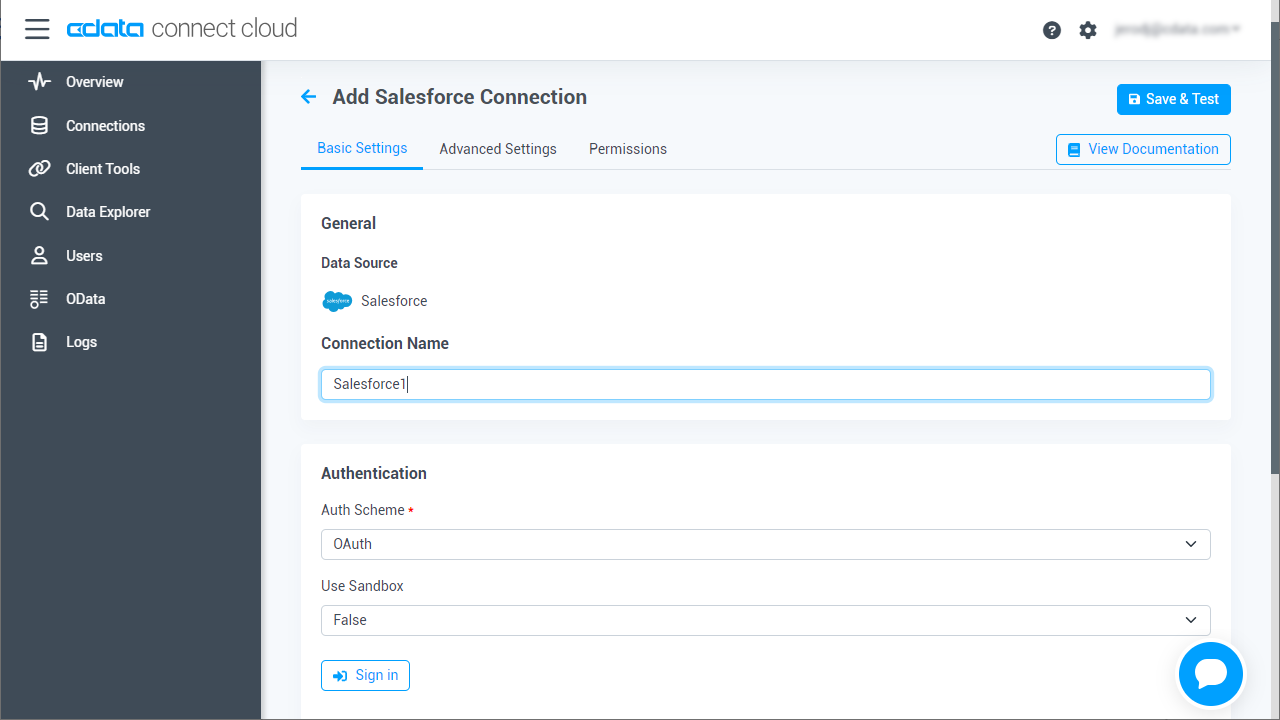
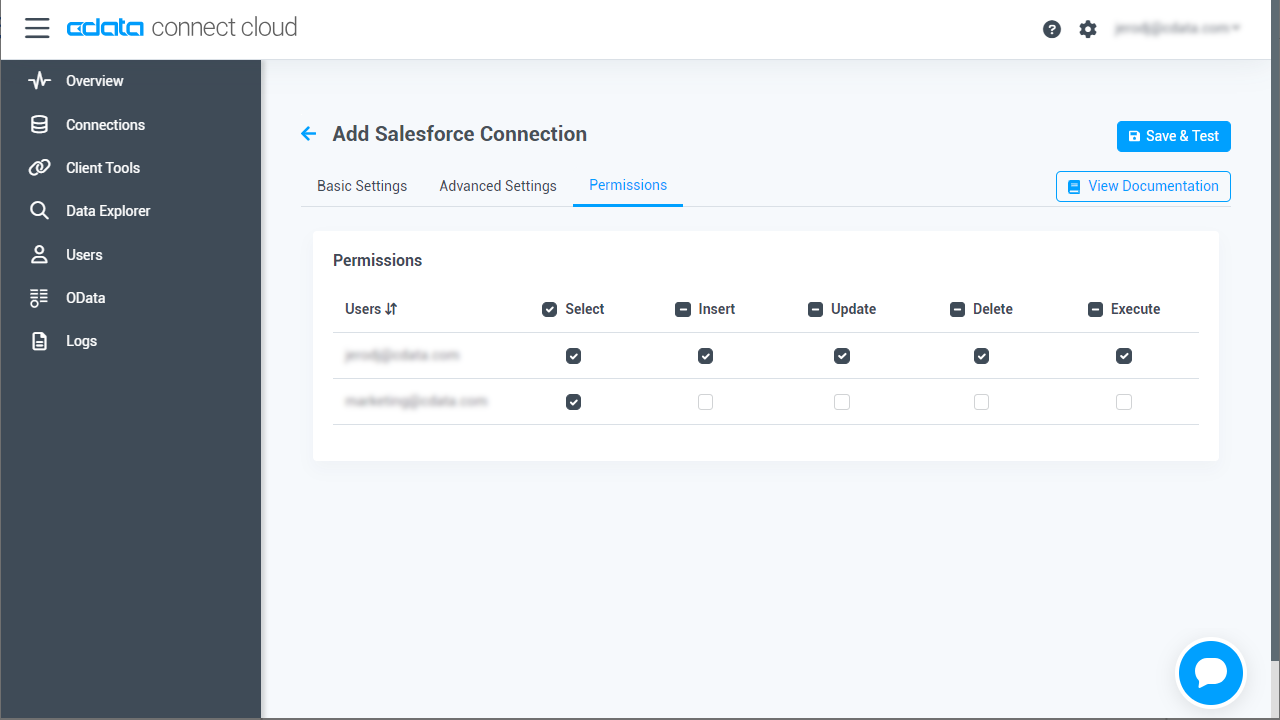
If the connection fails, refer to error messages for guidance in the documentation. Some data sources require direct sign-in, which can be completed via the Sign In button if prompted.
Configure the Virtual Datasets and Workspace, and Generate a Personal Access Token (PAT).
Once you've connected HCL Domino into the CData Connect Cloud, configure virtual Datasets and Workspaces, and then generate a personal access token (PAT) to enable seamless integration and data management across various connected data sources.
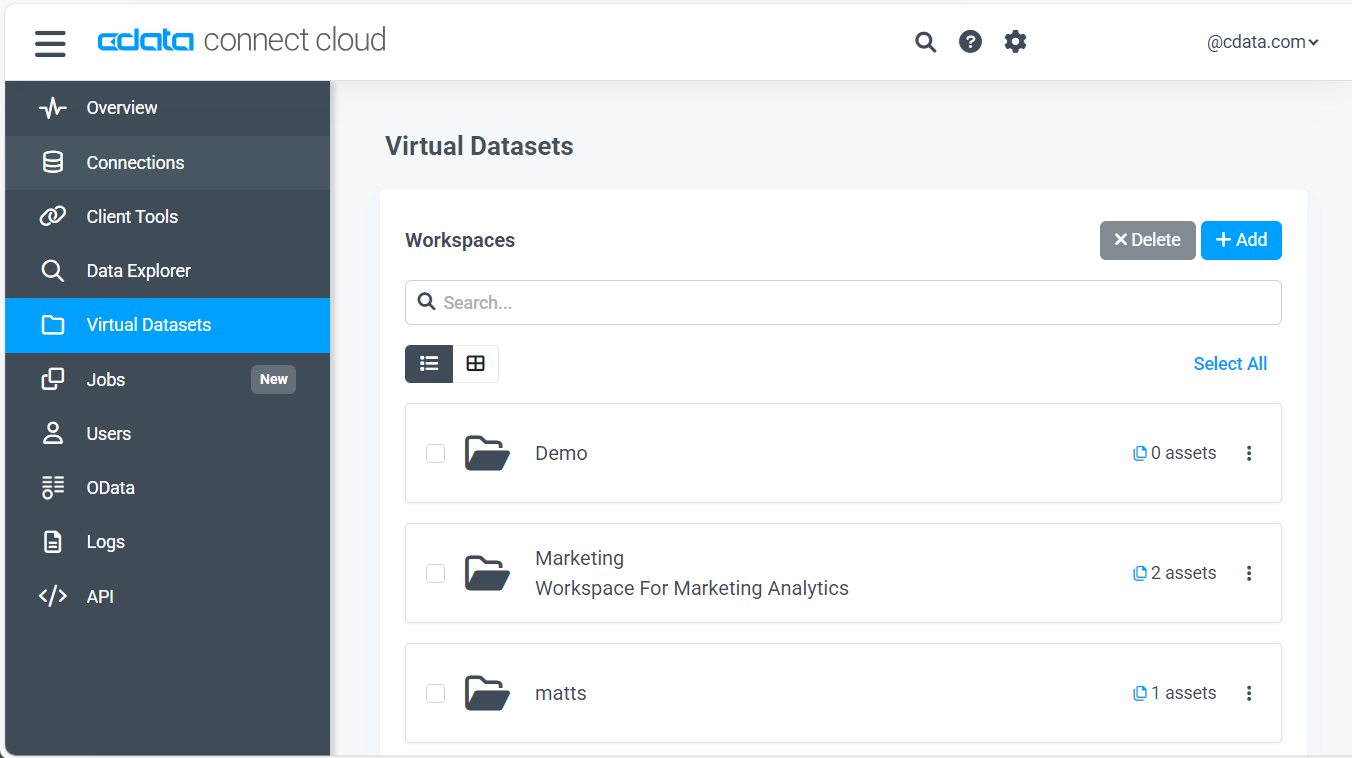
Virtual Datasets in CData Connect Cloud simplify access to diverse data sources, supporting tables, views, and derived views with full CRUD capabilities. Workspaces organize datasets, offer SQL Server, connectivity endpoints, and include assets like folders for efficient management. Learn more about Virtual Datasets here
- Create a Workspace:
- Click Virtual Datasets () on the left, then Add on the top right.
- Enter a Workspace Name and click Confirm to create the workspace.
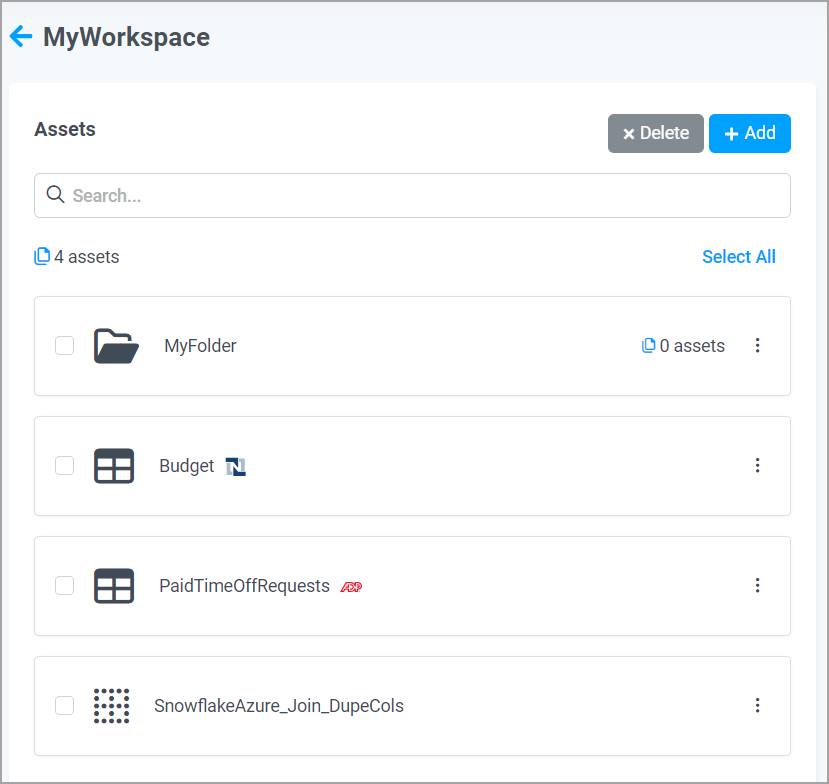
- Create a Virtual Dataset or Folder:
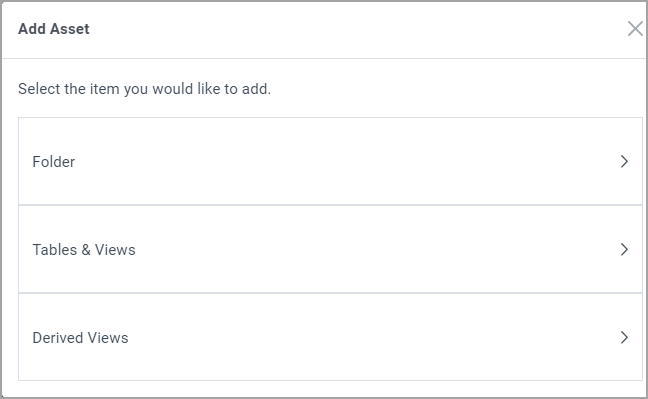
- In the workspace, click Add on the top right, select from the menu (Folder, Tables and Views, or Derived Views), and provide the necessary details (e.g., folder name, connection, tables/views).
- Click Confirm to add the asset.
- For any asset, the tabs show:
- Columns: Metadata table.
- Preview: Data item preview.
- SQL: Generated SQL query, including the configurable Alias.
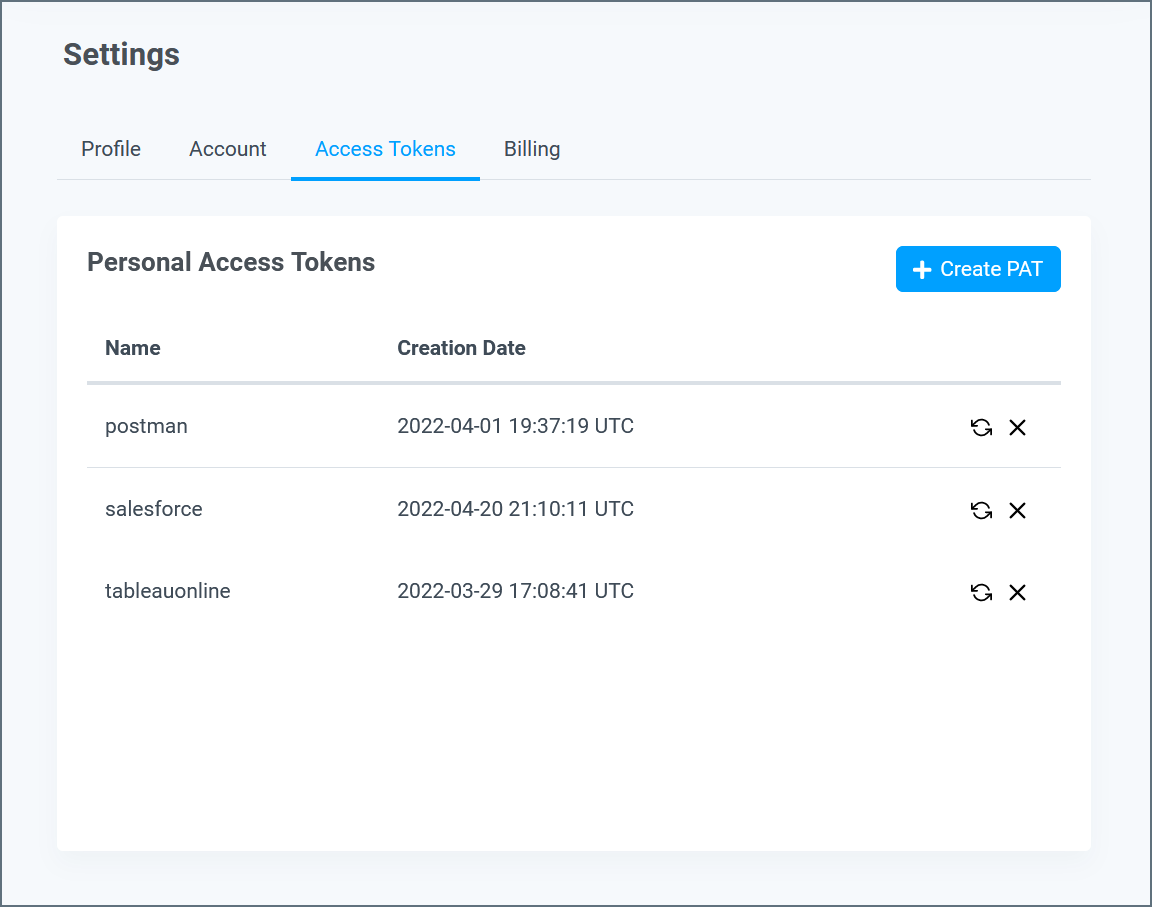
Personal Access Tokens (PATs) in CData Connect Cloud allow connections via REST API, OData, or Virtual SQL Server.
- To create a new PAT:
- Go to Settings (top right) > Access Tokens.
- Click Create PAT, enter a name, then click Create.
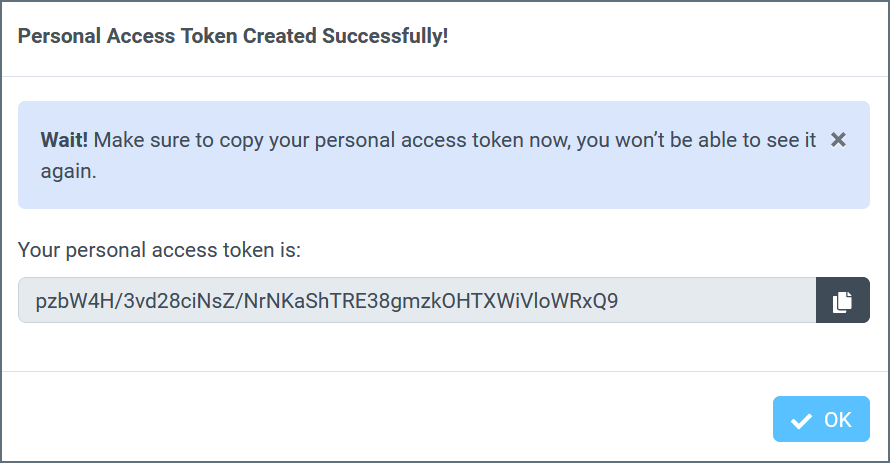
- Copy the PAT using the copy icon. NOTE: The PAT can't be viewed again after closing the dialog, so make sure to copy it before clicking OK.
- Click OK to close the dialog, and save the copied PAT for use in proceeding steps.
- To regenerate a PAT, click the regeneration icon () in the PAT list and follow the prompts.
STEP 2: Connect Retool to HCL Domino in CData Connect Cloud
Now that you've configured your HCL Domino connection in CData Connect Cloud, it's time to integrate it with Retool.
Retool can be connected to HCL Domino in CData Connect Cloud via either OpenAPI or the Virtual SQL Server API. Choose the method that best suits your workflow:
Connect via OpenAPI
To connect using the OpenAPI specification, follow these steps:
- On CData Connect Cloud, from the left-hand side, go to Virtual Database > select a Workspace.
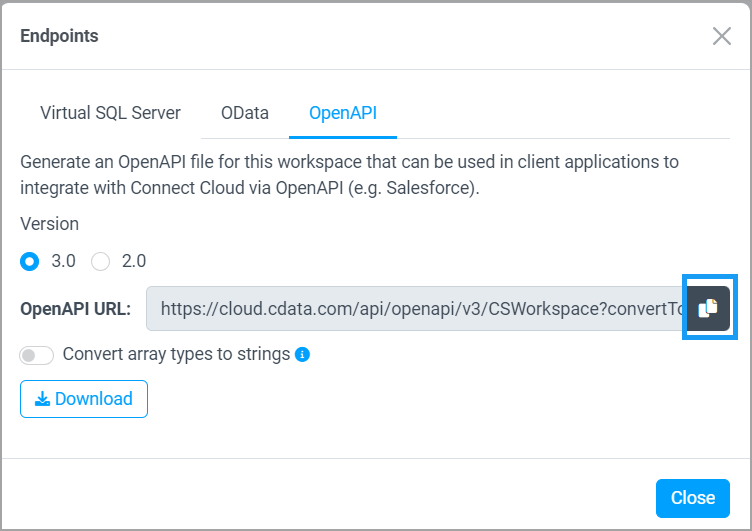
- Click the View Endpoints, and under the OpenAPI, copy the OpenAPI URL for the workspace. Keep the default options. See OpenAPI section for more information.
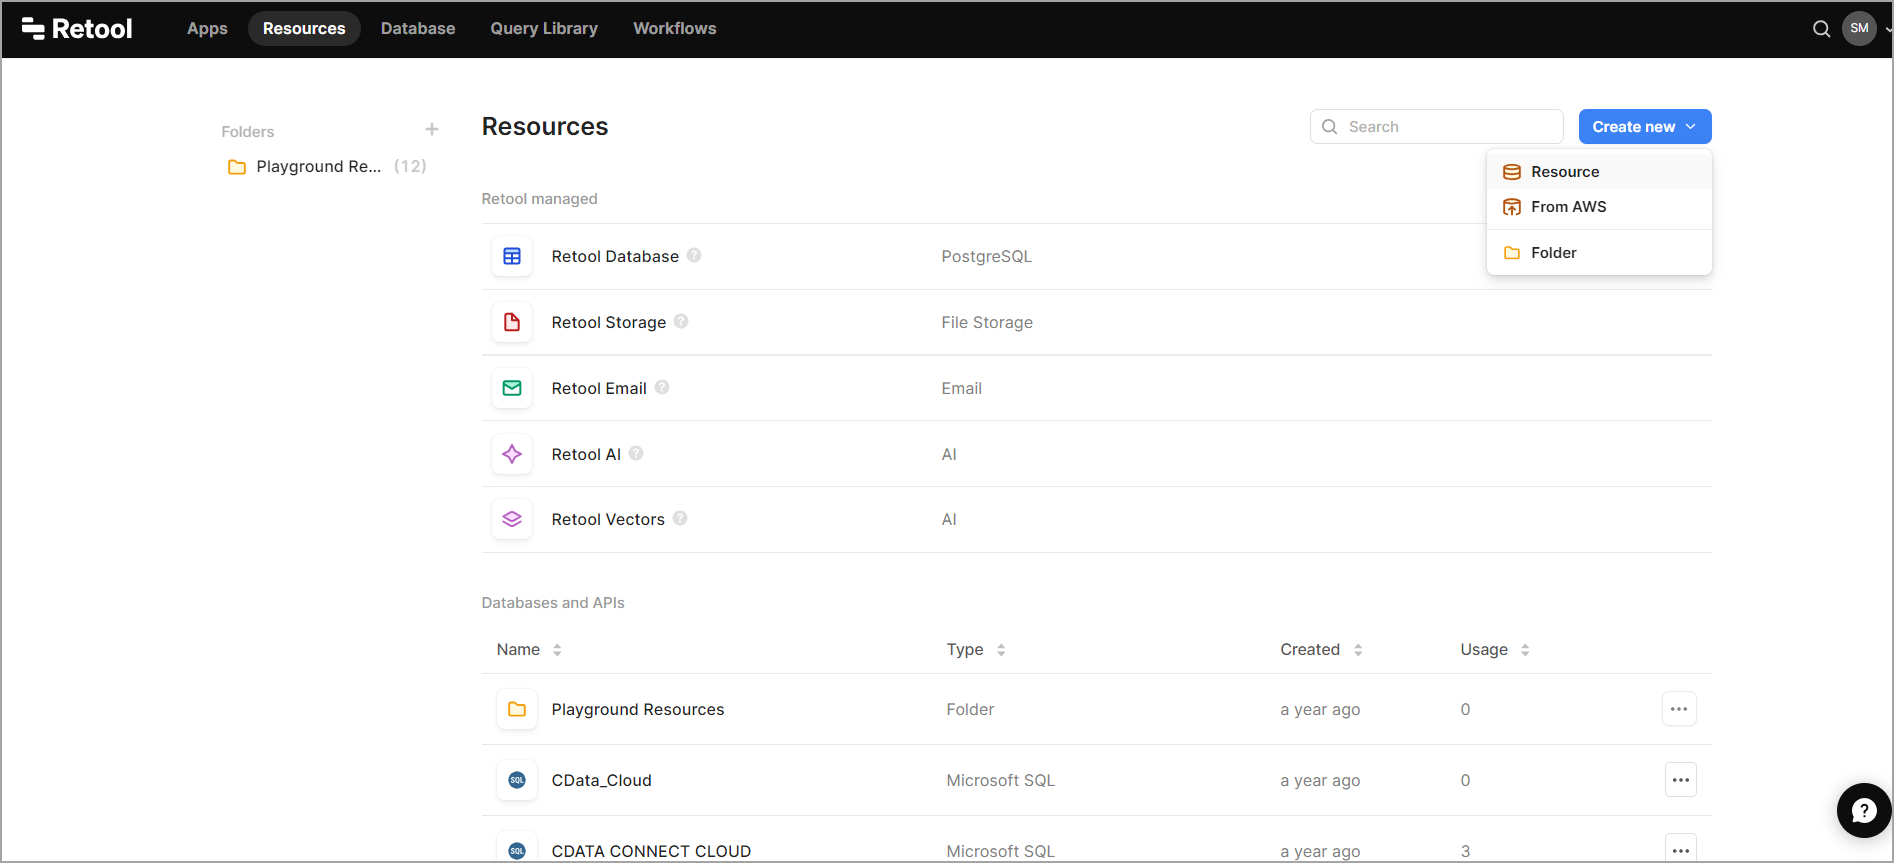
- Login to Retool and then go to the Resources tab, click Create new > Resource.
- In the Select a resource type search bar, and search for OpenAPI.
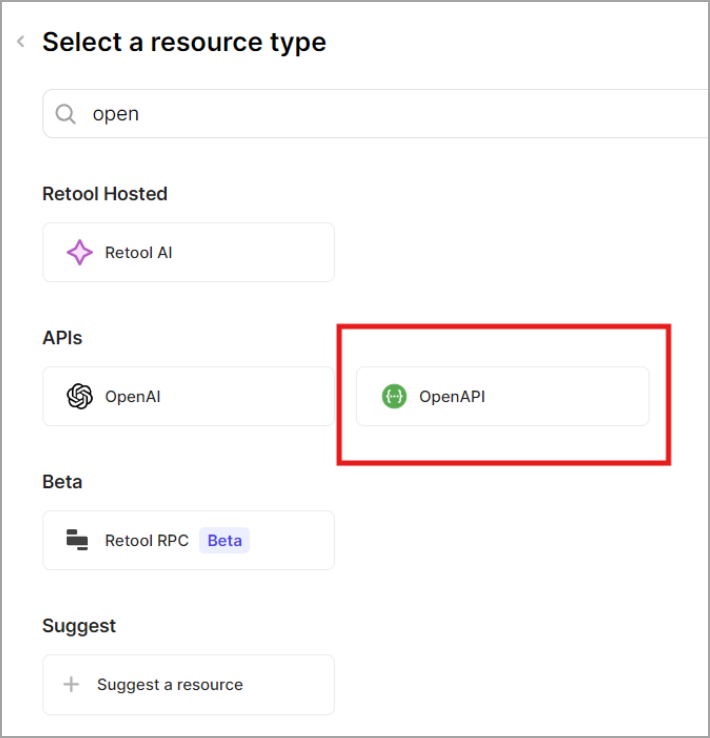
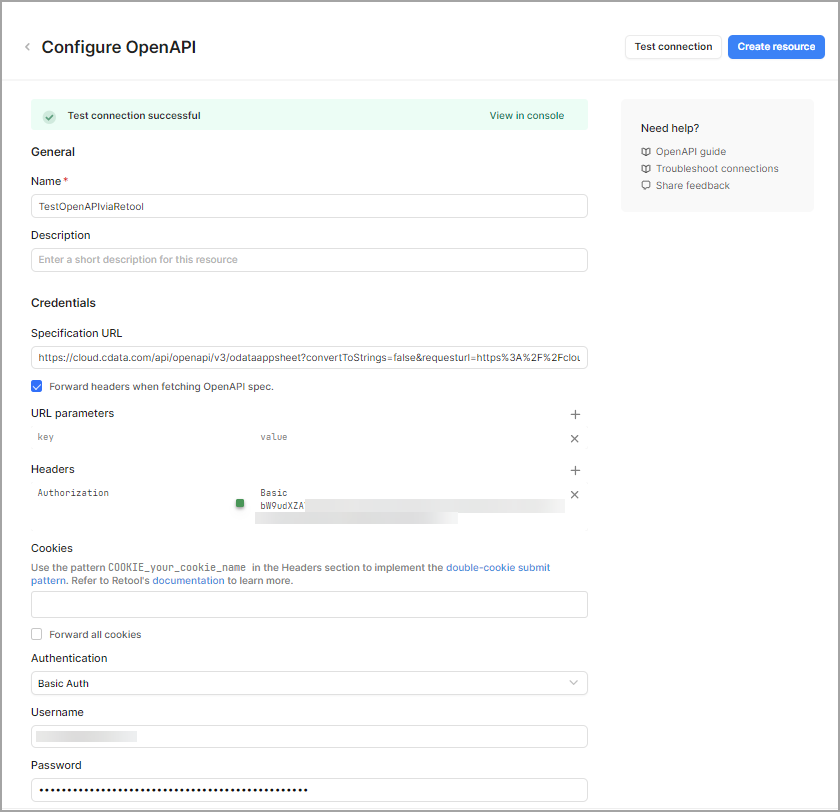
- Click OpenAPI. The Configure OpenAPI screen appears. Enter the following information to configure the OpenAPI connector:
- Name: The Connection Name to identify the connector on Retool.
- Specification URL: The OpenAPI URL you copied from the Workspace in CData Connect Cloud. Paste the URL here.
- Forward headers when fetching OpenAPI spec: Check this box.
- Under the URL parameters, keep the key-value pair unchanged.
- In the Headers section, write the key as Authorization and in the value, write Basic.
- For the Basic connection value, Retool requires a base64-encoded version of your CData Connect Cloud username:PAT combination (where PAT is the token you generated earlier). Use a tool like this to encode the value. For example, test@cdata.com:12345 encodes to dGVzdEBjZGF0YS5TIzNDU=. Copy this encoded value and paste it into the value field after Basic with a space.
- Username: Enter your CData Connect Cloud username. This is displayed in the top-right corner of the CData Connect Cloud interface. For example, test@cdata.com.
- Password: Enter the PAT you generated on the Settings page.
- Click Test connection to test your connection configuration. Once you have a successful connection, click Create resource.
- Create the app in Retool in which to integrate your data.
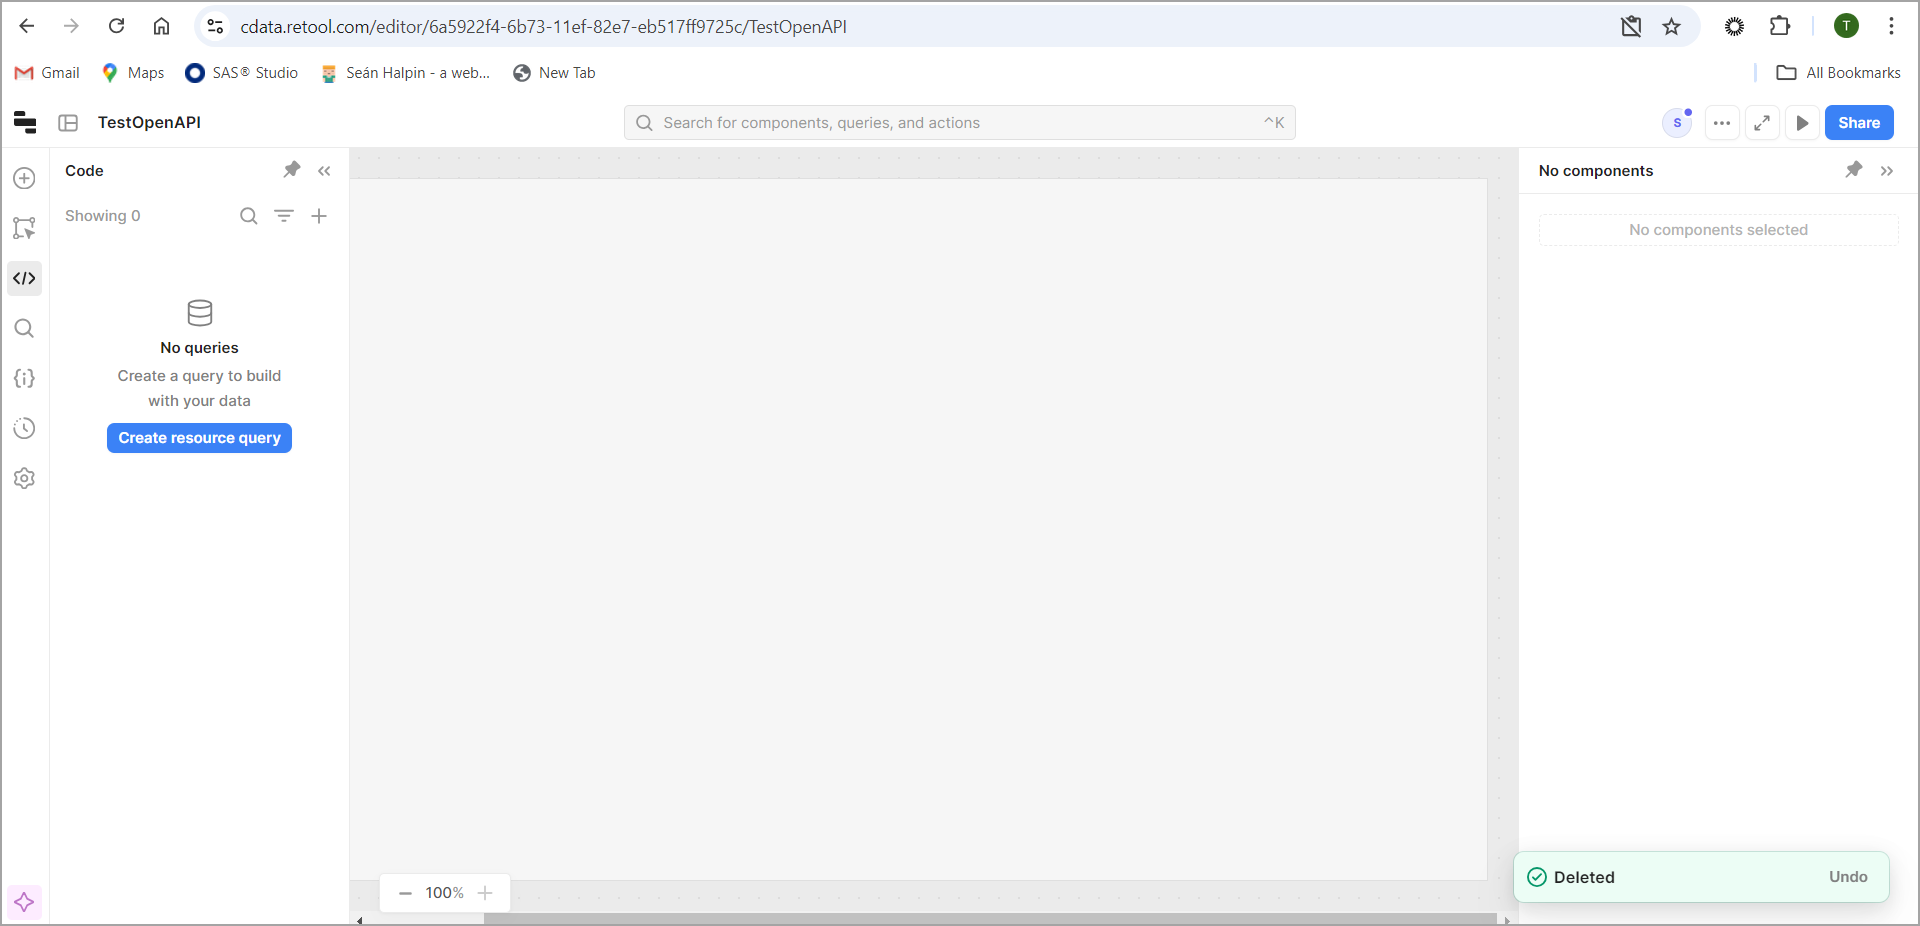
- Click Create resource query.
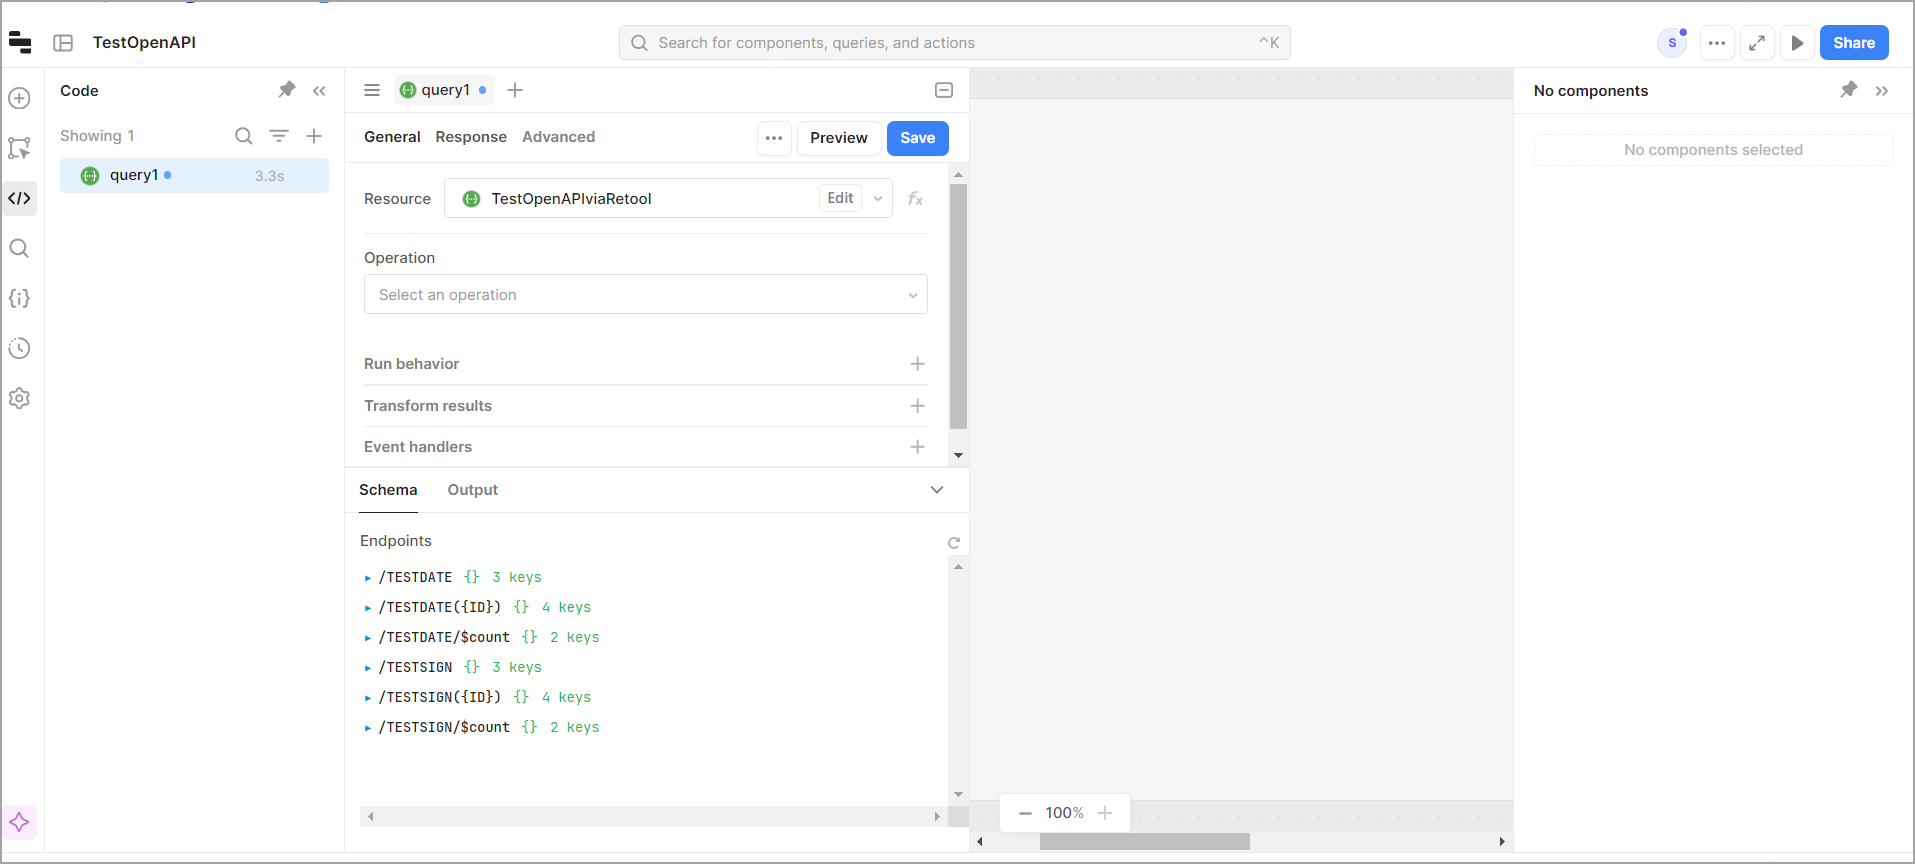
- Select the new resource you created, and view the endpoints that are available.
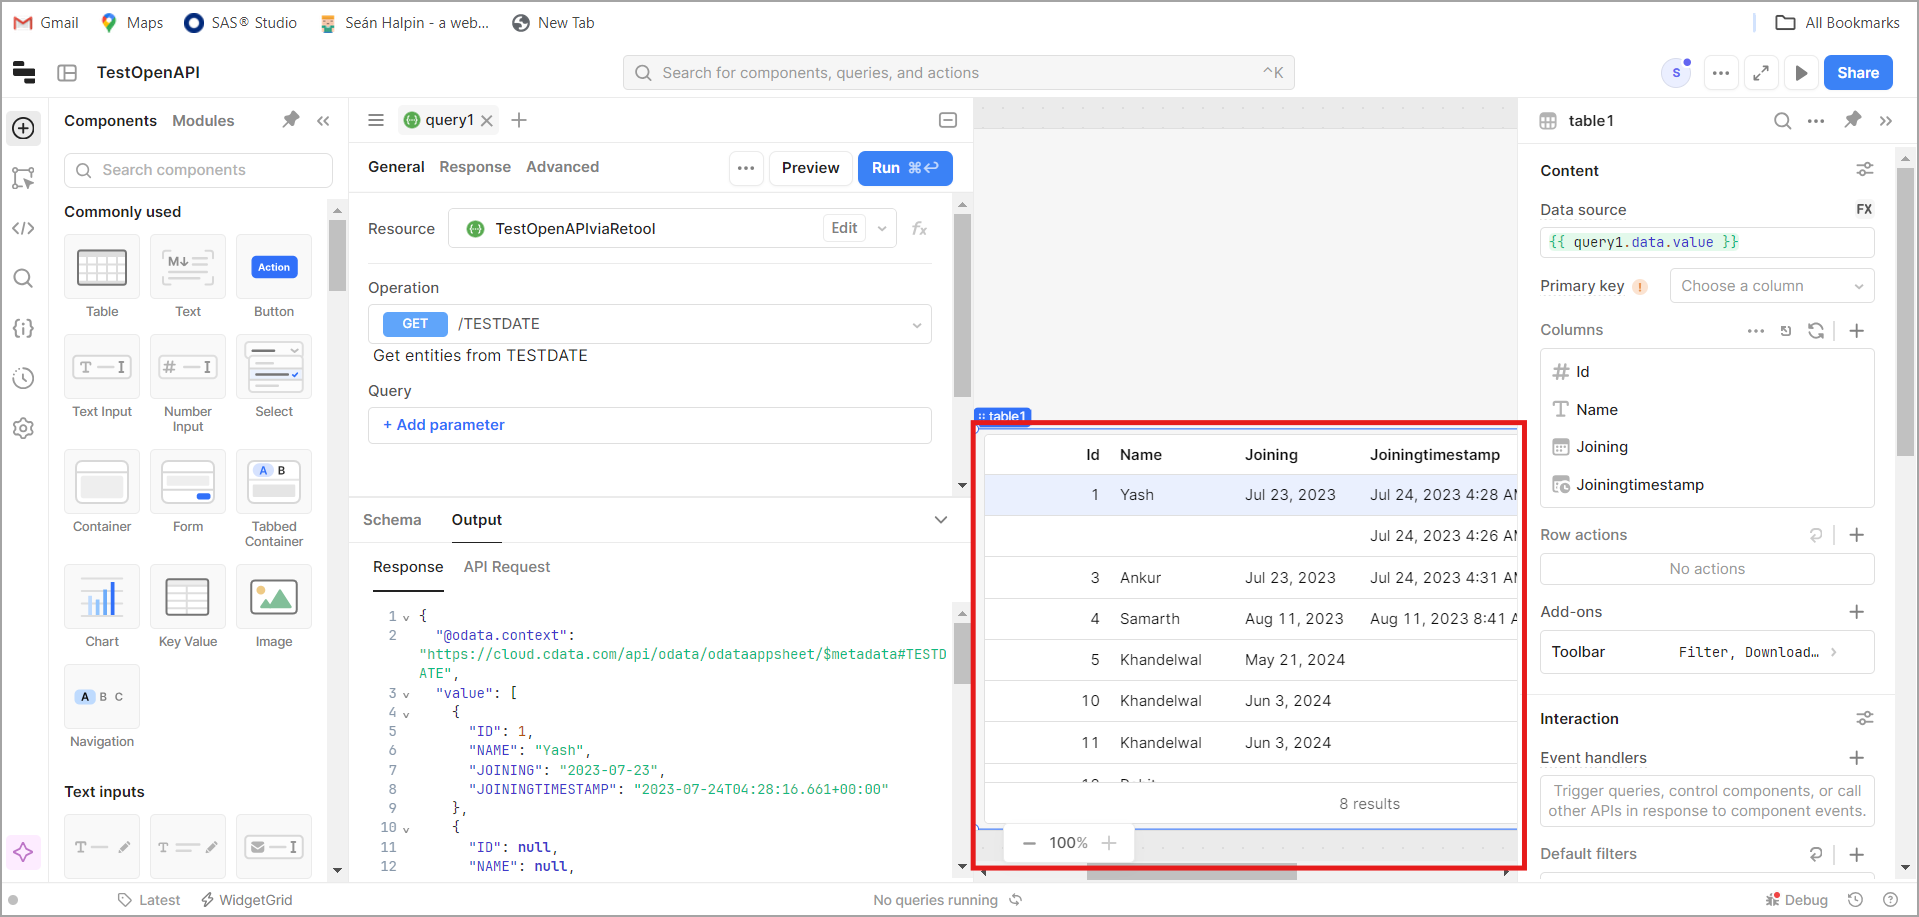
- You can now build your app with your live HCL Domino data.
Connect via Virtual SQL Server API
To connect using the Virtual SQL Server API, follow these steps:
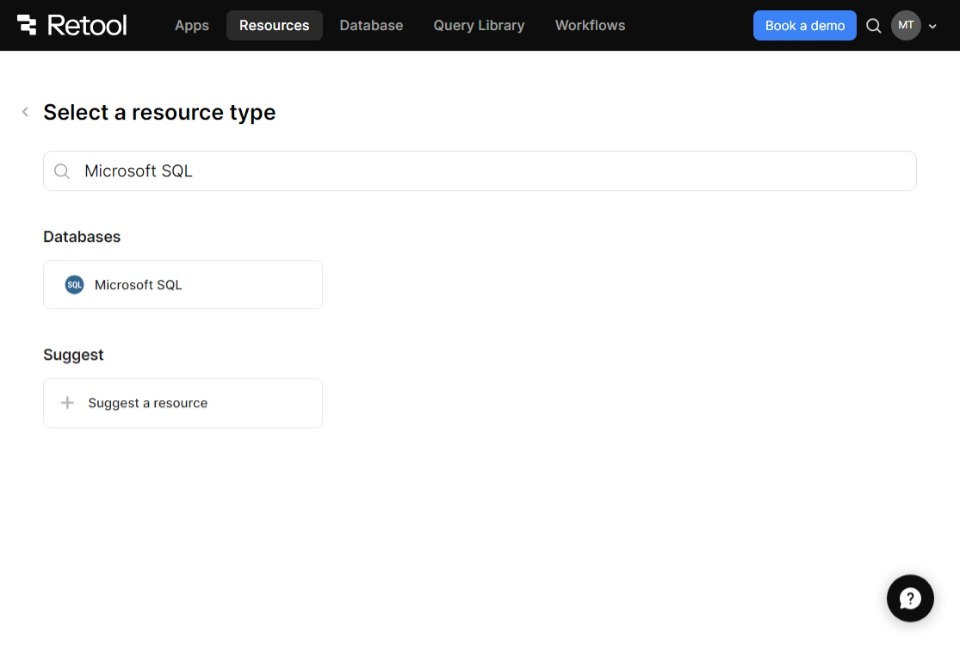
- Login to Retool, then go to Resources. Click Connect New at the top-right and select Resources.
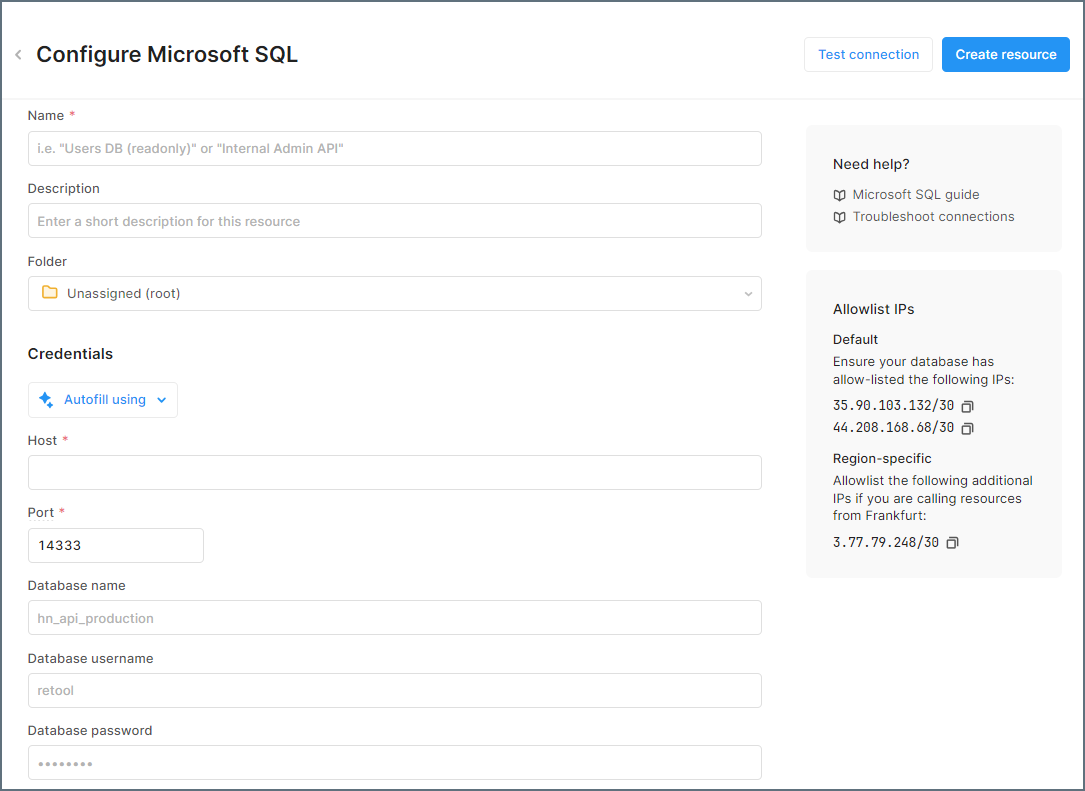
- Enter Microsoft SQL in the search bar, click the resulting option, and enter the following details:
- Name: A name for the connection to CData Connect Cloud.
- Host: tds.cdata.com.
- Port: 1433.
- Database Name: Enter the Connection Name of the CData Connect Cloud data source you want to connect to (for example, Salesforce1).
- Database Username: Enter your CData Connect Cloud username. This is displayed in the top-right corner of the CData Connect Cloud interface. For example, test@cdata.com.
- Database Password: Enter the PAT you generated on the Settings page.
- Click Test Connection. If the connection fails, you might need to whitelist CData Connect Cloud IPs for Retool and other data sources. Check out the documentation here.
- If it succeeds, click Create Resource.
- Your connection is now set up, and you can build your app with live HCL Domino data.

STEP 3: Build Retool Apps with Your Live HCL Domino Data
Now that you have integrated HCL Domino with Retool using CData Connect Cloud, it's time to utilize your live data to its full potential. Let's build a simple app:
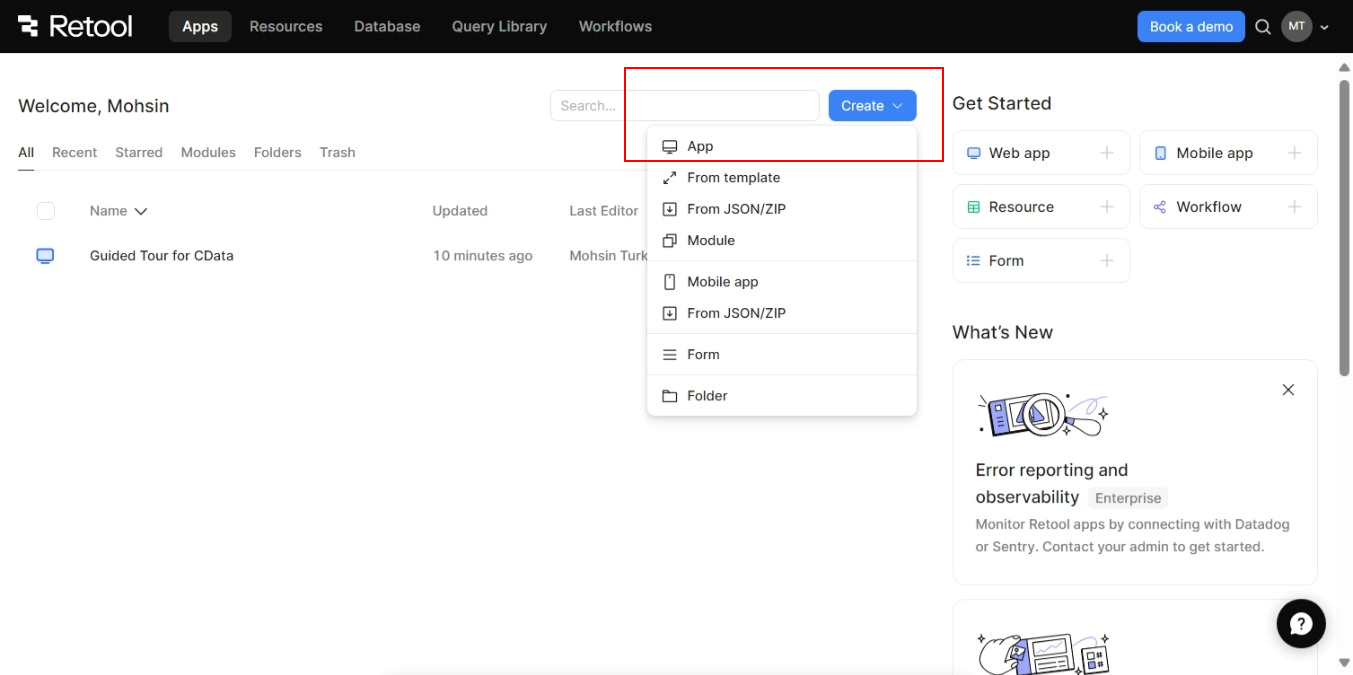
- Step 1: Set Up the Table (on home screen)
- Create a New App in Retool.
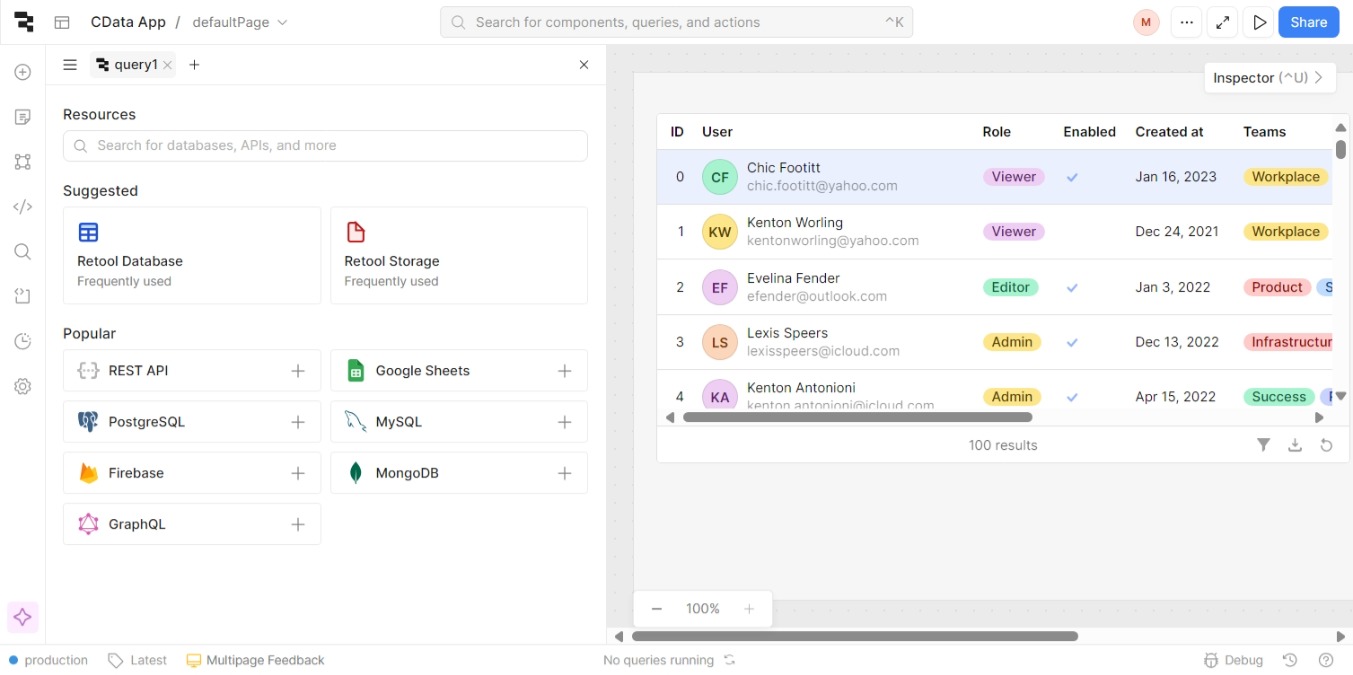
- Select your HCL Domino connection.
- Add a Table component and bind it to HCL Domino's data.
- Step 2: Add Filters (on top-right)
- Add a Dropdown to filter by Opportunity Stage.
- Add a Text Input for searching Account Name.
- Step 3: Display Key Metrics (below Table)
- Add a Text component to show Total Amount of filtered opportunities.
- Use a query to sum the Amount for filtered data.
- Step 4: Add Visuals (top-right or side panel)
- Add a Bar Chart to visualize opportunities by Stage.
- Add a Line Chart to show Expected Revenue over time.
- Step 5: Test and Deploy (top-right)
- Test filters, search, and charts.
- Deploy the app and share the link for access.
With these steps, you've successfully created a dynamic app to manage and visualize your Salesforce opportunities. Enjoy exploring your live data and leveraging it for better insights!
Try CData Connect Cloud Free for 30 Days
Experience real-time HCL Domino data access and enhanced app development with CData Connect Cloud in Retool. Start your free trial today!

