Model Context Protocol (MCP) finally gives AI models a way to access the business data needed to make them really useful at work. CData MCP Servers have the depth and performance to make sure AI has access to all of the answers.
Try them now for free →Add Dynamics 365 Data to Informatica Enterprise Data Catalog
Use the CData JDBC Driver for Dynamics 365 with the Informatica Enterprise Data Catalog to classify and organize data.
Informatica provides a powerful, elegant means of transporting and transforming your data. By utilizing the CData JDBC driver for Dynamics 365, you are gaining access to a driver based on industry-proven standards that integrates seamlessly with Informatica's Enterprise Data Catalog. This tutorial shows how to classify and organize Dynamics 365 data across any environment.
About Dynamics 365 Data Integration
CData simplifies access and integration of live Microsoft Dynamics 365 data. Our customers leverage CData connectivity to:
- Read and write data in the full Dynamics 365 ecosystem: Sales, Customer Service, Finance & Operations, Marketing, and more.
- Extend the native features of Dynamics CRM with customizable caching and intelligent query aggregation and separation.
- Authenticate securely with Dynamics 365 in a variety of ways, including Azure Active Directory, Azure Managed Service Identity credentials, and Azure Service Principal using either a client secret or a certificate.
- Use SQL stored procedures to manage their Dynamics 365 entities - listing, creating, and removing associations between entities.
CData customers use our Dynamics 365 connectivity solutions for a variety of reasons, whether they're looking to replicate their data into a data warehouse (alongside other data sources)or analyze live Dynamics 365 data from their preferred data tools inside the Microsoft ecosystem (Power BI, Excel, etc.) or with external tools (Tableau, Looker, etc.).
Getting Started
Load the JDBC Driver
To load the JDBC Driver:
- Install the JDBC Driver on the host running Informatica. For this article, it is assumed that the driver was installed into cdata.jdbc.dynamics365.Dynamics365Driver.
- Navigate to the JDBC install directory and create a zip file called genericJDBC.zip containing the driver and its license file.
- Move the genericJDBC.zip file into the Catalog Service directory within Informatica. For this article, it is assumed that Informatica is installed into /opt/informatica. Working in this folder will probably require root permissions, so make sure to su or sudo to root before continuing.
- Edit the custom deployment configuration to unpack the zip file.
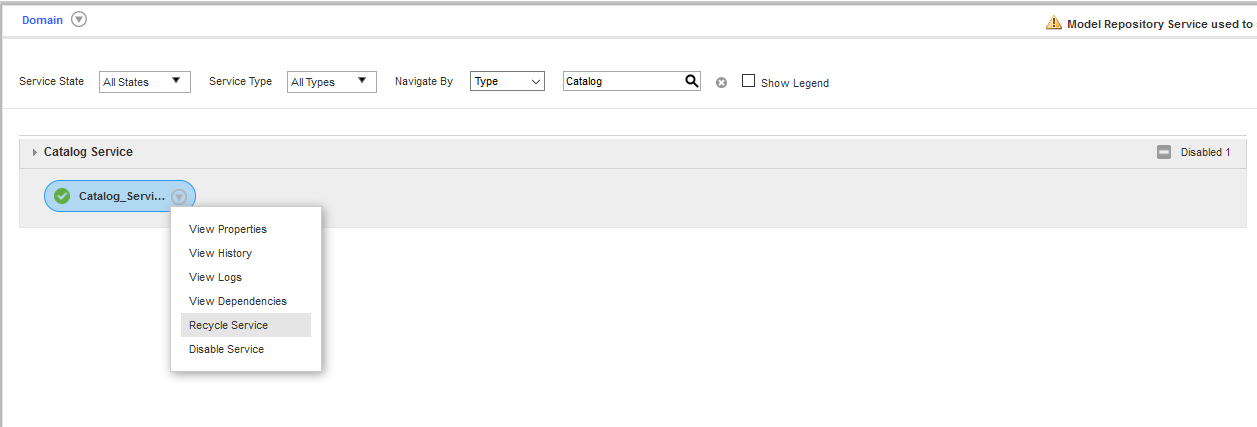
- Refresh the Catalog Service from the Admin console.
$ java -jar setup.jar
$ cd ~/cdata-jdbc-driver-for-dynamics365/lib
$ zip genericJDBC.zip cdata.jdbc.dynamics365.jar cdata.jdbc.dynamics365.lic
# mv genericJDBC.zip /opt/informatica/services/CatalogService/ScannerBinaries
# cd /opt/informatica/services/CatalogService/ScannerBinaries/CustomDeployer/
# nano scannerDeployer.xml
After unpacking the existing ExecutionContextProperty nodes, add a new ExecutionContextProperty node with this content.
<ExecutionContextProperty
    isLocationProperty="true"
    dependencyToUnpack="genericJDBC.zip">
<PropertyName>JDBCScanner_DriverLocation</PropertyName>
<PropertyValue>scanner_miti/genericJDBC/Drivers</PropertyValue>
</ExecutionContextProperty>

Configure the JDBC Resource
To configure the JDBC resource:
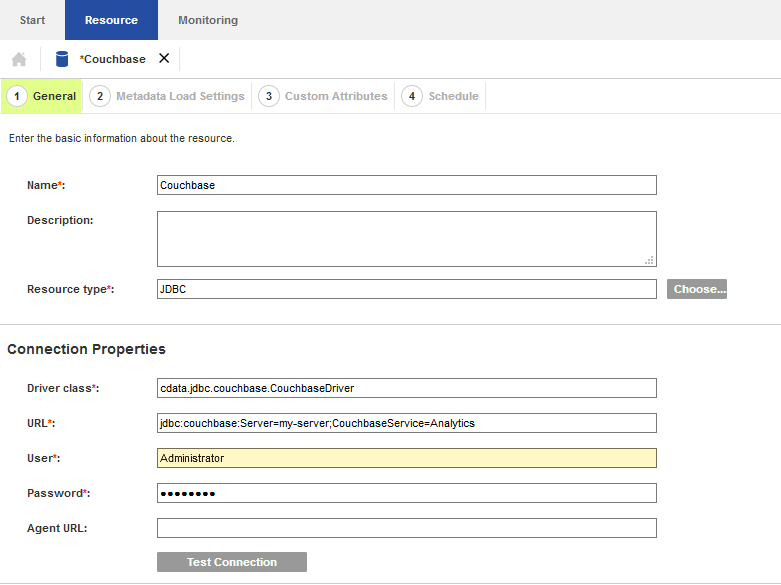
- Open the Catalog administrator and add a new JDBC resource with the following properties:
- Driver Class: cdata.jdbc.dynamics365.Dynamics365Driver
- URL: jdbc.dynamics365:OrganizationUrl=https://myaccount.operations.dynamics.com/;Edition=Sales;InitiateOAuth=GETANDREFRESH;
- Username: user
- Password: password
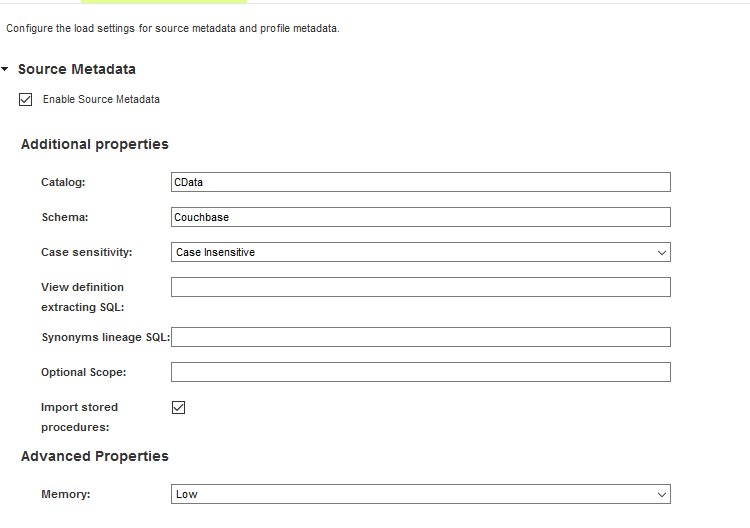
- Configure the metadata options to perform at least one source metadata scan. This scan uses the driver to determine what tables, views, and stored procedures are available through the service.
- Source Metadata: Enable this option.
- Catalog: Set this to the appropriate catalog for multi-catalog data sources. Otherwise, set this to CData.
- Schema: Set this to the appropriate schema for multi-schema data sources. Otherwise, set this to the name of the service (for example, Couchbase).
- Case-sensitivity: Generally this option should be disabled. Enable it only for data sources which are case-sensitive.
- Import stored procedures: Enable this if you want to import stored procedure definitions in addition to tables and views.
- Complete the driver configuration, optionally configuring custom attributes and a scanner schedule.
- Perform the metadata scan by navigating to the Monitoring tab and clicking Run. Depending upon the data source, this may takes a few minutes.
Edition and OrganizationUrl are required connection properties. The Dynamics 365 connector supports connecting to the following editions: CustomerService, FieldService, FinOpsOnline, FinOpsOnPremise, HumanResources, Marketing, ProjectOperations and Sales.
For Dynamics 365 Business Central, use the separate Dynamics 365 Business Central driver.
OrganizationUrl is the URL to your Dynamics 365 organization. For instance, https://orgcb42e1d0.crm.dynamics.com
Built-In Connection String Designer
For assistance in constructing the JDBC URL, use the connection string designer built into the Dynamics 365 JDBC Driver. Either double-click the .jar file or execute the .jar file from the command-line.
java -jar cdata.jdbc.dynamics365.jar
Fill in the connection properties and copy the connection string to the clipboard.

When you configure the JDBC URL, you may also want to set the Max Rows connection property. This will limit the number of rows returned, which is especially helpful for improving performance when designing reports and visualizations.
Typical additional connection string properties follow:
JDBC;MSTR_JDBC_JAR_FOLDER=PATH\TO\JAR\;DRIVER=cdata.jdbc.dynamics365.Dynamics365Driver;URL={jdbc:dynamics365:OrganizationUrl=https://myaccount.operations.dynamics.com/;Edition=Sales;};
Note that the Username and Password properties are required, even if the driver you are using does not require them. In those cases, you can enter a placeholder value instead.


Other metadata scanners may be enabled as desired.
When the scan is complete, a summary of all of the metadata objects is displayed along with the status of the Metadata Load job. If any errors occur, you can open the Log Location link for the job to see the errors reported by Informatica or the driver.

Validate the Discovered Metadata
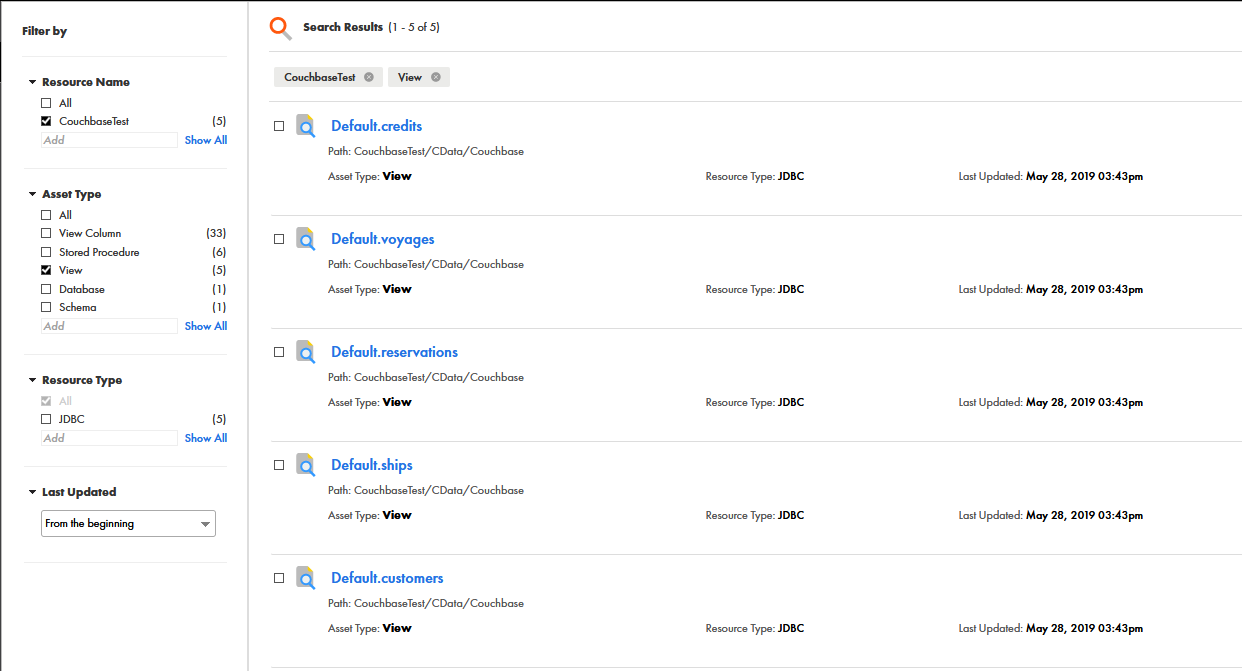
Open the Catalog Service browser to view the metadata extracted from the data source. Depending upon the options you selected when configuring the metadata scanner, you may see any combination of tables, views, and stored procedures for the resource you defined.


