Model Context Protocol (MCP) finally gives AI models a way to access the business data needed to make them really useful at work. CData MCP Servers have the depth and performance to make sure AI has access to all of the answers.
Try them now for free →Connect to Jira Data in CloverDX (formerly CloverETL)
Transfer Jira data using the visual workflow in the CloverDX data integration tool.
The CData JDBC Driver for Jira enables you to use the data transformation components in CloverDX (formerly CloverETL) to work with Jira as sources. In this article, you will use the JDBC Driver for Jira to set up a simple transfer into a flat file. The CData JDBC Driver for Jira enables you to use the data transformation components in CloverDX (formerly CloverETL) to work with Jira as sources. In this article, you will use the JDBC Driver for Jira to set up a simple transfer into a flat file.
About Jira Data Integration
CData simplifies access and integration of live Jira data. Our customers leverage CData connectivity to:
- Gain bi-directional access to their Jira objects like issues, projects, and workflows.
- Use SQL stored procedures to perform functional actions like changing issues status, creating custom fields, download or uploading an attachment, modifying or retrieving time tracking settings, and more.
- Authenticate securely using a variety of methods, including username and password, OAuth, personal access token, API token, Crowd or OKTA SSO, LDAP, and more.
Most users leverage CData solutions to integrate Jira data with their database or data warehouse, whether that's using CData Sync directly or relying on CData's compatibility with platforms like SSIS or Azure Data Factory. Others are looking to get analytics and reporting on live Jira data from preferred analytics tools like Tableau and Power BI.
Learn more about how customers are seamlessly connecting to their Jira data to solve business problems from our blog: Drivers in Focus: Collaboration Tools.
Getting Started
Connect to Jira as a JDBC Data Source
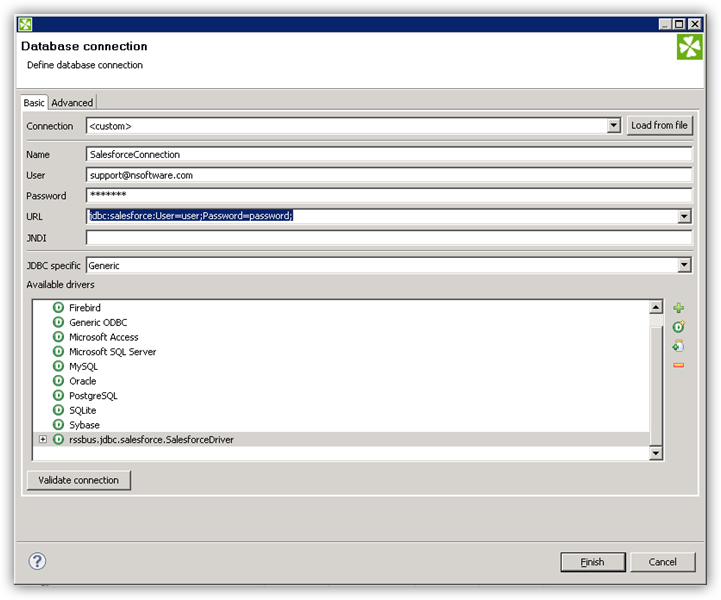
- Create the connection to Jira data. In a new CloverDX graph, right-click the Connections node in the Outline pane and click Connections -> Create Connection. The Database Connection wizard is displayed.
- Click the plus icon to load a driver from a JAR. Browse to the lib subfolder of the installation directory and select the cdata.jdbc.jira.jar file.
- Enter the JDBC URL.
To connect to JIRA, provide the User and Password. Additionally, provide the Url; for example, https://yoursitename.atlassian.net.
Built-in Connection String Designer
For assistance in constructing the JDBC URL, use the connection string designer built into the Jira JDBC Driver. Either double-click the JAR file or execute the jar file from the command-line.
java -jar cdata.jdbc.jira.jarFill in the connection properties and copy the connection string to the clipboard.
![Using the built-in connection string designer to generate a JDBC URL (Salesforce is shown.)]()
A typical JDBC URL is below:
jdbc:jira:User=admin;Password=123abc;Url=https://yoursitename.atlassian.net;

Query Jira Data with the DBInputTable Component
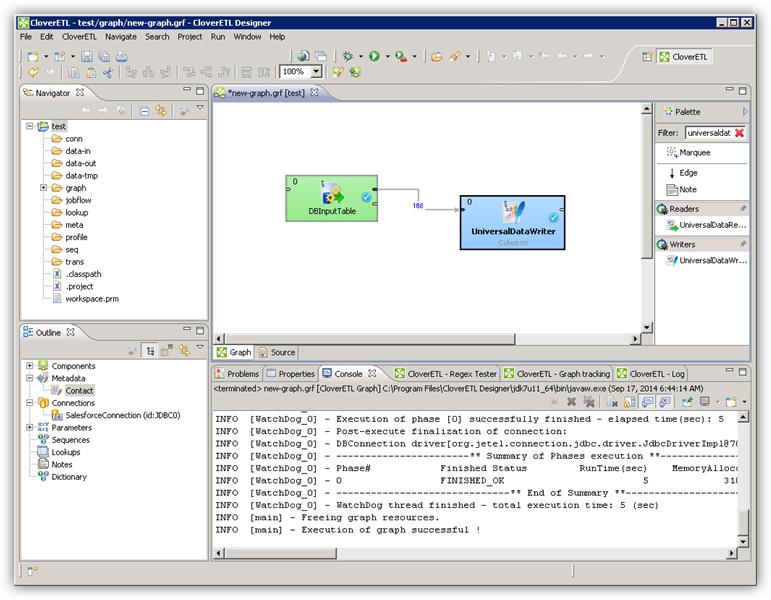
- Drag a DBInputTable from the Readers selection of the Palette onto the job flow and double-click it to open the configuration editor.
- In the DB connection property, select the Jira JDBC data source from the drop-down menu.
- Enter the SQL query. For example:
SELECT Projects.LeadName, Issues.Summary FROM Projects, Issues WHERE Projects.Id=Issues.ProjectId
Write the Output of the Query to a UniversalDataWriter
- Drag a UniversalDataWriter from the Writers selection onto the jobflow.
- Double-click the UniversalDataWriter to open the configuration editor and add a file URL.
- Right-click the DBInputTable and then click Extract Metadata.
- Connect the output port of the DBInputTable to the UniversalDataWriter.
- In the resulting Select Metadata menu for the UniversalDataWriter, choose the Issues table. (You can also open this menu by right-clicking the input port for the UniversalDataWriter.)
- Click Run to write to the file.


