Model Context Protocol (MCP) finally gives AI models a way to access the business data needed to make them really useful at work. CData MCP Servers have the depth and performance to make sure AI has access to all of the answers.
Try them now for free →Automated Continuous Jira Replication to Amazon Redshift
Use CData Sync for automated, continuous, customizable Jira replication to Amazon Redshift.
Always-on applications rely on automatic failover capabilities and real-time data access. CData Sync integrates live Jira data into your Amazon Redshift instance, allowing you to consolidate all of your data into a single location for archiving, reporting, analytics, machine learning, artificial intelligence and more.
About Jira Data Integration
CData simplifies access and integration of live Jira data. Our customers leverage CData connectivity to:
- Gain bi-directional access to their Jira objects like issues, projects, and workflows.
- Use SQL stored procedures to perform functional actions like changing issues status, creating custom fields, download or uploading an attachment, modifying or retrieving time tracking settings, and more.
- Authenticate securely using a variety of methods, including username and password, OAuth, personal access token, API token, Crowd or OKTA SSO, LDAP, and more.
Most users leverage CData solutions to integrate Jira data with their database or data warehouse, whether that's using CData Sync directly or relying on CData's compatibility with platforms like SSIS or Azure Data Factory. Others are looking to get analytics and reporting on live Jira data from preferred analytics tools like Tableau and Power BI.
Learn more about how customers are seamlessly connecting to their Jira data to solve business problems from our blog: Drivers in Focus: Collaboration Tools.
Getting Started
Configure Amazon Redshift as a Replication Destination
Using CData Sync, you can replicate Jira data to Amazon Redshift. To add a replication destination, navigate to the Connections tab.
- Click Add Connection.
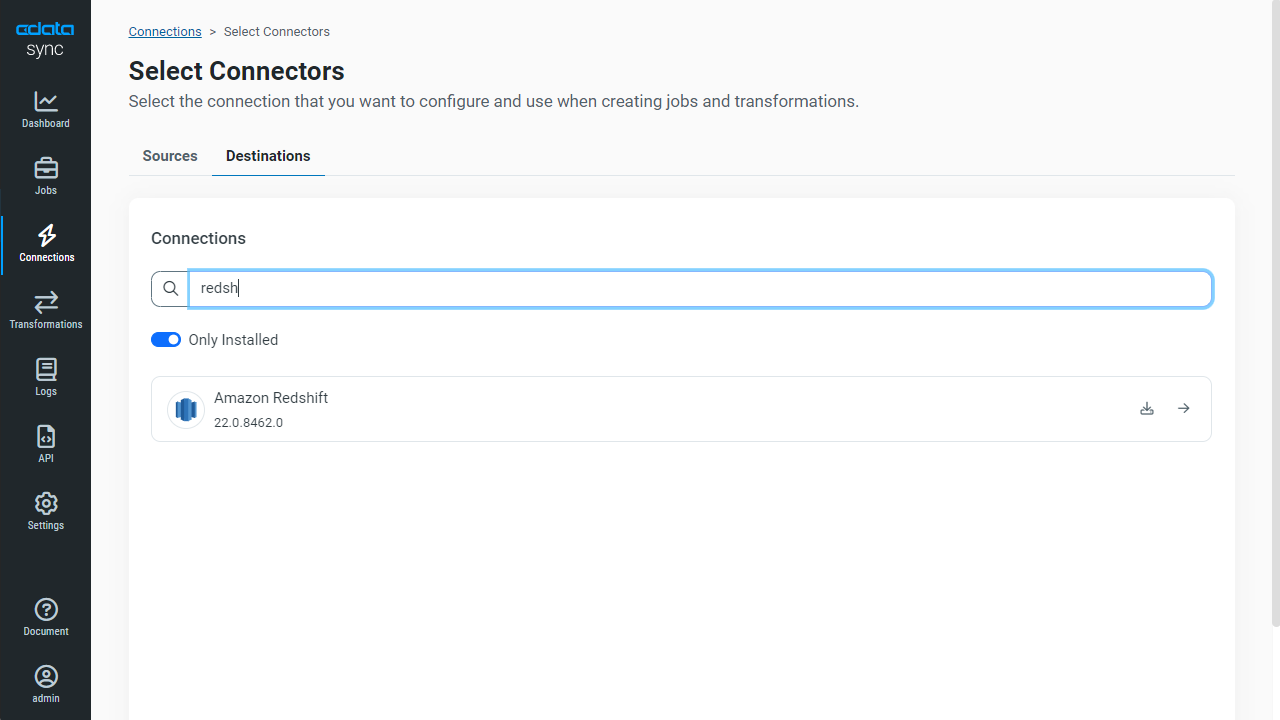
- Select Amazon Redshift as a destination.
![Configure a Destination connection to Amazon Redshift.]()
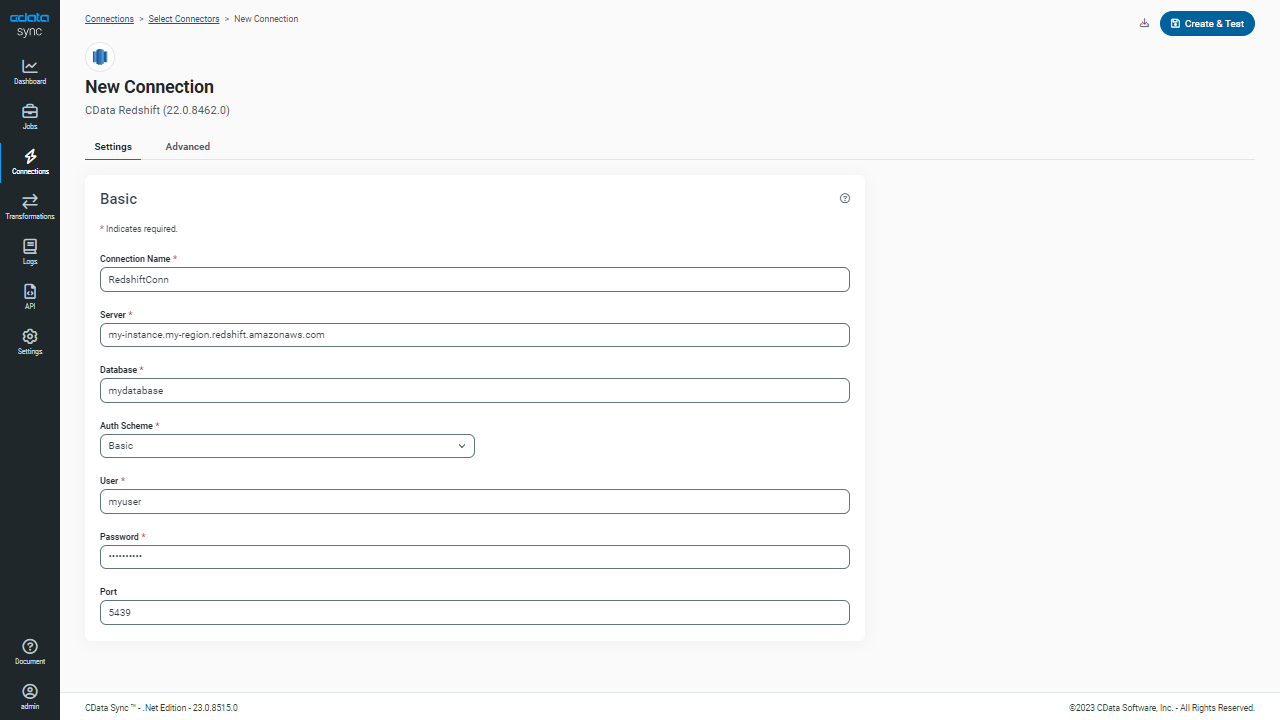
- Enter the necessary connection properties. To connect to Amazon Redshift, set the following:
- Server: Set this to the host name or IP address of the cluster hosting the Database you want to connect to.
- Port: Set this to the port of the cluster.
- Database: Set this to the name of the database. Or, leave this blank to use the default database of the authenticated user.
- User: Set this to the username you want to use to authenticate to the Server.
- Password: Set this to the password you want to use to authenticate to the Server.
You can obtain these values in the AWS Management Console:
- Open the Amazon Redshift console.
- On the Clusters page, click the name of the cluster.
- On the Configuration tab, obtain the properties from the Cluster Database Properties section. The connection property values will be the same as the values set in the ODBC URL.
- Click Test Connection to ensure that the connection is configured properly.
![Configure a Destination connection.]()
- Click Save Changes.
Configure the Jira Connection
You can configure a connection to Jira from the Connections tab. To add a connection to your Jira account, navigate to the Connections tab.
- Click Add Connection.
- Select a source (Jira).
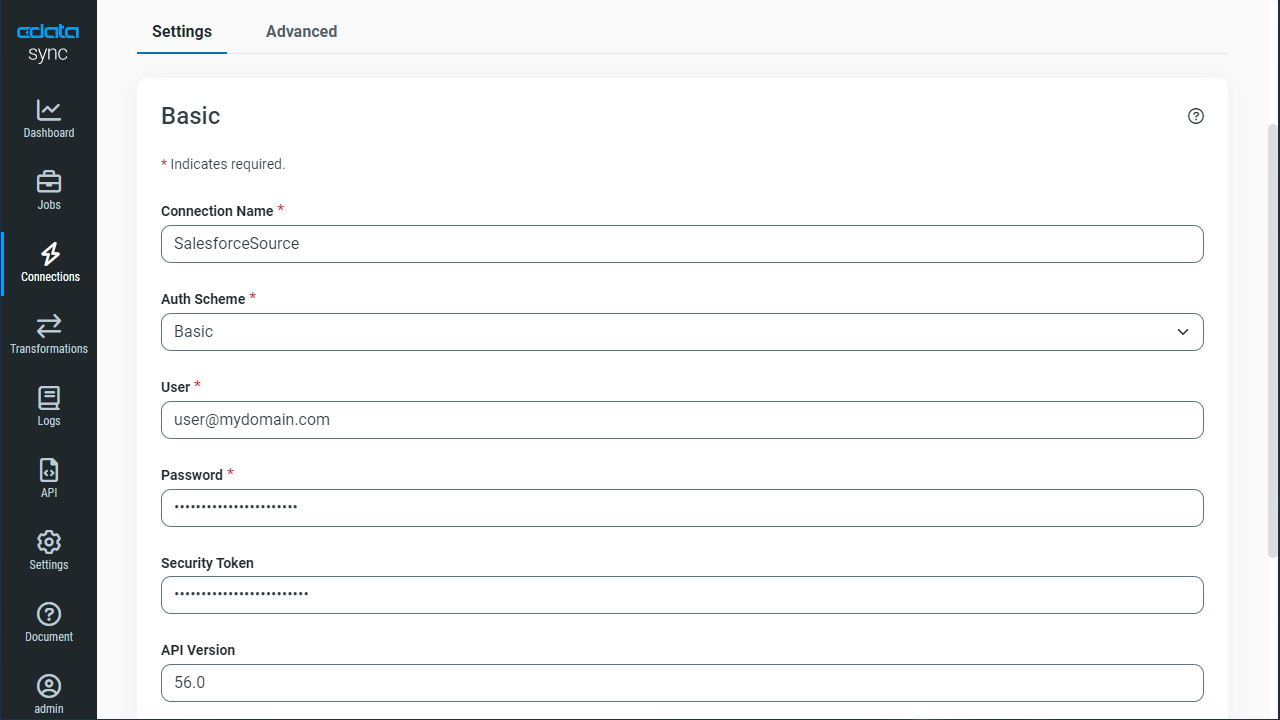
- Configure the connection properties.
To connect to JIRA, provide the User and Password. Additionally, provide the Url; for example, https://yoursitename.atlassian.net.
![Configure a Source connection (Salesforce is shown).]()
- Click Connect to ensure that the connection is configured properly.
- Click Save Changes.
Configure Replication Queries
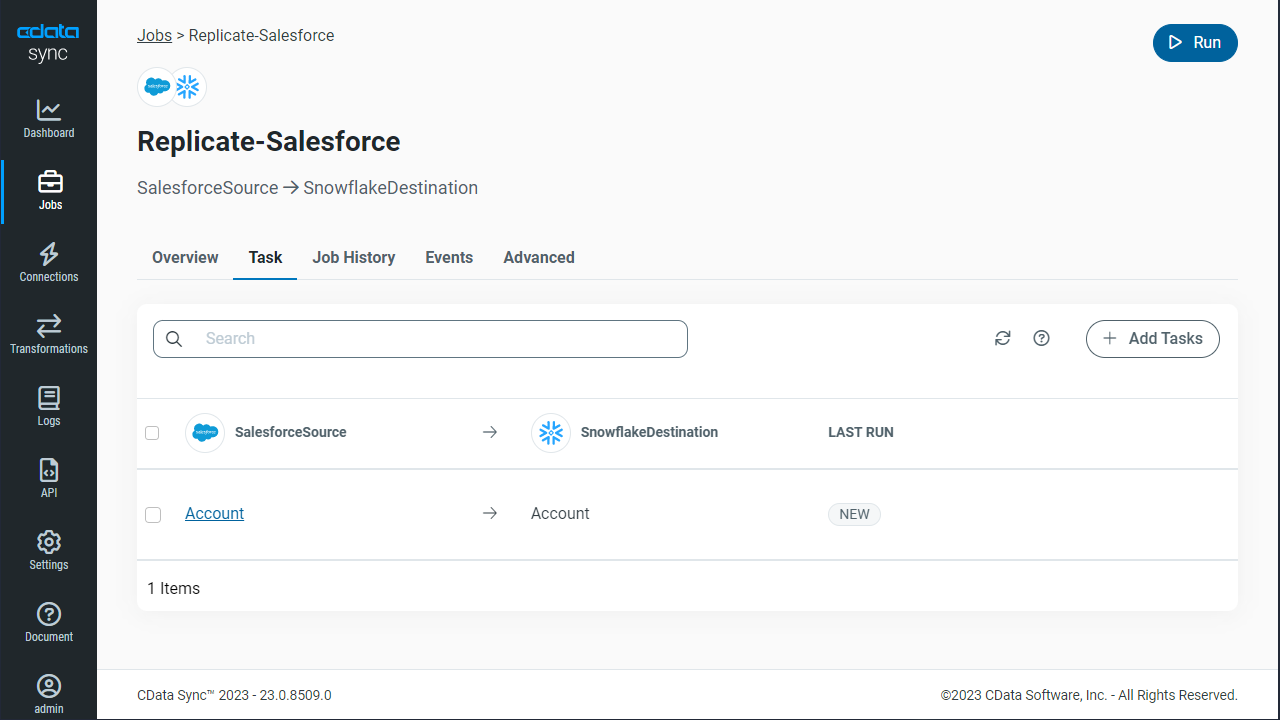
CData Sync enables you to control replication with a point-and-click interface and with SQL queries. For each replication you wish to configure, navigate to the Jobs tab and click Add Job. Select the Source and Destination for your replication.
Replicate Entire Tables
To replicate an entire table, click Add Tables in the Tables section, choose the table(s) you wish to replicate, and click Add Selected Tables.
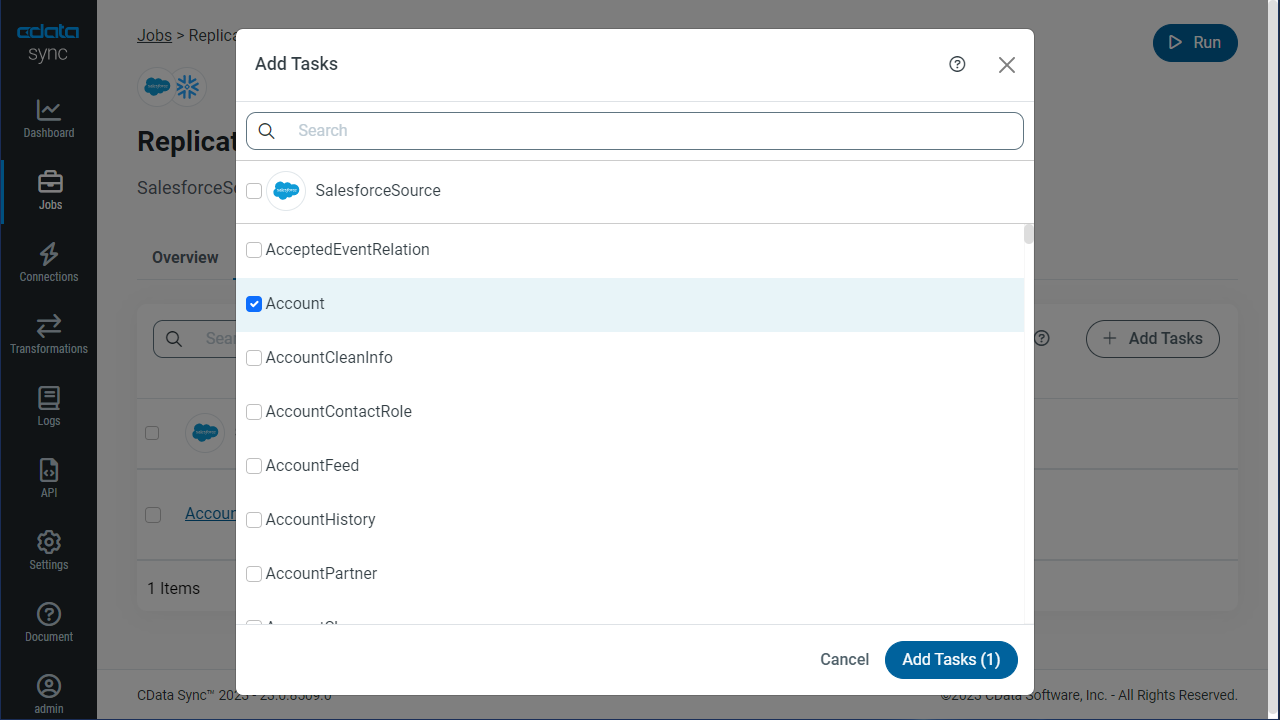
Customize Your Replication
You can use the Columns and Query tabs of a task to customize your replication. The Columns tab allows you to specify which columns to replicate, rename the columns at the destination, and even perform operations on the source data before replicating. The Query tab allows you to add filters, grouping, and sorting to the replication.
Schedule Your Replication
In the Schedule section, you can schedule a job to run automatically, configuring the job to run after specified intervals ranging from once every 10 minutes to once every month.
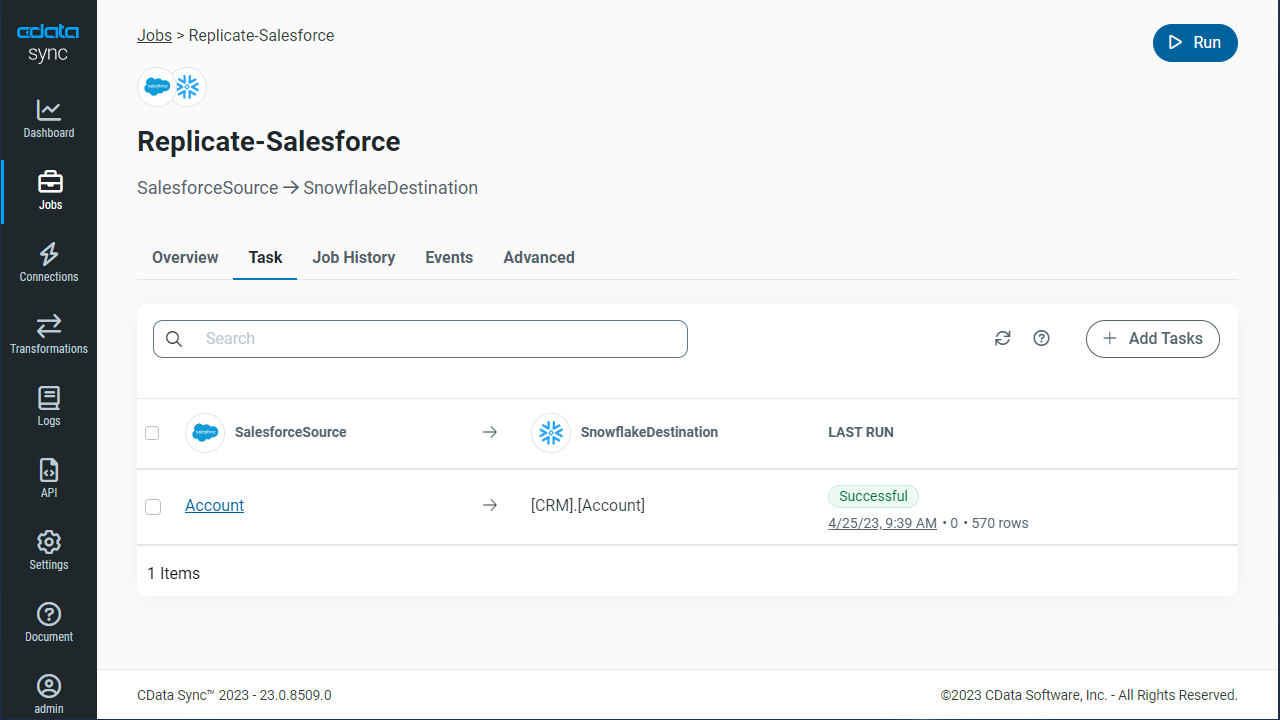
Once you have configured the replication job, click Save Changes. You can configure any number of jobs to manage the replication of your Jira data to Amazon Redshift.

