Model Context Protocol (MCP) finally gives AI models a way to access the business data needed to make them really useful at work. CData MCP Servers have the depth and performance to make sure AI has access to all of the answers.
Try them now for free →DataBind Salesforce Pardot Data to the DevExpress Data Grid
Use the CData ADO.NET Provider for Salesforce Pardot with the DevExpress Windows Forms and Web controls to provide Salesforce Pardot data to a chart.
The ADO.NET Provider for Salesforce Pardot by CData incorporates conventional ADO.NET data access components compatible with third-party controls. You can adhere to the standard ADO.NET data binding procedures to establish two-way access to real-time data through UI controls. This article will demonstrate the utilization of CData components for data binding with DevExpress UI Controls (Windows Forms and Web controls), specifically binding to a chart that visualizes live data.
Salesforce Pardot supports connecting through API Version, Username, Password and User Key.
- ApiVersion: The Salesforce Pardot API version which the provided account can access. Defaults to 4.
- User: The Username of the Salesforce Pardot account.
- Password: The Password of the Salesforce Pardot account.
- UserKey: The unique User Key for the Salesforce Pardot account. This key does not expire.
- IsDemoAccount (optional): Set to TRUE to connect to a demo account.
Accessing the Pardot User Key
The User Key of the current account may be accessed by going to Settings -> My Profile, under the API User Key row.
Windows Forms Controls
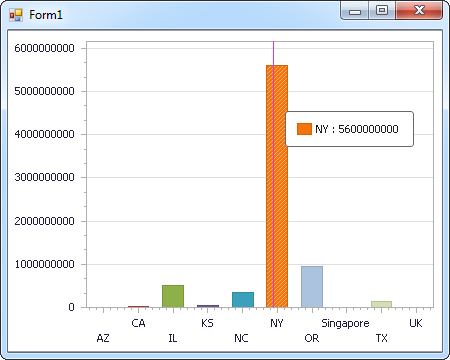
The code below shows how to populate a DevExpress chart with Salesforce Pardot data. The SalesforcePardotDataAdapter binds to the Series property of the chart control. The Diagram property of the control defines the x- and y-axes as the column names.
using (SalesforcePardotConnection connection = new SalesforcePardotConnection(
"ApiVersion=4;User=YourUsername;Password=YourPassword;UserKey=YourUserKey;")) {
  SalesforcePardotDataAdapter dataAdapter = new SalesforcePardotDataAdapter(
  "SELECT Id, Email FROM Prospects WHERE ProspectAccountId = '703'", connection);

  DataTable table = new DataTable();
  dataAdapter.Fill(table);
  DevExpress.XtraCharts.Series series = new DevExpress.XtraCharts.Series();
  chartControl1.Series.Add(series);
  series.DataSource = table;
  series.ValueDataMembers.AddRange(new string[] { "Email" });
  series.ArgumentScaleType = DevExpress.XtraCharts.ScaleType.Qualitative;
  series.ArgumentDataMember = "Id";
  series.ValueScaleType = DevExpress.XtraCharts.ScaleType.Numerical;
  chartControl1.Legend.Visibility = DevExpress.Utils.DefaultBoolean.False;
  ((DevExpress.XtraCharts.SideBySideBarSeriesView)series.View).ColorEach = true;
}

Web Controls
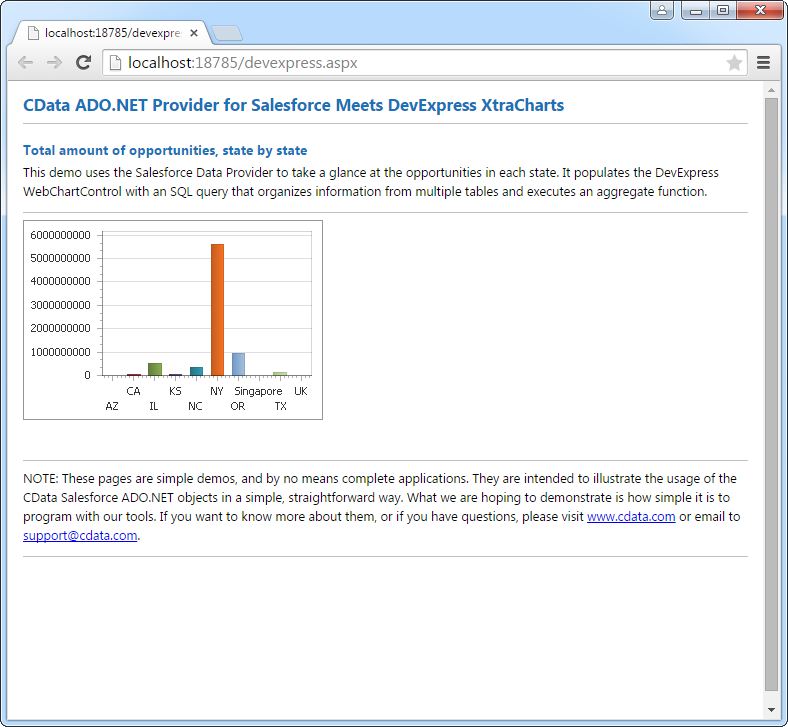
The code below shows how to populate a DevExpress Web control with Salesforce Pardot data. The SalesforcePardotDataAdapter binds to the Series property of the chart; the Diagram property defines the x- and y-axes as the column names.
using DevExpress.XtraCharts;

using (SalesforcePardotConnection connection = new SalesforcePardotConnection(
"ApiVersion=4;User=YourUsername;Password=YourPassword;UserKey=YourUserKey;"))
{
  SalesforcePardotDataAdapter SalesforcePardotDataAdapter1 = new SalesforcePardotDataAdapter("SELECT Id, Email FROM Prospects WHERE ProspectAccountId = '703'", connection);
  DataTable table = new DataTable();
  SalesforcePardotDataAdapter1.Fill(table);
  DevExpress.XtraCharts.Series series = new Series("Series1", ViewType.Bar);
  WebChartControl1.Series.Add(series);
  series.DataSource = table;
  series.ValueDataMembers.AddRange(new string[] { "Email" });
  series.ArgumentScaleType = ScaleType.Qualitative;
  series.ArgumentDataMember = "Id";
  series.ValueScaleType = ScaleType.Numerical;
  ((DevExpress.XtraCharts.SideBySideBarSeriesView)series.View).ColorEach = true;
}


