Model Context Protocol (MCP) finally gives AI models a way to access the business data needed to make them really useful at work. CData MCP Servers have the depth and performance to make sure AI has access to all of the answers.
Try them now for free →How to import Salesforce Data into Apache Solr
Use the CData JDBC Driver for Salesforce in Data Import Handler and create an automated import of Salesforce data to Apache Solr Enterprise Search platform.
The Apache Solr platform is a popular, blazing-fast, open source enterprise search solution built on Apache Lucene.
Apache Solr is equipped with the Data Import Handler (DIH), which can import data from databases and, XML, CSV, and JSON files. When paired with the CData JDBC Driver for Salesforce, you can easily import Salesforce data to Apache Solr. In this article, we show step-by-step how to use CData JDBC Driver in Apache Solr Data Import Handler and import Salesforce data for use in enterprise search.
About Salesforce Data Integration
Accessing and integrating live data from Salesforce has never been easier with CData. Customers rely on CData connectivity to:
- Access to custom entities and fields means Salesforce users get access to all of Salesforce.
- Create atomic and batch update operations.
- Read, write, update, and delete their Salesforce data.
- Leverage the latest Salesforce features and functionalities with support for SOAP API versions 30.0.
- See improved performance based on SOQL support to push complex queries down to Salesforce servers.
- Use SQL stored procedures to perform actions like creating, retrieving, aborting, and deleting jobs, uploading and downloading attachments and documents, and more.
Users frequently integrate Salesforce data with:
- other ERPs, marketing automation, HCMs, and more.
- preferred data tools like Power BI, Tableau, Looker, and more.
- databases and data warehouses.
For more information on how CData solutions work with Salesforce, check out our Salesforce integration page.
Getting Started
Create an Apache Solr Core and a Schema for Importing Salesforce
- Run Apache Solr and create a Core.
> solr create -c CDataCoreFor this article, Solr is running as a standalone instance in the local environment and you can access the core at this URL: http://localhost:8983/solr/#/CDataCore/core-overview - Create a schema consisting of "field" objects to represent the columns of the Salesforce data to be imported and a unique key for the entity. LastModifiedDate, if it exists in Salesforce, is used for incremental updates. If it does not exist, you cannot do the deltaquery in the later section. Save the schema in the managed-schema file created by Apache Solr.
- Install the CData Salesforce JDBC Driver. Copy the JAR and license file (cdata.salesforce.jar and cdata.jdbc.salesforce.lic) to the Solr directory.
- CData JDBC JAR file: C:\Program Files\CData\CData JDBC Driver for Salesforce ####\lib
- Apache Solr: solr-8.5.2\server\lib
SalesforceUniqueKey
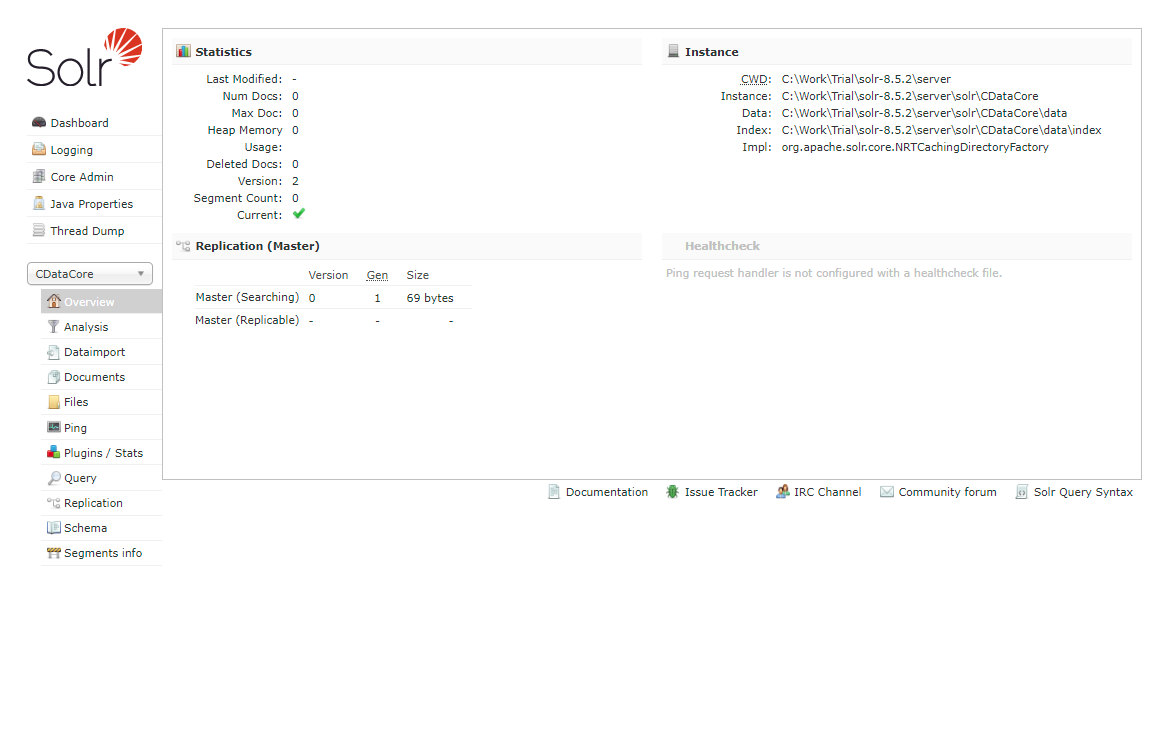
Now we are ready to use Salesforce data in Solr.
Define an Import of Salesforce to Apache Solr
In this section, we walk through configuring the Data Import Handler.
- Modify the Config file of the created Core. Add the JAR file reference and add the DIH RequestHander definition.
<lib dir="${solr.install.dir:../../../..}/dist/" regex="solr-dataimporthandler-.*\.jar" /> <requestHandler name="/dataimport" class="org.apache.solr.handler.dataimport.DataImportHandler"> <lst name="defaults"> <str name="config">solr-data-config.xml</str> </lst> </requestHandler> - Next, create a solr-data-config.xml at the same level. In this article, we retrieve a table from Salesforce, but you can use a custom SQL query to request data as well. The Driver Class and a sample JDBC Connection string are in the sample code below.
<dataConfig> <dataSource driver="cdata.jdbc.salesforce.SalesforceDriver" url="jdbc:salesforce:User=username;Password=password;SecurityToken=Your_Security_Token;"> </dataSource> <document> <entity name="Account" query="SELECT Id,SalesforceColumn1,SalesforceColumn2,SalesforceColumn3,SalesforceColumn4,SalesforceColumn5,SalesforceColumn6,SalesforceColumn7,LastModifiedDate FROM Account" deltaQuery="SELECT Id FROM Account where LastModifiedDate >= '${dataimporter.last_index_time}'" deltaImportQuery="SELECT Id,SalesforceColumn1,SalesforceColumn2,SalesforceColumn3,SalesforceColumn4,SalesforceColumn5,SalesforceColumn6,SalesforceColumn7,LastModifiedDate FROM Account where Id=${dataimporter.delta.Id}"> <field column="Id" name="Id" ></field> <field column="SalesforceColumn1" name="SalesforceColumn1" ></field> <field column="SalesforceColumn2" name="SalesforceColumn2" ></field> <field column="SalesforceColumn3" name="SalesforceColumn3" ></field> <field column="SalesforceColumn4" name="SalesforceColumn4" ></field> <field column="SalesforceColumn5" name="SalesforceColumn5" ></field> <field column="SalesforceColumn6" name="SalesforceColumn6" ></field> <field column="SalesforceColumn7" name="SalesforceColumn7" ></field> <field column="LastModifiedDate" name="LastModifiedDate" ></field> </entity> </document> </dataConfig> - In the query section, set the SQL query that select the data from Salesforce. deltaQuery and deltaImportquery define the ID and the conditions when using incremental updates from the second import of the same entity.
- After all settings are done, restart Solr.
	> solr stop -all
	> solr start
Run a DataImport of Salesforce Data.
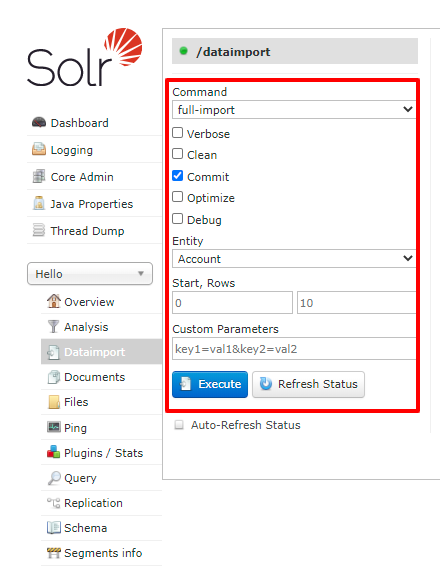
- Execute DataImport from the URL below:
http://localhost:8983/solr/#/CDataCore/dataimport//dataimport![Load Salesforce data to Solr using Data Import.]()
- Select the "full-import" Command, choose the table from Entity, and click "Execute."
![Execute full import in Solr.]()
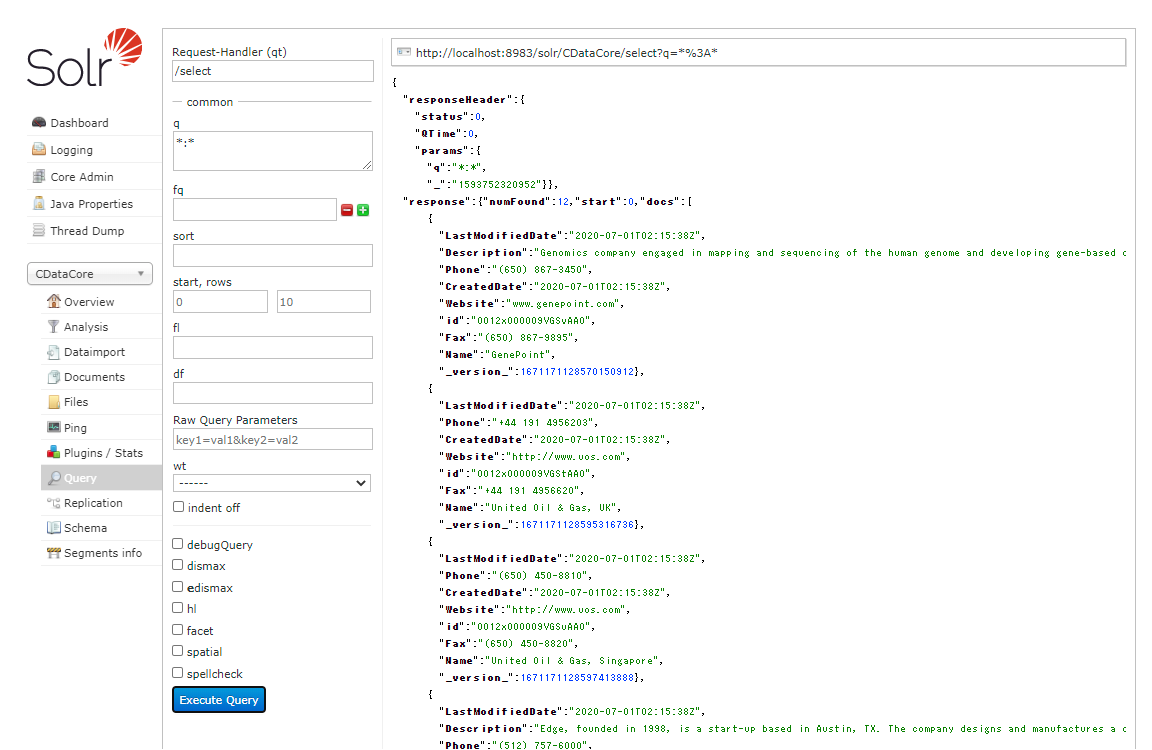
- Check the result of the import from the Query.
![Check the full import result of Salesforce.]()
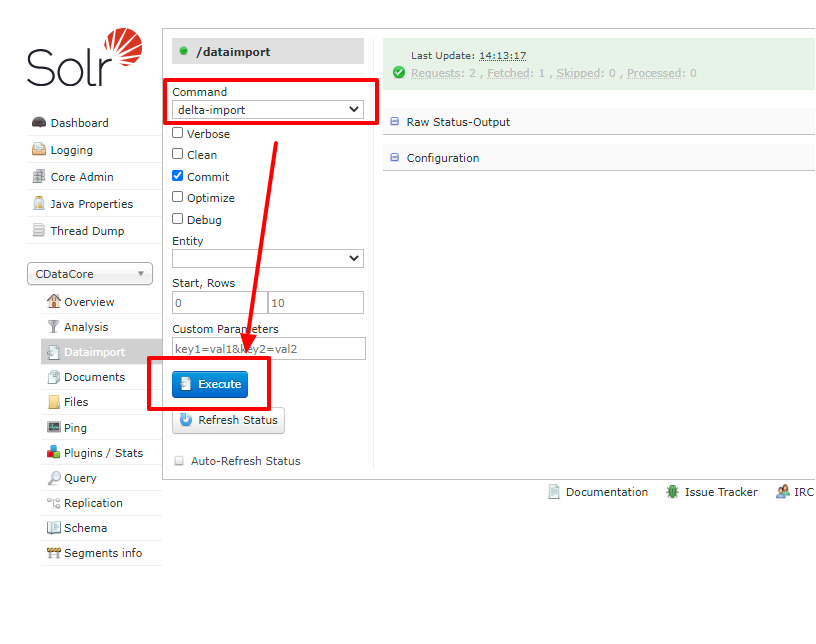
- Try an incremental update using deltaQuery. Modify some data in the original Salesforce data set. Select the "delta-import" command this time from DataImport window and click "Execute."
![Execute Delta import in Solr.]()
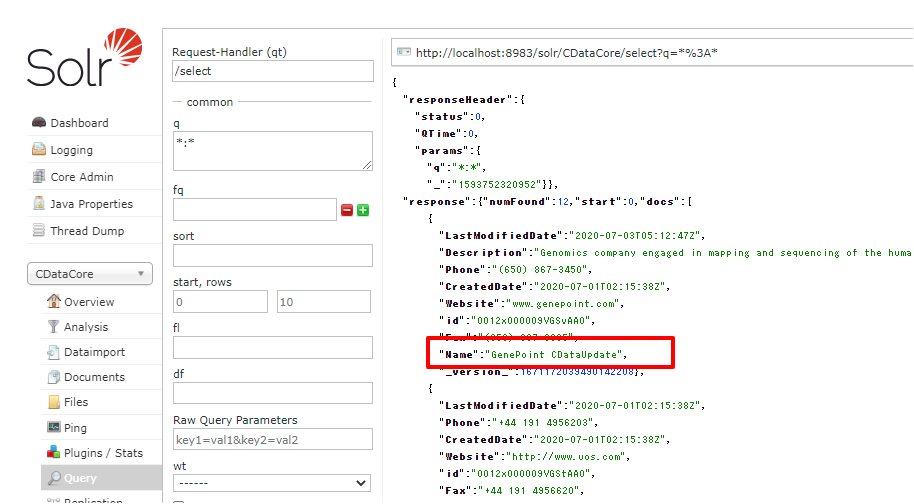
- Check the result of the incremental update.
![Check the delta import result of Salesforce.]()
Using the CData JDBC Driver for Salesforce you are able to create an automated import of Salesforce data into Apache Solr. Download a free, 30 day trial of any of the 200+ CData JDBC Drivers and get started today.

