Model Context Protocol (MCP) finally gives AI models a way to access the business data needed to make them really useful at work. CData MCP Servers have the depth and performance to make sure AI has access to all of the answers.
Try them now for free →Automated Continuous SharePoint Replication to Apache Cassandra
Use CData Sync for automated, continuous, customizable SharePoint replication to Apache Cassandra.
Always-on applications rely on automatic failover capabilities and real-time data access. CData Sync integrates live SharePoint data into your Apache Cassandra instance, allowing you to consolidate all of your data into a single location for archiving, reporting, analytics, machine learning, artificial intelligence and more.
About SharePoint Data Integration
Accessing and integrating live data from SharePoint has never been easier with CData. Customers rely on CData connectivity to:
- Access data from a wide range of SharePoint versions, including Windows SharePoint Services 3.0, Microsoft Office SharePoint Server 2007 and above, and SharePoint Online.
- Access all of SharePoint thanks to support for Hidden and Lookup columns.
- Recursively scan folders to create a relational model of all SharePoint data.
- Use SQL stored procedures to upload and download documents and attachments.
Most customers rely on CData solutions to integrate SharePoint data into their database or data warehouse, while others integrate their SharePoint data with preferred data tools, like Power BI, Tableau, or Excel.
For more information on how customers are solving problems with CData's SharePoint solutions, refer to our blog: Drivers in Focus: Collaboration Tools.
Getting Started
Configure Cassandra as a Replication Destination
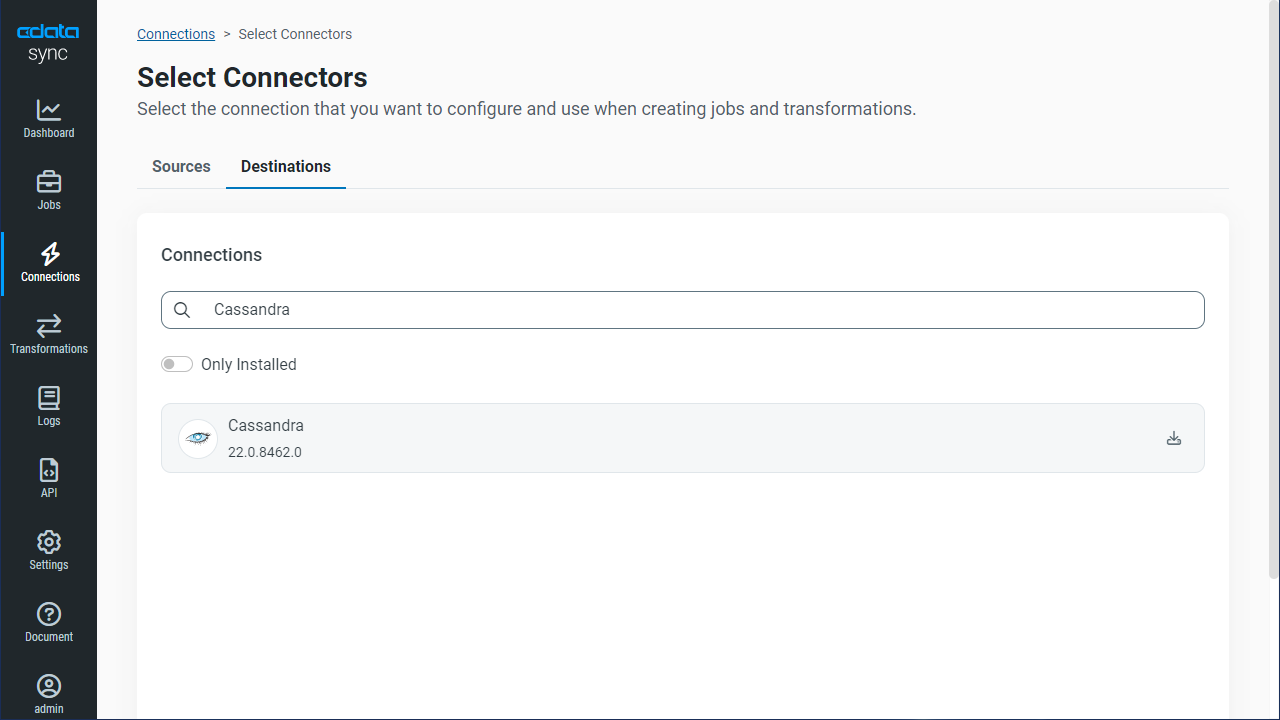
Using CData Sync, you can replicate SharePoint data to Apache Cassandra. To add a replication destination, navigate to the Connections tab.
- Click Add Connection.
- Select Apache Cassandra as a destination.
![Configure a Destination connection to Apache Cassandra.]()
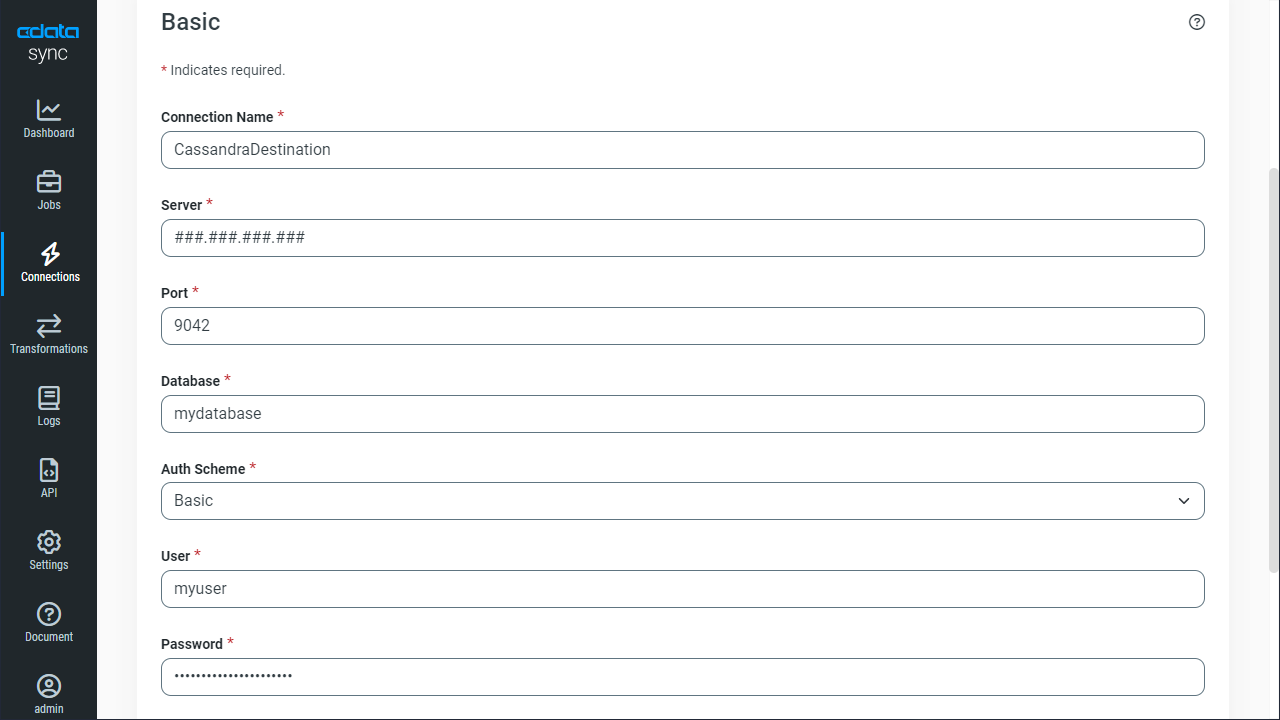
Enter the necessary connection properties. CData Sync supports Basic authentication with login credentials and the additional authentication features of DataStax Enterprise (DSE) Cassandra. The following sections detail connection properties your authentication method may require.
You need to set AuthScheme to the value corresponding to the authenticator configured for your system. You specify the authenticator in the authenticator property in the cassandra.yaml file. This file is typically found in /etc/dse/cassandra or through the DSE Unified Authenticator on DSE Cassandra.
Basic Authentication
Basic authentication is supported through Cassandra's built-in default PasswordAuthenticator.
- Set the AuthScheme property to 'BASIC' and set the User and Password properties.
- In the cassandra.yaml file, set the authenticator property to 'PasswordAuthenticator.'
Kerberos Authentication
Kerberos authentication is supported through DataStax Enterprise Unified Authentication.
- Set the AuthScheme property to 'KERBEROS' and set the User and Password properties.
- Set the KerberosKDC, KerberosRealm, and KerberosSPN properties.
- In the cassandra.yaml file, set the authenticator property to "com.datastax.bdp.cassandra.auth.DseAuthenticator."
- Modify the authentication_options section in the dse.yaml file, specifying the default_schema and other_schemas properties as 'kerberos.'
- Modify the kerberos_options section in the dse.yaml file, specifying the keytab, service_principle, http_principle and qop properties.
LDAP Authentication
LDAP authentication is supported through DataStax Enterprise Unified Authentication.
- Set the AuthScheme property to 'LDAP' and set the User and Password properties.
- In the cassandra.yaml file, set the authenticator property to "com.datastax.bdp.cassandra.auth.DseAuthenticator."
- Modify the authentication_options section in the dse.yaml file, specifying the default_schema and other_schemas properties as 'ldap.'
- Modify the ldap_options section in the dse.yaml file, specifying the server_host, server_port, search_dn, search_password, user_search_base, and user_search_filter properties.
Using PKI
You can specify a client certificate to authenticate CData Sync with SSLClientCert, SSLClientCertType, SSLClientCertSubject, and SSLClientCertPassword.
- Click Test Connection to ensure that the connection is configured properly.
![Configure a Destination connection.]()
- Click Save Changes.
Configure the SharePoint Connection
You can configure a connection to SharePoint from the Connections tab. To add a connection to your SharePoint account, navigate to the Connections tab.
- Click Add Connection.
- Select a source (SharePoint).
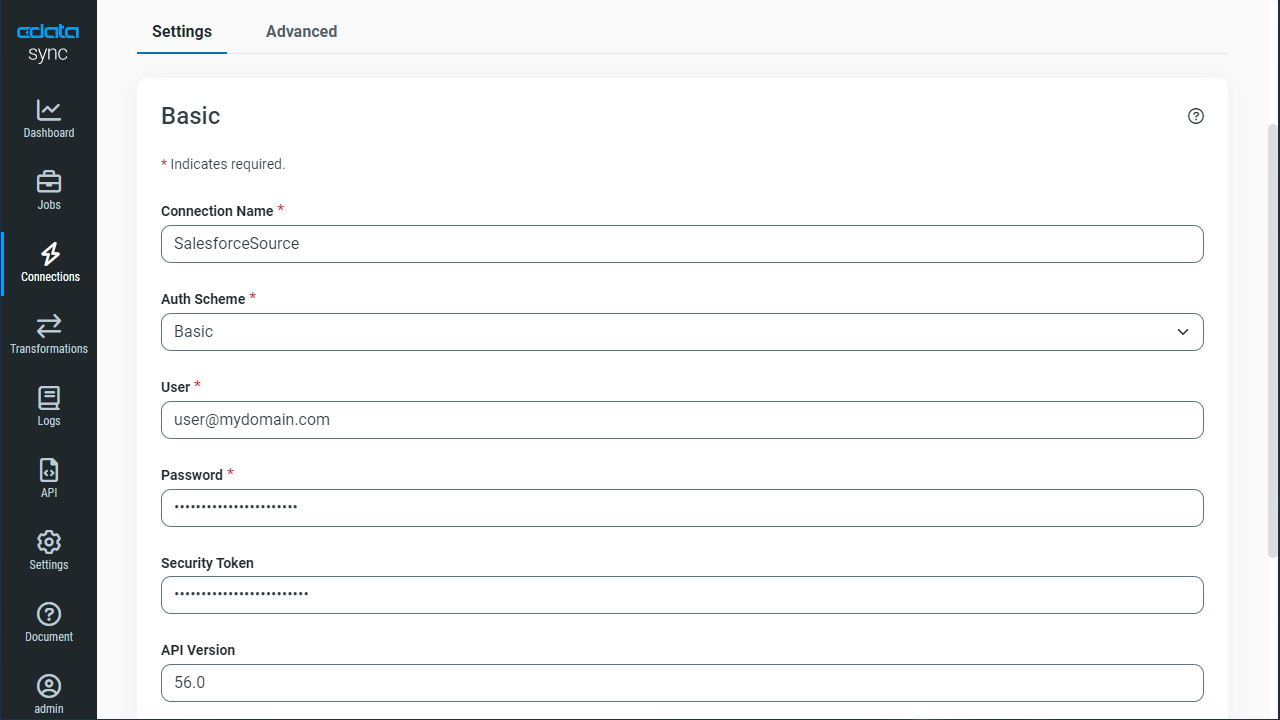
- Configure the connection properties.
Set the URL property to the base SharePoint site or to a sub-site. This allows you to query any lists and other SharePoint entities defined for the site or sub-site.
The User and Password properties, under the Authentication section, must be set to valid SharePoint user credentials when using SharePoint On-Premise.
If you are connecting to SharePoint Online, set the SharePointEdition to SHAREPOINTONLINE along with the User and Password connection string properties. For more details on connecting to SharePoint Online, see the "Getting Started" chapter of the help documentation
![Configure a Source connection (Salesforce is shown).]()
- Click Connect to ensure that the connection is configured properly.
- Click Save Changes.
Configure Replication Queries
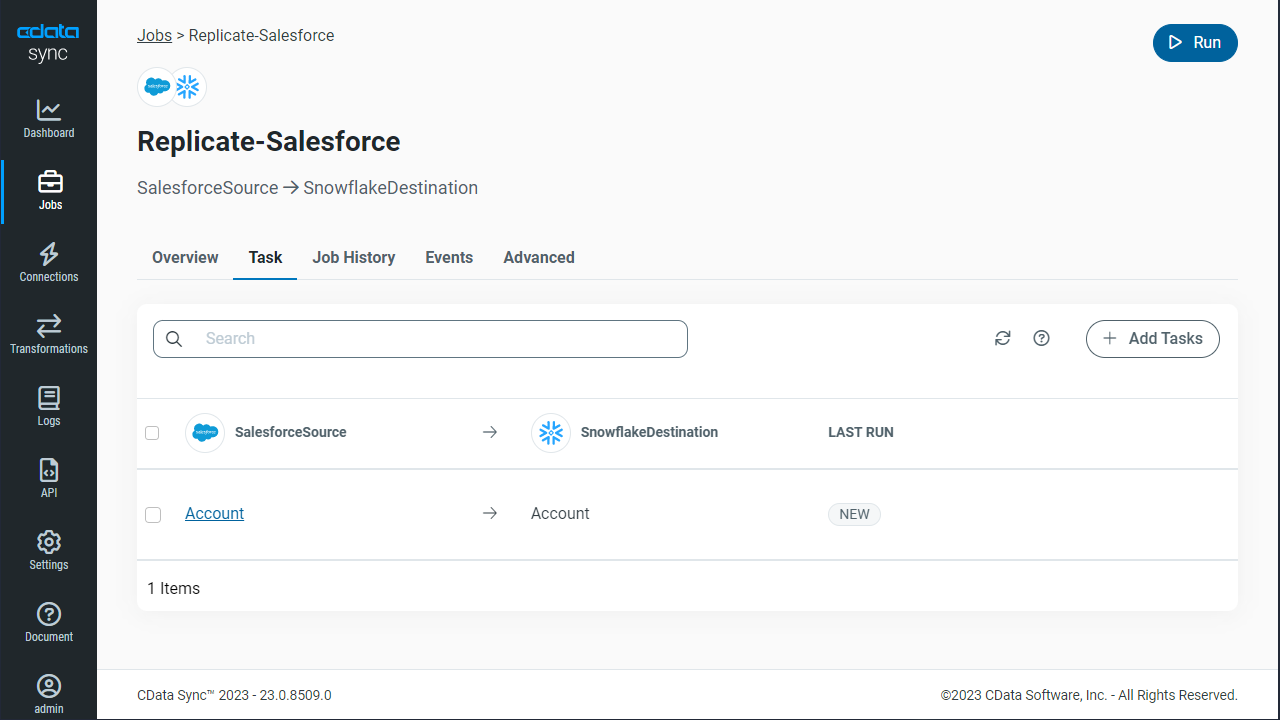
CData Sync enables you to control replication with a point-and-click interface and with SQL queries. For each replication you wish to configure, navigate to the Jobs tab and click Add Job. Select the Source and Destination for your replication.
Replicate Entire Tables
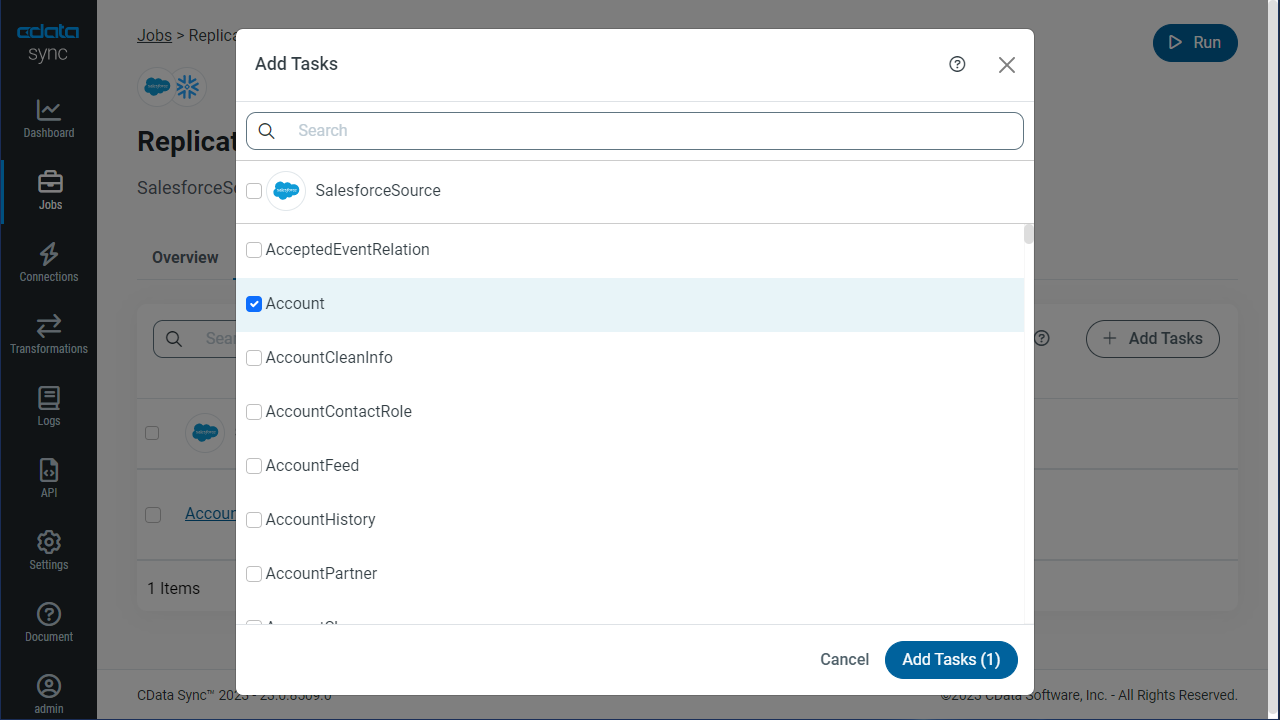
To replicate an entire table, click Add Tables in the Tables section, choose the table(s) you wish to replicate, and click Add Selected Tables.
Customize Your Replication
You can use the Columns and Query tabs of a task to customize your replication. The Columns tab allows you to specify which columns to replicate, rename the columns at the destination, and even perform operations on the source data before replicating. The Query tab allows you to add filters, grouping, and sorting to the replication.
Schedule Your Replication
In the Schedule section, you can schedule a job to run automatically, configuring the job to run after specified intervals ranging from once every 10 minutes to once every month.
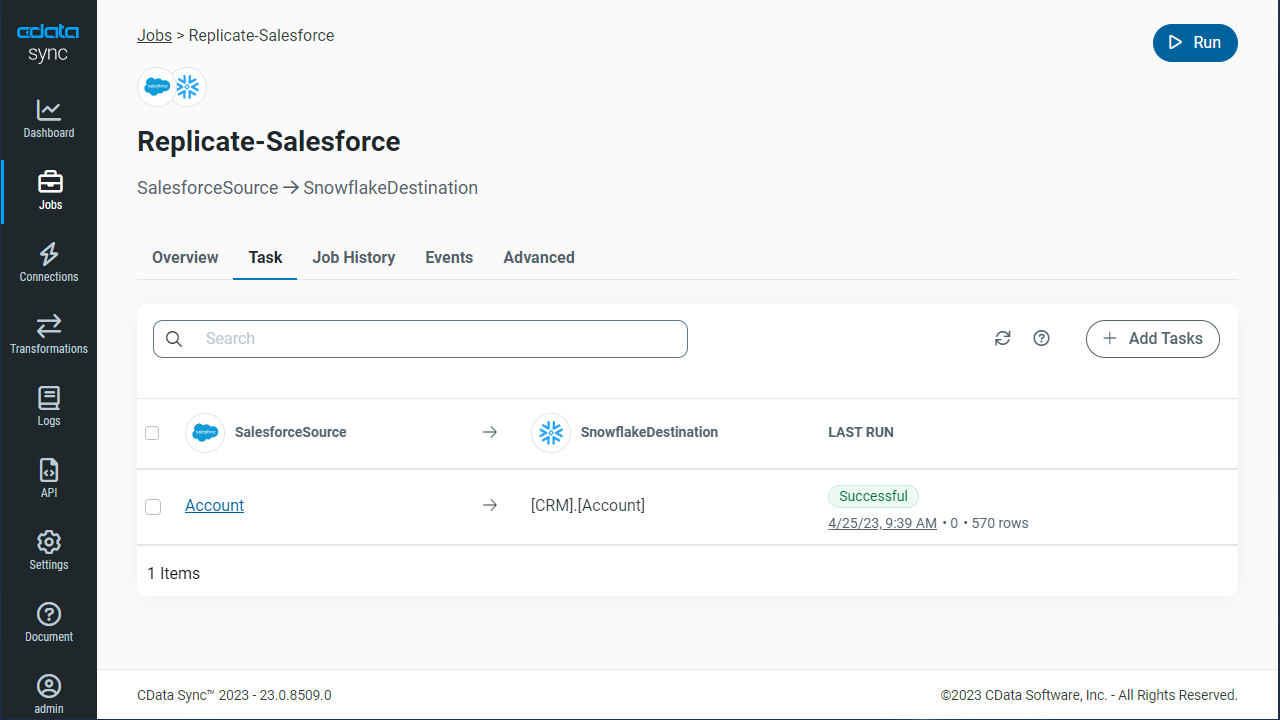
Once you have configured the replication job, click Save Changes. You can configure any number of jobs to manage the replication of your SharePoint data to Apache Cassandra.

