Model Context Protocol (MCP) finally gives AI models a way to access the business data needed to make them really useful at work. CData MCP Servers have the depth and performance to make sure AI has access to all of the answers.
Try them now for free →Query Snowflake Data in DataGrip
Create a Data Source for Snowflake in DataGrip and use SQL to query live Snowflake data.
DataGrip is a database IDE that allows SQL developers to query, create, and manage databases. When paired with the CData JDBC Driver for Snowflake, DataGrip can work with live Snowflake data. This article shows how to establish a connection to Snowflake data in DataGrip and use the table editor to load Snowflake data.
About Snowflake Data Integration
CData simplifies access and integration of live Snowflake data. Our customers leverage CData connectivity to:
- Reads and write Snowflake data quickly and efficiently.
- Dynamically obtain metadata for the specified Warehouse, Database, and Schema.
- Authenticate in a variety of ways, including OAuth, OKTA, Azure AD, Azure Managed Service Identity, PingFederate, private key, and more.
Many CData users use CData solutions to access Snowflake from their preferred tools and applications, and replicate data from their disparate systems into Snowflake for comprehensive warehousing and analytics.
For more information on integrating Snowflake with CData solutions, refer to our blog: https://www.cdata.com/blog/snowflake-integrations.
Getting Started
Create a New Driver Definition for Snowflake
The steps below describe how to create a new Data Source in DataGrip for Snowflake.
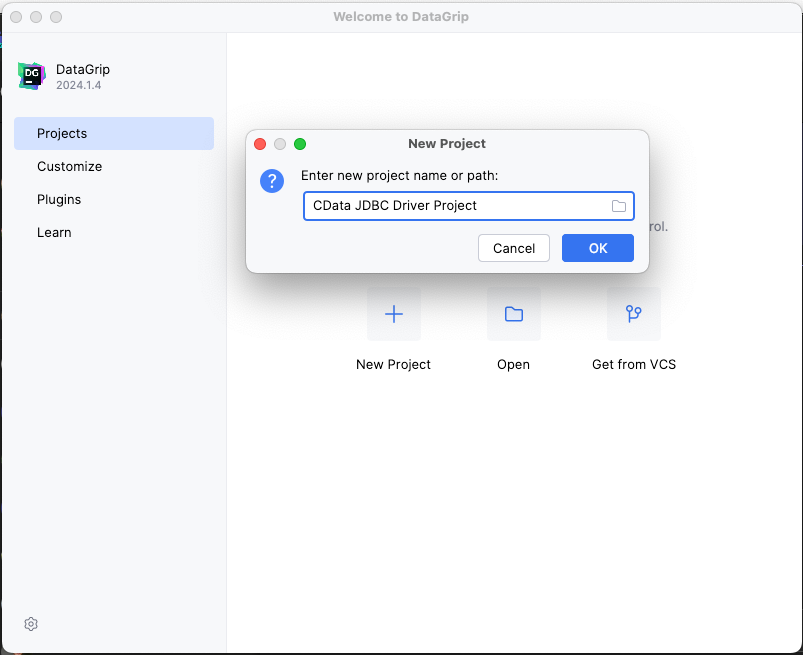
- In DataGrip, click File -> New > Project and name the project
![Creating a new DataGrip project.]()
- In the Database Explorer, click the plus icon () and select Driver.
![Adding a new Driver.]()
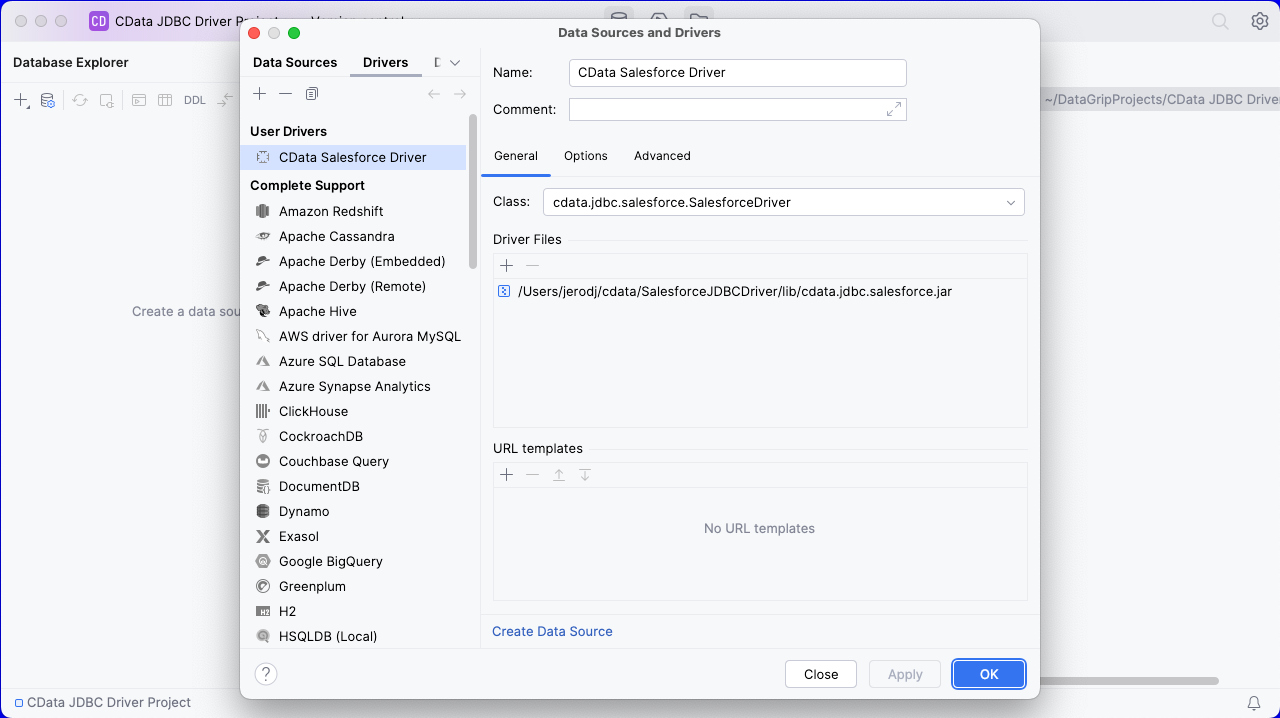
- In the Driver tab:
- Set Name to a user-friendly name (e.g. "CData Snowflake Driver")
- Set Driver Files to the appropriate JAR file. To add the file, click the plus (), select "Add Files," navigate to the "lib" folder in the driver's installation directory and select the JAR file (e.g. cdata.jdbc.snowflake.jar).
- Set Class to cdata.jdbc.snowflake.Snowflake.jar
Additionally, in the advanced tab you can change driver properties and some other settings like VM Options, VM environment, VM home path, DBMS, etc - For most cases, change the DBMS type to "Unknown" in Expert options to avoid native SQL Server queries (Transact-SQL), which might result in an invalid function error
- Click "Apply" then "OK" to save the Connection
![A configured Driver (Salesforce is shown).]()
Configure a Connection to Snowflake
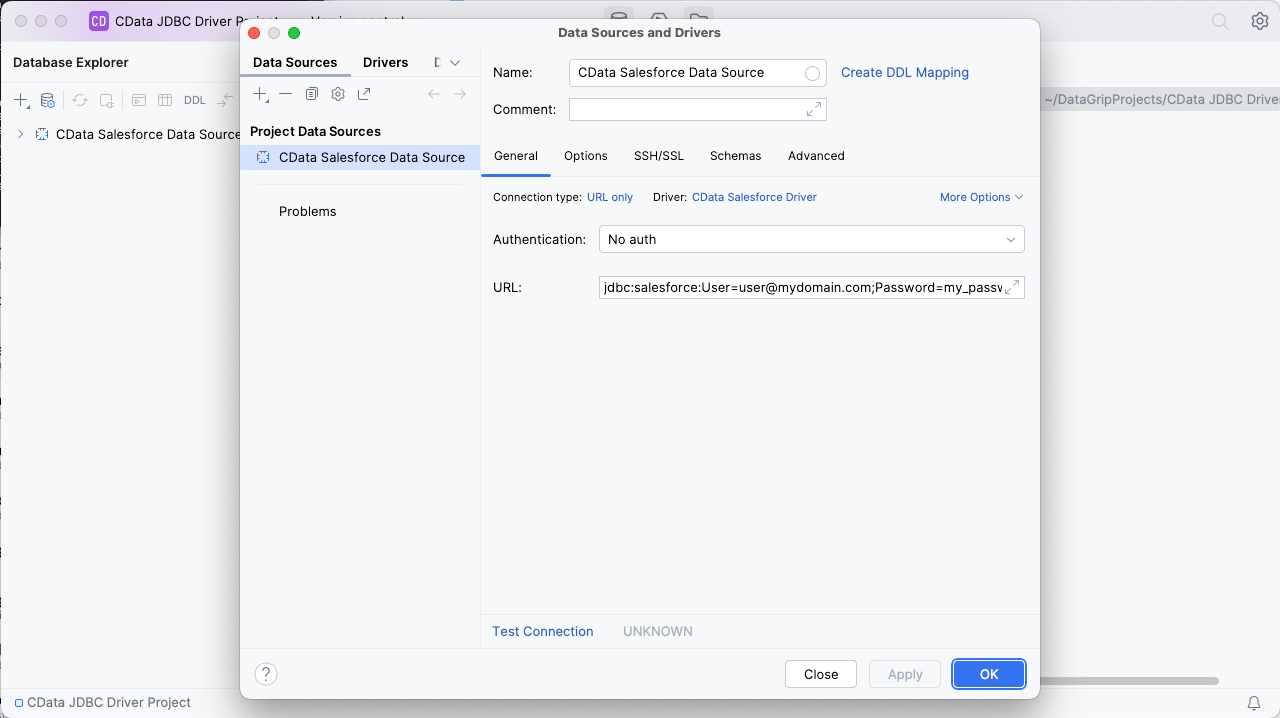
- Once the connection is saved, click the plus (), then "Data Source" then "CData Snowflake Driver" to create a new Snowflake Data Source.
- In the new window, configure the connection to Snowflake with a JDBC URL.
Built-in Connection String Designer
For assistance in constructing the JDBC URL, use the connection string designer built into the Snowflake JDBC Driver. Either double-click the JAR file or execute the jar file from the command-line.
java -jar cdata.jdbc.snowflake.jarFill in the connection properties and copy the connection string to the clipboard.
To connect to Snowflake:
- Set User and Password to your Snowflake credentials and set the AuthScheme property to PASSWORD or OKTA.
- Set URL to the URL of the Snowflake instance (i.e.: https://myaccount.snowflakecomputing.com).
- Set Warehouse to the Snowflake warehouse.
- (Optional) Set Account to your Snowflake account if your URL does not conform to the format above.
- (Optional) Set Database and Schema to restrict the tables and views exposed.
See the Getting Started guide in the CData driver documentation for more information.
![Using the built-in connection string designer to generate a JDBC URL (Salesforce is shown.)]()
- Set URL to the connection string, e.g.,
jdbc:snowflake:User=Admin;Password=test123;Server=localhost;Database=Northwind;Warehouse=TestWarehouse;Account=Tester1; - Click "Apply" and "OK" to save the connection string
![A configured Data Source (Salesforce is shown).]()
At this point, you will see the data source in the Data Explorer.
Execute SQL Queries Against Snowflake
To browse through the Snowflake entities (available as tables) accessible through the JDBC Driver, expand the Data Source.
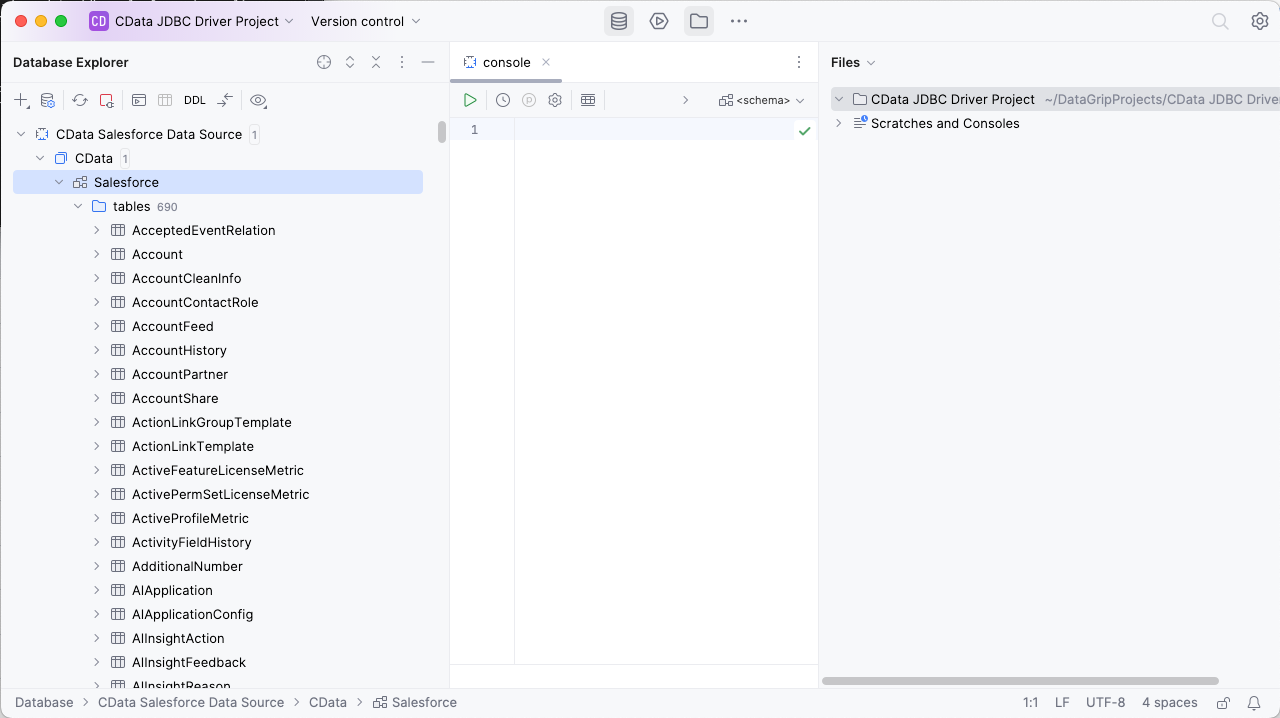
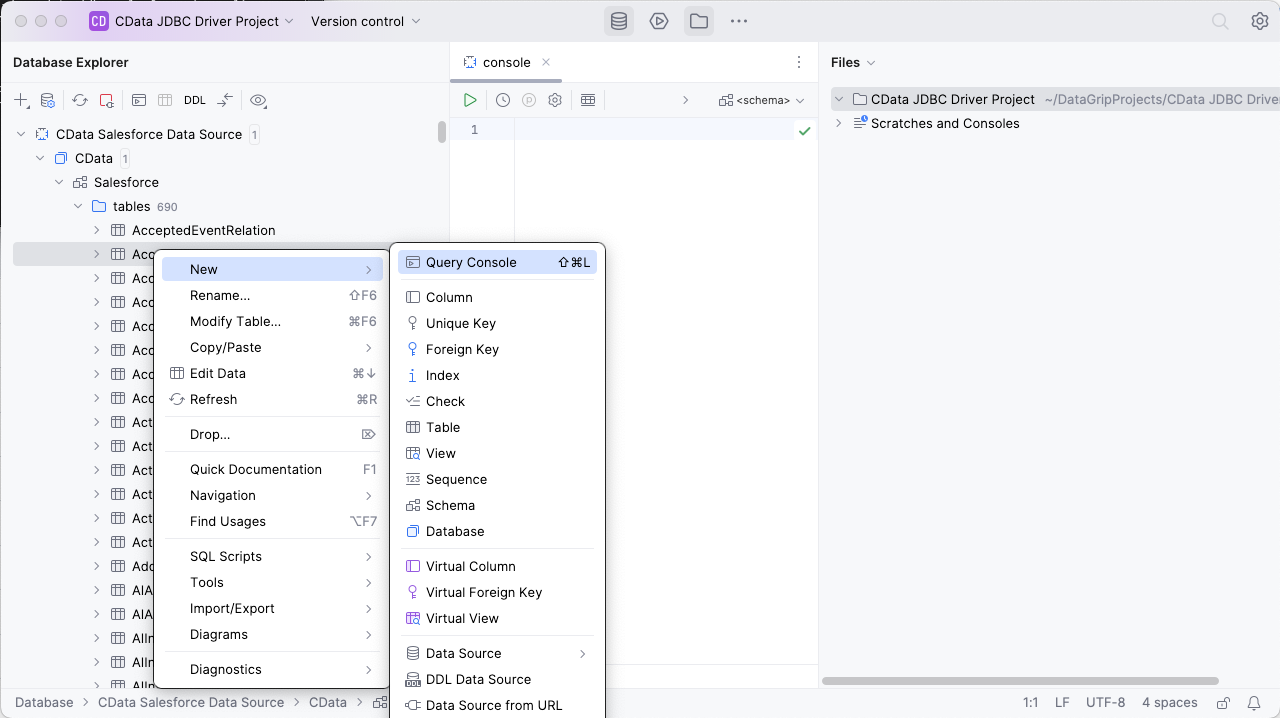
To execute queries, right click on any table and select "New" -> "Query Console."
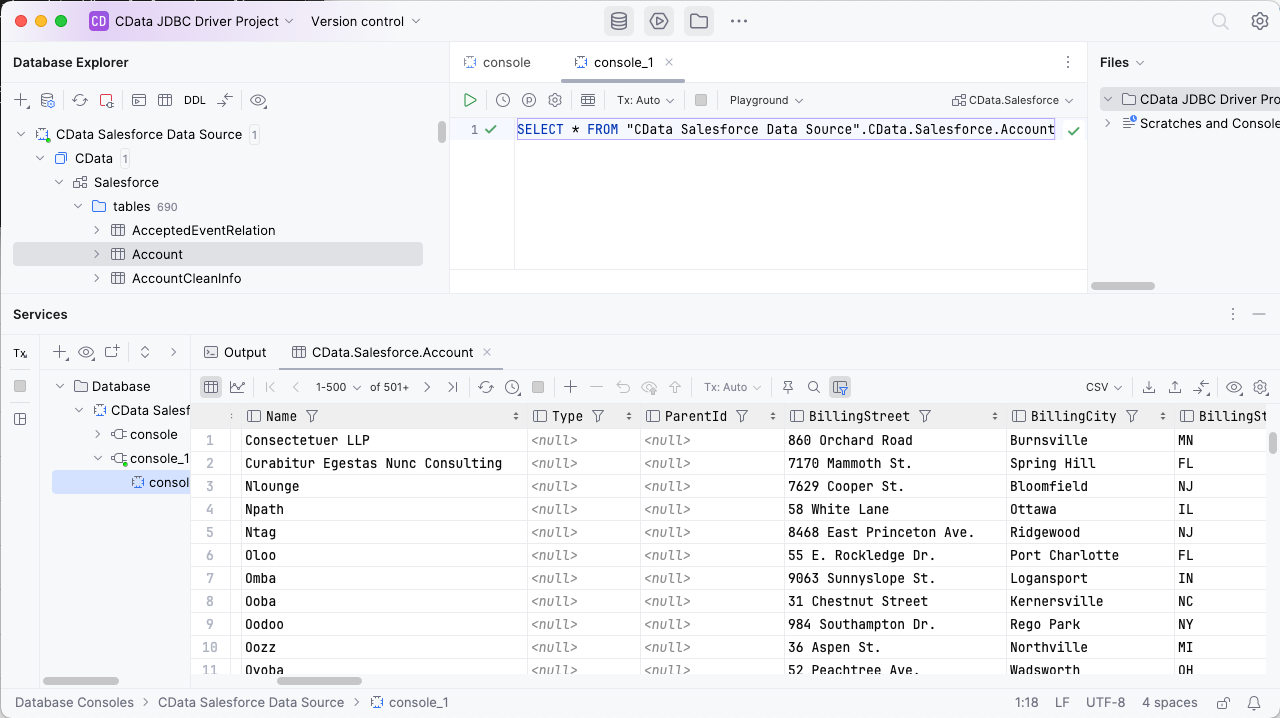
In the Console, write the SQL query you wish to execute. For example: SELECT Id, ProductName FROM Products
Download a free, 30-day trial of the CData JDBC Driver for Snowflake and start working with your live Snowflake data in DataGrip. Reach out to our Support Team if you have any questions.

