Model Context Protocol (MCP) finally gives AI models a way to access the business data needed to make them really useful at work. CData MCP Servers have the depth and performance to make sure AI has access to all of the answers.
Try them now for free →Provide OData Services of Workday Data from a WCF Application
In this article, we will demonstrate the process of generating an OData feed for Workday data by developing a WCF Service Application.
The CData ADO.NET Provider for Workday enables you to rapidly develop service-oriented applications using the Windows Communication Foundation (WCF) framework, providing Workday data data to OData consumers. This article guides you through creating an entity data model for connectivity and a WCF Data Service to expose OData services. You can then consume the feed with various OData clients, such as Power Pivot or applications using the CData ADO.NET Provider for OData.
About Workday Data Integration
CData provides the easiest way to access and integrate live data from Workday. Customers use CData connectivity to:
- Access the tables and datasets you create in Prism Analytics Data Catalog, working with the native Workday data hub without compromising the fidelity of your Workday system.
- Access Workday Reports-as-a-Service to surface data from departmental datasets not available from Prism and datasets larger than Prism allows.
- Access base data objects with WQL, REST, or SOAP, getting more granular, detailed access but with the potential need for Workday admins or IT to help craft queries.
Users frequently integrate Workday with analytics tools such as Tableau, Power BI, and Excel, and leverage our tools to replicate Workday data to databases or data warehouses. Access is secured at the user level, based on the authenticated user's identity and role.
For more information on configuring Workday to work with CData, refer to our Knowledge Base articles: Comprehensive Workday Connectivity through Workday WQL and Reports-as-a-Service & Workday + CData: Connection & Integration Best Practices.
Getting Started
Create the OData Service
Follow the steps below to create a WCF service application that will provide connectivity to Workday data via OData.
- Open Visual Studio and create a new project. Select the WCF Service Application template.
- Delete the autogenerated IService.cs and Service1.svc.
- Install Entity Framework 6:
Use the Package Manager Console in Visual Studio to install the latest version of Entity Framework. Run the following command to download and install Entity Framework automatically:
Install-Package EntityFramework - Register the Entity Framework provider:
- Add the following provider entry in the "providers" section of your App.config or Web.config file. This section should already exist if the Entity Framework installation was successful.
<configuration> ... <entityFramework> <providers> ... <provider invariantName="System.Data.CData.Workday" type="System.Data.CData.Workday.WorkdayProviderServices, System.Data.CData.Workday.Entities.EF6" /> </providers> </entityFramework> </configuration> - Add a reference to System.Data.CData.Workday.Entities.dll, located in lib/4.0 in the installation directory.
- Build the project to complete the setup for using EF6.
- Add the following provider entry in the "providers" section of your App.config or Web.config file. This section should already exist if the Entity Framework installation was successful.
- Click Project -> Add New Item -> ADO.NET Entity Data Model.
- In the Entity Data Model wizard that is displayed, select the 'EF Designer from Database' option.
- In the resulting Choose Your Connection dialog, click New Connection.
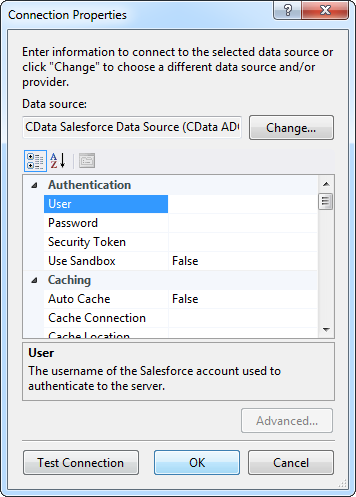
In the Connection properties dialog, select the CData Workday Data Source and enter the necessary credentials.
A typical connection string is below:
User=myuser;Password=mypassword;Tenant=mycompany_gm1;BaseURL=https://wd3-impl-services1.workday.com;ConnectionType=WQL;InitiateOAuth=GETANDREFRESHTo connect to Workday, users need to find the Tenant and BaseURL and then select their API type.
Obtaining the BaseURL and Tenant
To obtain the BaseURL and Tenant properties, log into Workday and search for "View API Clients." On this screen, you'll find the Workday REST API Endpoint, a URL that includes both the BaseURL and Tenant.
The format of the REST API Endpoint is: https://domain.com/subdirectories/mycompany, where:
- https://domain.com/subdirectories/ is the BaseURL.
- mycompany (the portion of the url after the very last slash) is the Tenant.
Using ConnectionType to Select the API
The value you use for the ConnectionType property determines which Workday API you use. See our Community Article for more information on Workday connectivity options and best practices.
API ConnectionType Value WQL WQL Reports as a Service Reports REST REST SOAP SOAP
Authentication
Your method of authentication depends on which API you are using.
- WQL, Reports as a Service, REST: Use OAuth authentication.
- SOAP: Use Basic or OAuth authentication.
See the Help documentation for more information on configuring OAuth with Workday.
![Required connection properties, specified in the Add Connection dialog. (Salesforce is shown.)]()
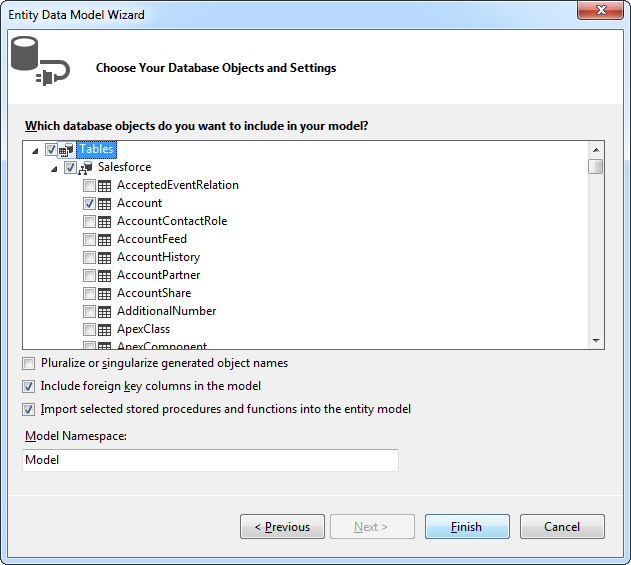
- Select Workday tables and views that you want OData clients to access.
![Available tables in the Entity Data Model Wizard. (Salesforce is shown.)]()
- Click Project -> Add New Item -> WCF Data Service.
Specify the data source class and configure access to the new WCF Data Service. In the example below, the Access Rule for the entities is set to All. This means that any user will be able to read and modify data.
using System; using System.Collections.Generic; using System.Data.Services; using System.Data.Services.Common; using System.Linq; using System.ServiceModel.Web; using System.Web; namespace WorkdayService{ public class WorkdayDataService : DataService<WorkdayEntities> { public static void InitializeService(DataServiceConfiguration config) { config.SetEntitySetAccessRule("*", EntitySetRights.All); config.DataServiceBehavior.MaxProtocolVersion = DataServiceProtocolVersion.V3; } } }-
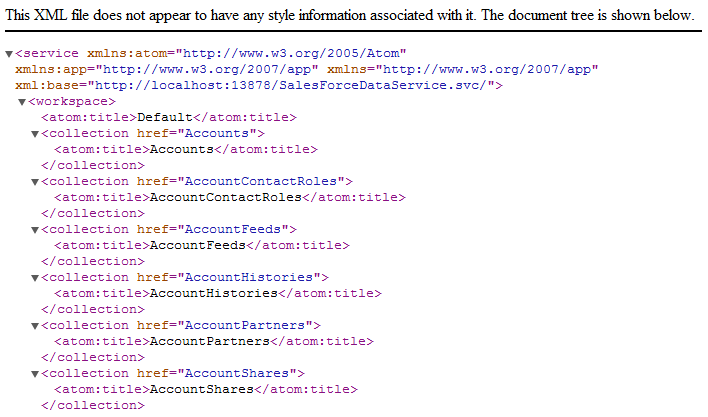
Run the project. Applications that support OData can now access the Salesforce data and reflect any changes. You can access the feed in your browser. The feed will resemble the following:
![The raw OData feed. (Salesforce is shown.)]()
Consume the OData Service from Power Pivot
You can now use the service from any OData client; for example, Excel Power Pivot.
- Open Excel and click on the Power Pivot Window button.
- A new pop-up will appear. Select the option From Data Feeds.
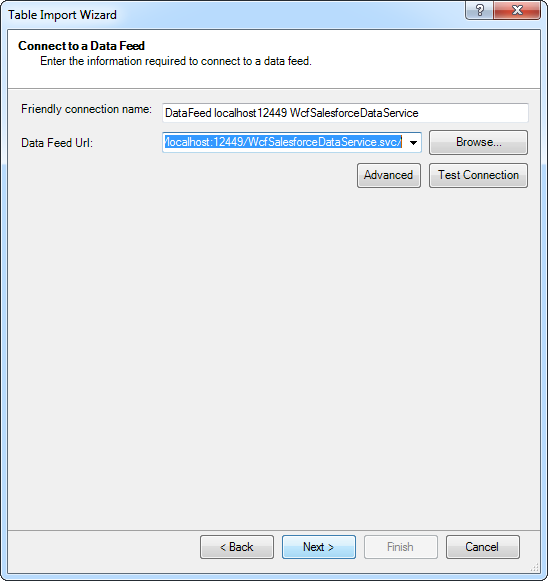
- In the resulting Table Import Wizard, enter the OData URL. For example, http://localhost:12449/WorkdayDataService.svc/.
![The OData URL for Workday.]()
- After connecting to the OData service, click the Next button at the bottom of the window.
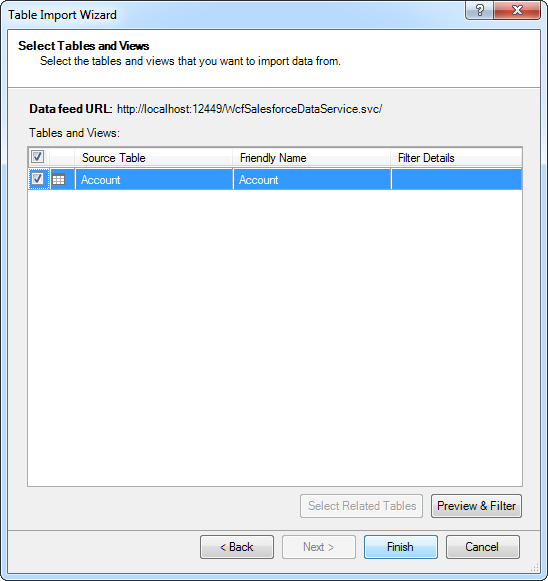
- A table listing of the available tables will appear in the next window of the wizard. Select which tables you want to import and click Finish.
![Available tables in the Table Import Wizard. (Salesforce is shown.)]()
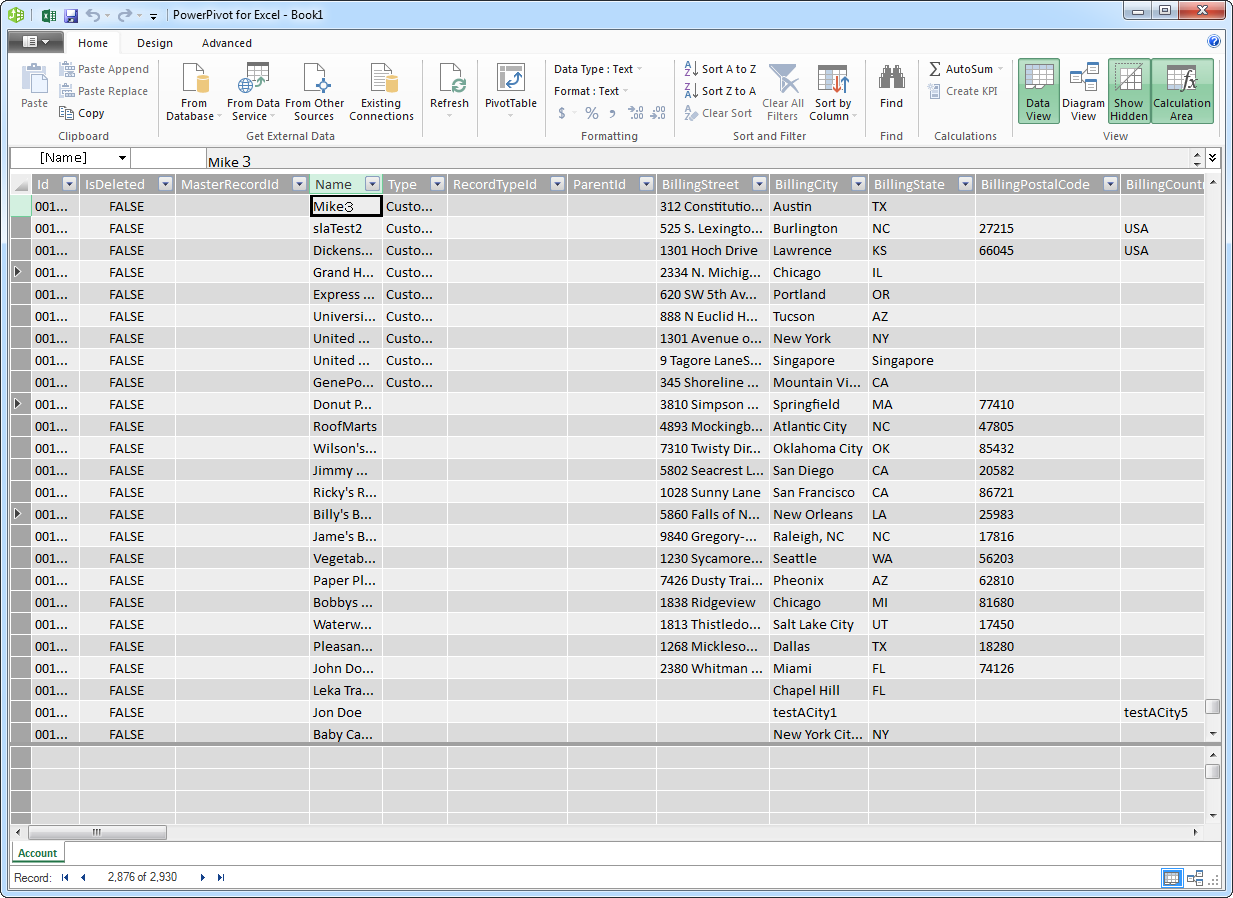
- Click Close to import the data in Power Pivot.
![The table loaded in Power Pivot. (Salesforce is shown.)]()

