Model Context Protocol (MCP) finally gives AI models a way to access the business data needed to make them really useful at work. CData MCP Servers have the depth and performance to make sure AI has access to all of the answers.
Try them now for free →Analyze Workday Data in Looker
Use CData Connect Cloud to connect to Workday Data from Looker and build custom apps using live Workday data.
Looker is a business intelligence and big data analytics platform that helps you explore, analyze and share real-time business analytics. When paired with CData Connect Cloud, you get instant, cloud-to-cloud access to Workday data for business applications. This article shows how to connect to Workday in Connect Cloud and then connect to Workday data in Looker.
CData Connect Cloud provides a pure cloud-to-cloud interface for Workday, allowing you to build reports from live Workday data in Looker — without replicating the data to a natively supported database. As you create applications to work with data, Looker generates SQL queries to gather data. Using optimized data processing out of the box, CData Connect Cloud pushes all supported SQL operations (filters, JOINs, etc.) directly to Workday, leveraging server-side processing to quickly return the requested Workday data.
About Workday Data Integration
CData provides the easiest way to access and integrate live data from Workday. Customers use CData connectivity to:
- Access the tables and datasets you create in Prism Analytics Data Catalog, working with the native Workday data hub without compromising the fidelity of your Workday system.
- Access Workday Reports-as-a-Service to surface data from departmental datasets not available from Prism and datasets larger than Prism allows.
- Access base data objects with WQL, REST, or SOAP, getting more granular, detailed access but with the potential need for Workday admins or IT to help craft queries.
Users frequently integrate Workday with analytics tools such as Tableau, Power BI, and Excel, and leverage our tools to replicate Workday data to databases or data warehouses. Access is secured at the user level, based on the authenticated user's identity and role.
For more information on configuring Workday to work with CData, refer to our Knowledge Base articles: Comprehensive Workday Connectivity through Workday WQL and Reports-as-a-Service & Workday + CData: Connection & Integration Best Practices.
Getting Started
Configure Workday Connectivity for Looker
Connectivity to Workday from Looker is made possible through CData Connect Cloud. To work with Workday data from Looker, we start by creating and configuring a Workday connection.
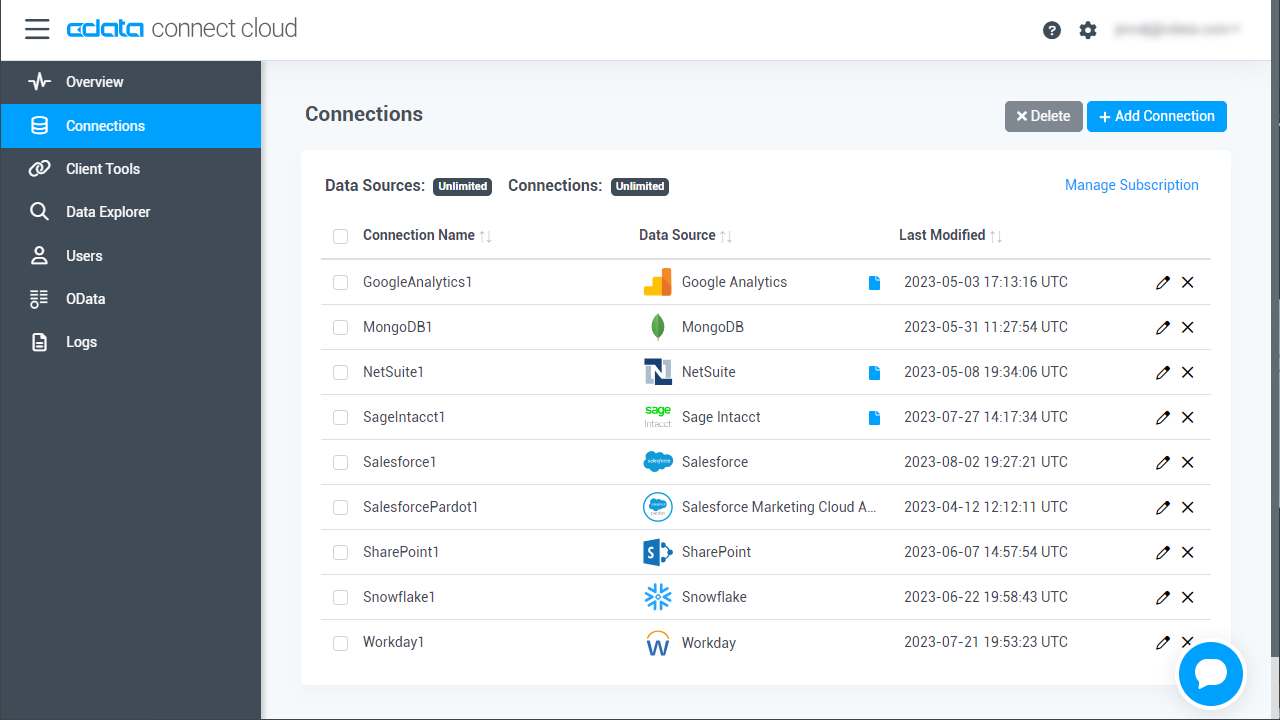
- Log into Connect Cloud, click Connections and click Add Connection
![Adding a Connection]()
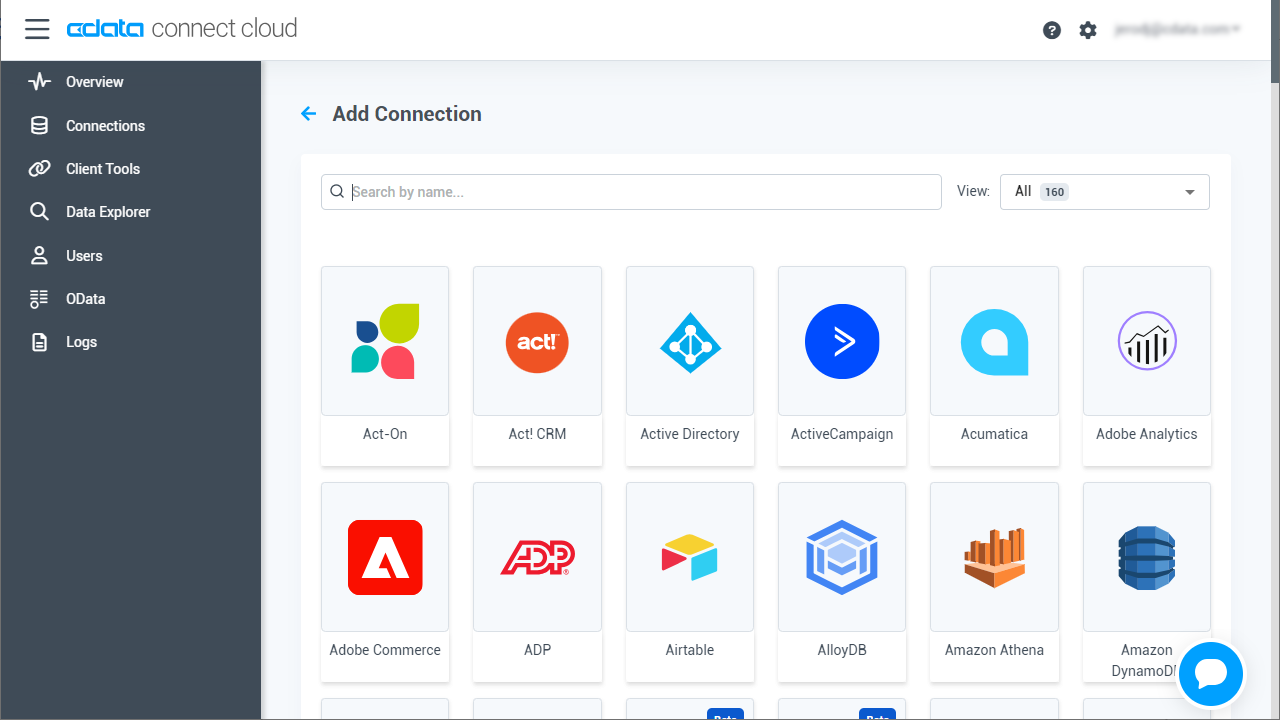
- Select "Workday" from the Add Connection panel
![Selecting a data source]()
-
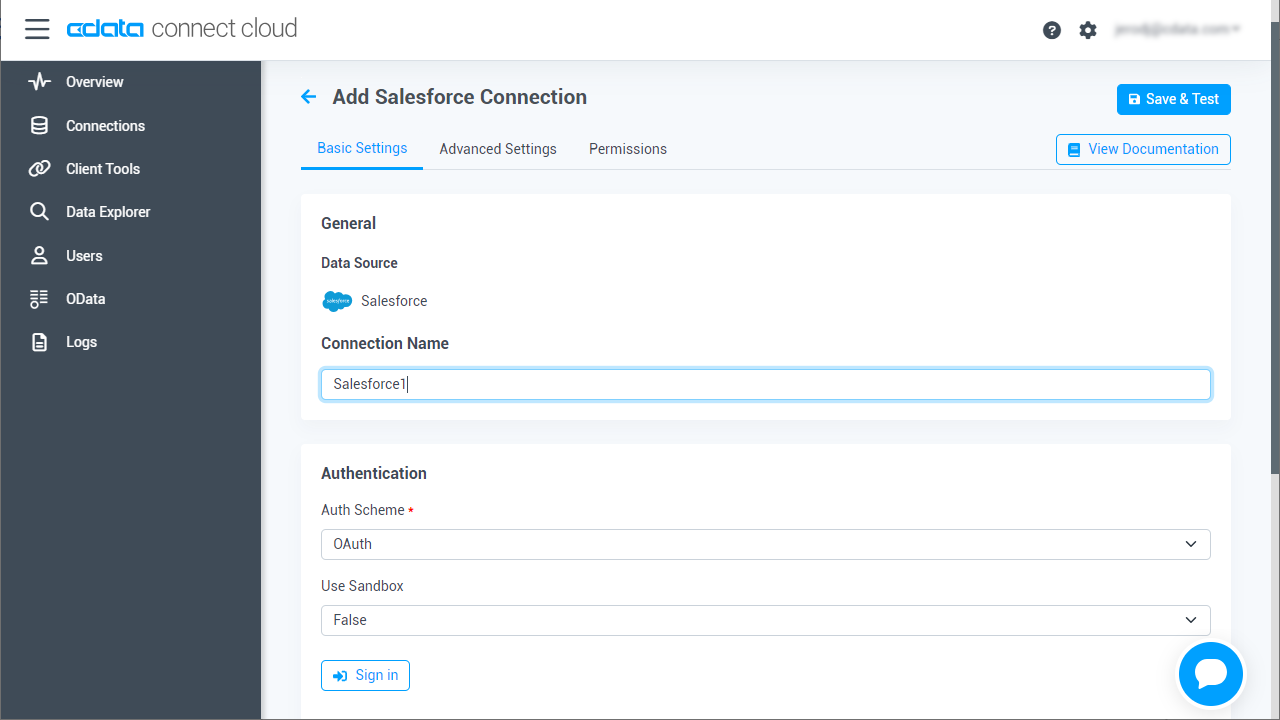
Enter the necessary authentication properties to connect to Workday.
To connect to Workday, users need to find the Tenant and BaseURL and then select their API type.
Obtaining the BaseURL and Tenant
To obtain the BaseURL and Tenant properties, log into Workday and search for "View API Clients." On this screen, you'll find the Workday REST API Endpoint, a URL that includes both the BaseURL and Tenant.
The format of the REST API Endpoint is: https://domain.com/subdirectories/mycompany, where:
- https://domain.com/subdirectories/ is the BaseURL.
- mycompany (the portion of the url after the very last slash) is the Tenant.
Using ConnectionType to Select the API
The value you use for the ConnectionType property determines which Workday API you use. See our Community Article for more information on Workday connectivity options and best practices.
API ConnectionType Value WQL WQL Reports as a Service Reports REST REST SOAP SOAP
Authentication
Your method of authentication depends on which API you are using.
- WQL, Reports as a Service, REST: Use OAuth authentication.
- SOAP: Use Basic or OAuth authentication.
See the Help documentation for more information on configuring OAuth with Workday.
![Configuring a connection (Salesforce is shown)]()
- Click Create & Test
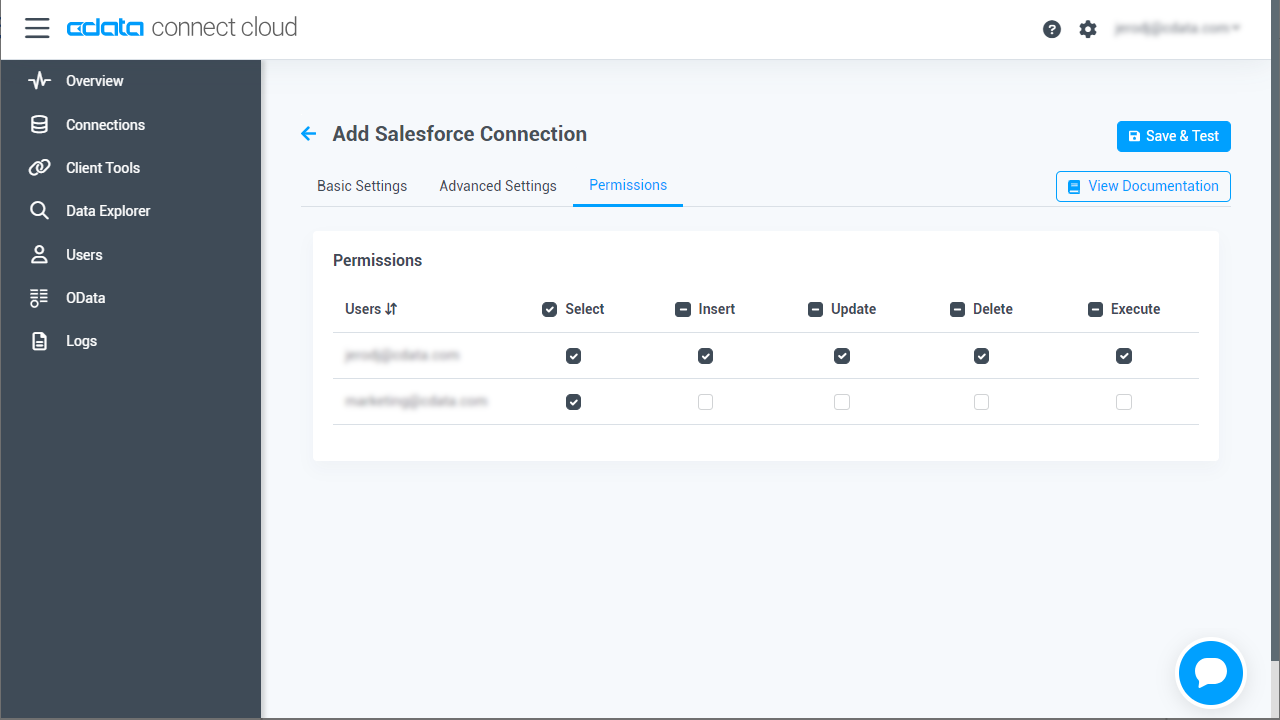
- Navigate to the Permissions tab in the Add Workday Connection page and update the User-based permissions.
![Updating permissions]()
Add a Personal Access Token
If you are connecting from a service, application, platform, or framework that does not support OAuth authentication, you can create a Personal Access Token (PAT) to use for authentication. Best practices would dictate that you create a separate PAT for each service, to maintain granularity of access.
- Click on your username at the top right of the Connect Cloud app and click User Profile.
- On the User Profile page, scroll down to the Personal Access Tokens section and click Create PAT.
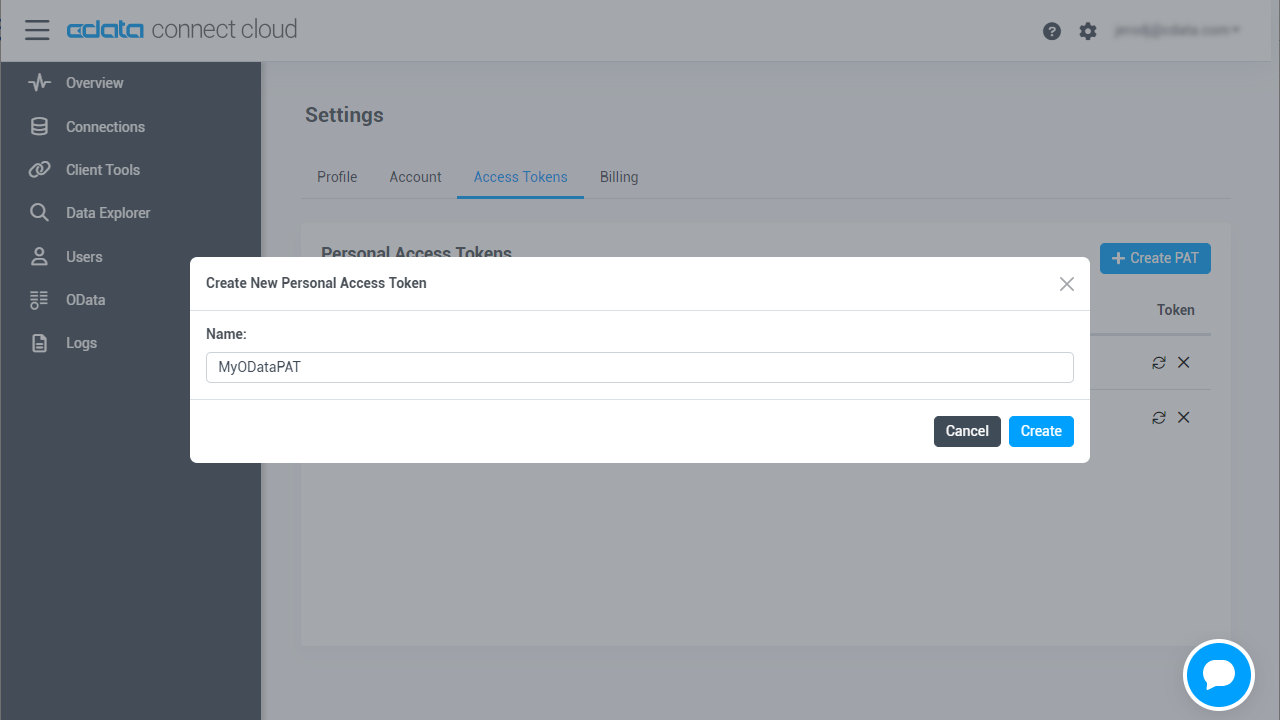
- Give your PAT a name and click Create.
![Creating a new PAT]()
- The personal access token is only visible at creation, so be sure to copy it and store it securely for future use.
With the connection configured, you are ready to connect to Workday data from Looker.
Connect to Workday in Looker
The steps below outline connecting to CData Connect Cloud from Looker to create a new Workday data source.
- Log-in to Looker
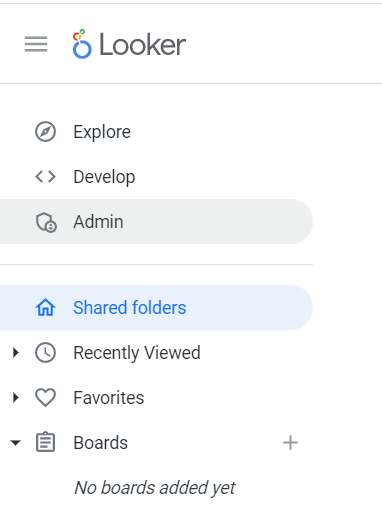
- In the navigation pane, select Admin.
![Selecting Admin]()
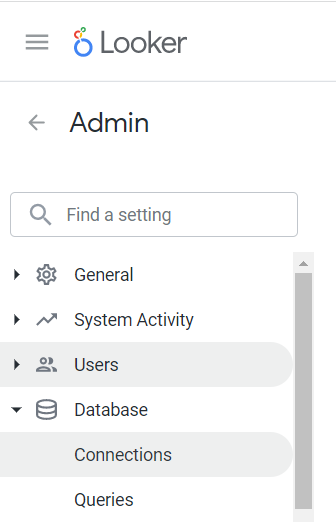
- Under the Database category, select Connections.
![Selecting connections]()
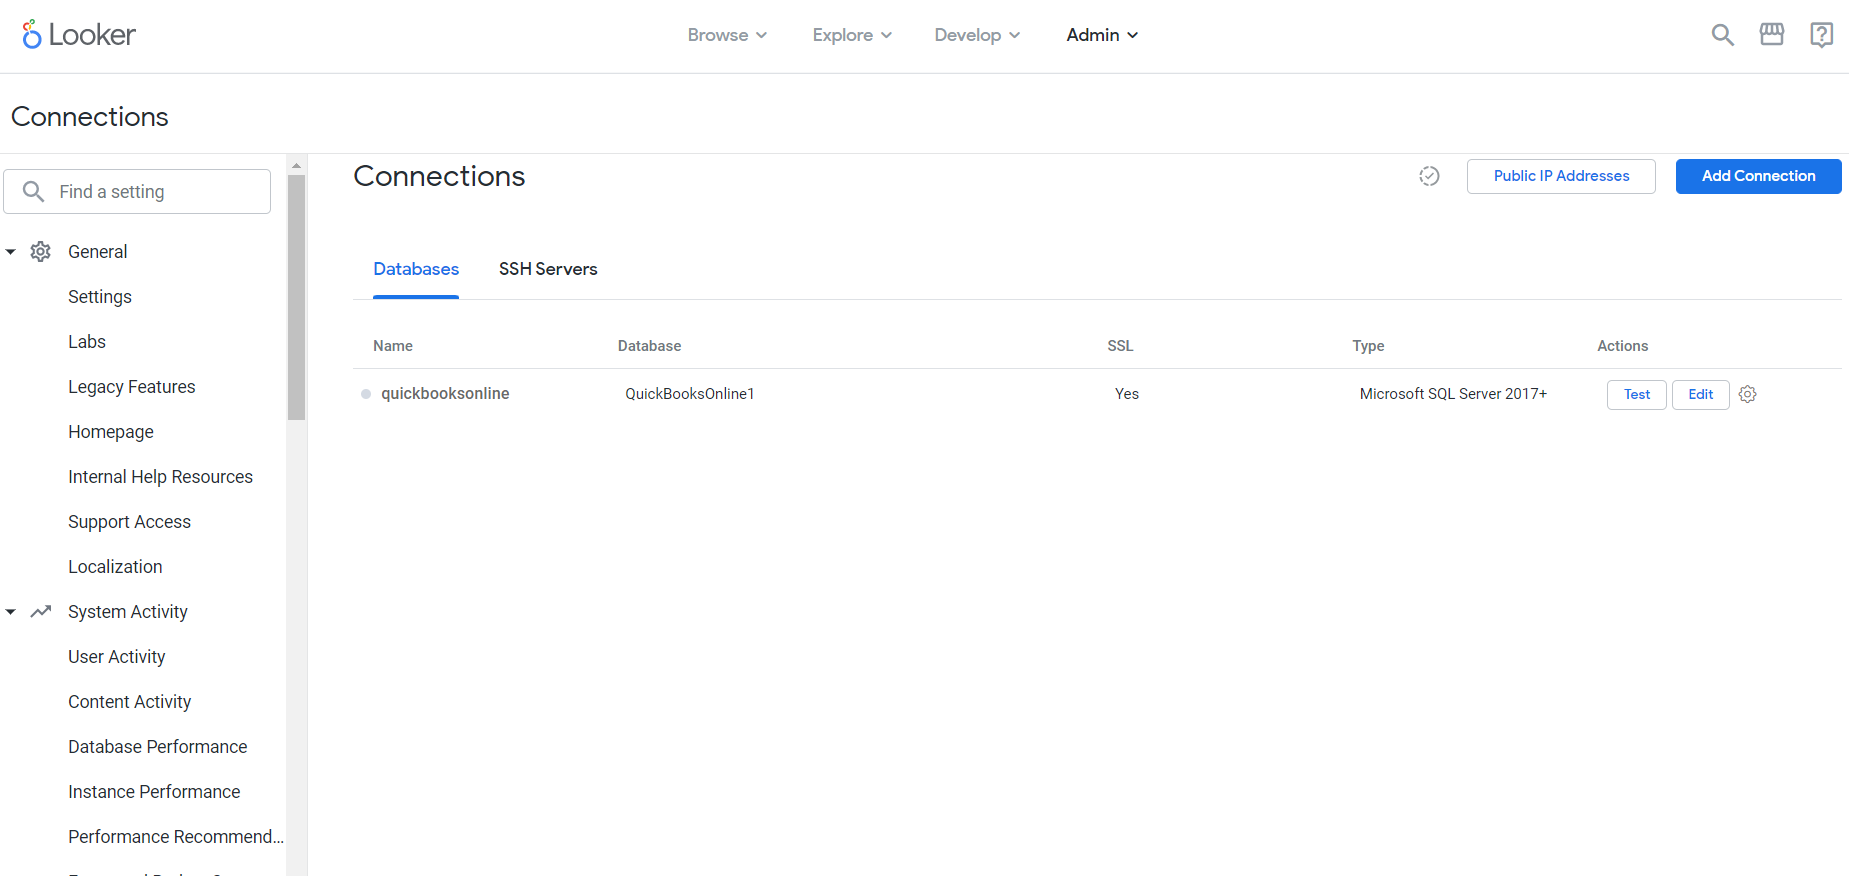
- On the Connections page, click Add Connection.
![Adding a new connection]()
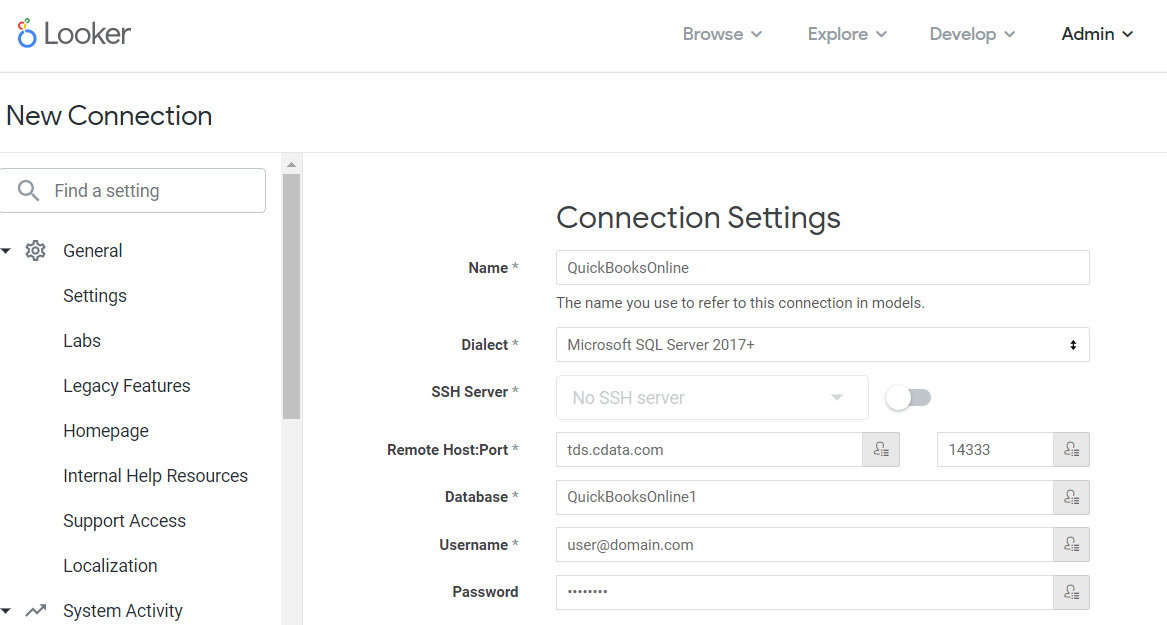
- Enter the connection settings:
- Name: the name for the connection in models.
- Dialect: select Microsoft SQL Server 2017+.
- SSH Server: leave this disabled.
- Remote Host:Port: enter tds.cdata.com in the first field and 14333 in the second field.
- Database: enter the Connection Name of the CData Connect Cloud data source you want to connect to (for example, QuickBooksOnline1).
- Username: enter your CData Connect Cloud username. This is displayed in the top-right corner of the CData Connect Cloud interface. For example, test@cdata.com
- Password: enter the PAT you generated on the Settings page
![Configuring connection settings]()
- At the bottom of the page, click Test These Settings to ensure that you can connect to CData Connect Cloud.
- Click Add Connection to create the connection and return to the
Connections page.
![New connection added.]()
Your connection is now available for use in Looker. To connect to additional data sources from your CData Connect Cloud account, repeat the setup steps above, changing the value for Database for each data source.
Creating A Looker Visualization From The SQL Runner and Explore Features
To create a visualization in Looker using the SQL Runner, follow these steps:
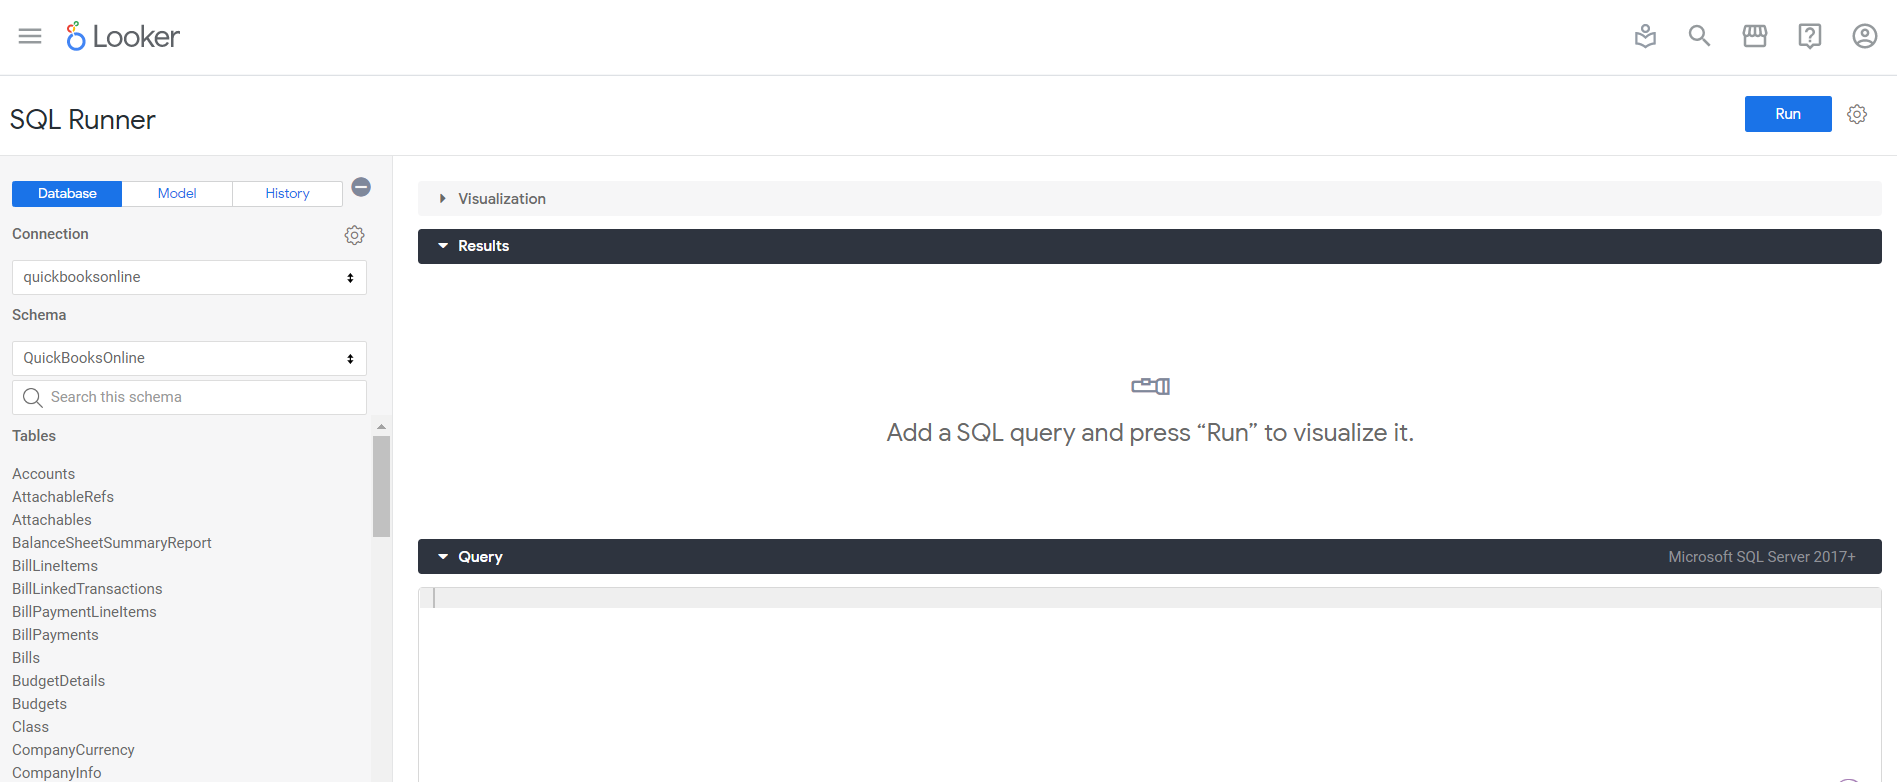
- In the Looker interface, select Develop -> SQL Runner from the left navigation pane.
![Select SQL Runner.]()
- On the SQL Runner interface, select the connection you made in the previous steps.
![Entering name for new dashboard.]()
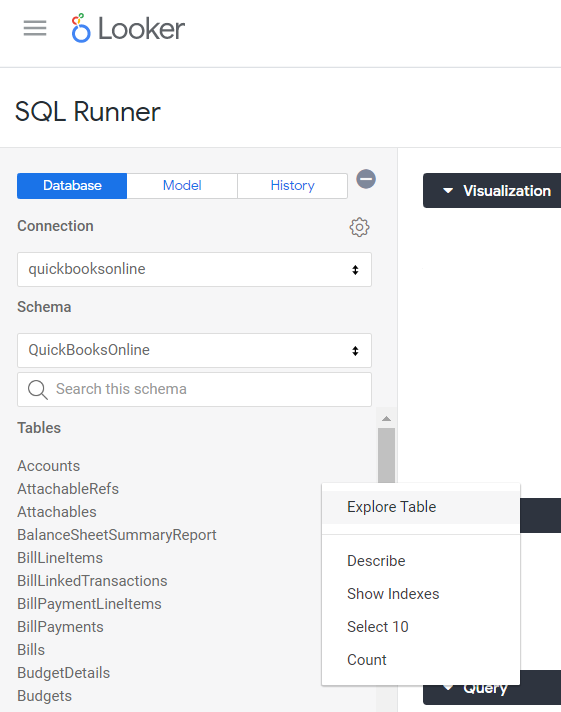
- Now, click the gear symbol next to a table and then select Explore Table.
![Entering name for new dashboard.]()
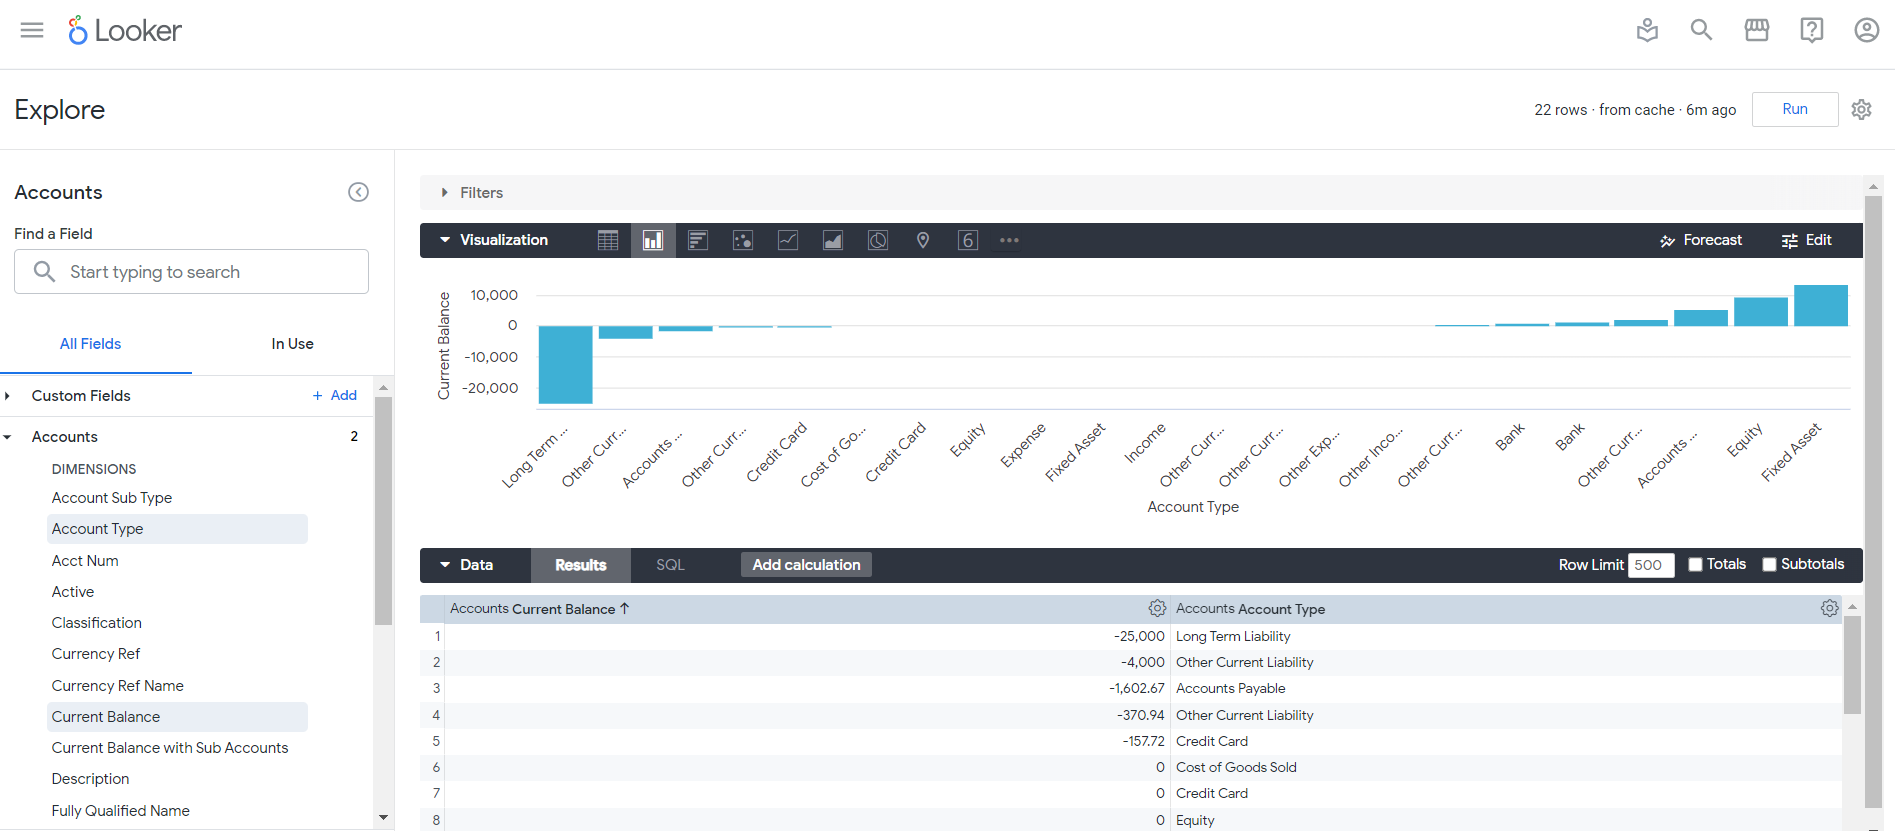
- Next, on the left menu, select fields from the table and click Run. You can now expand the Visualization accordion, and see a bar chart, by default.
![Entering name for new dashboard.]()
We have now created a visualization of Workday data in Looker using CData Connect Cloud!
Get CData Connect Cloud
To get live data access to 100+ SaaS, Big Data, and NoSQL sources directly from your cloud applications, try CData Connect Cloud today!

