Model Context Protocol (MCP) finally gives AI models a way to access the business data needed to make them really useful at work. CData MCP Servers have the depth and performance to make sure AI has access to all of the answers.
Try them now for free →How to create Visio diagrams from Workday Data
Automatically update Workday data with the changes you make to Visio master shapes.
Automate the process of entering data into Visio diagrams and keeping your diagrams up to date with the CData ODBC Driver for Workday. The driver surfaces Workday data as an ODBC data source that can be accessed by applications with built-in ODBC support like Microsoft Office. This article shows how to create a simple diagram to start brainstorming about Visio projects linked to Workday data.
About Workday Data Integration
CData provides the easiest way to access and integrate live data from Workday. Customers use CData connectivity to:
- Access the tables and datasets you create in Prism Analytics Data Catalog, working with the native Workday data hub without compromising the fidelity of your Workday system.
- Access Workday Reports-as-a-Service to surface data from departmental datasets not available from Prism and datasets larger than Prism allows.
- Access base data objects with WQL, REST, or SOAP, getting more granular, detailed access but with the potential need for Workday admins or IT to help craft queries.
Users frequently integrate Workday with analytics tools such as Tableau, Power BI, and Excel, and leverage our tools to replicate Workday data to databases or data warehouses. Access is secured at the user level, based on the authenticated user's identity and role.
For more information on configuring Workday to work with CData, refer to our Knowledge Base articles: Comprehensive Workday Connectivity through Workday WQL and Reports-as-a-Service & Workday + CData: Connection & Integration Best Practices.
Getting Started
Connect to Workday as an ODBC Data Source
If you have not already, first specify connection properties in an ODBC DSN (data source name). This is the last step of the driver installation. You can use the Microsoft ODBC Data Source Administrator to create and configure ODBC DSNs.
To connect to Workday, users need to find the Tenant and BaseURL and then select their API type.
Obtaining the BaseURL and Tenant
To obtain the BaseURL and Tenant properties, log into Workday and search for "View API Clients." On this screen, you'll find the Workday REST API Endpoint, a URL that includes both the BaseURL and Tenant.
The format of the REST API Endpoint is: https://domain.com/subdirectories/mycompany, where:
- https://domain.com/subdirectories/ is the BaseURL.
- mycompany (the portion of the url after the very last slash) is the Tenant.
Using ConnectionType to Select the API
The value you use for the ConnectionType property determines which Workday API you use. See our Community Article for more information on Workday connectivity options and best practices.
| API | ConnectionType Value |
|---|---|
| WQL | WQL |
| Reports as a Service | Reports |
| REST | REST |
| SOAP | SOAP |
Authentication
Your method of authentication depends on which API you are using.
- WQL, Reports as a Service, REST: Use OAuth authentication.
- SOAP: Use Basic or OAuth authentication.
See the Help documentation for more information on configuring OAuth with Workday.
Connect Workday Data to Diagrams
Follow the steps below to use the Data Selector Wizard to import data into your diagram.
- Open Visio and click File -> New. Open the Brainstorming template.
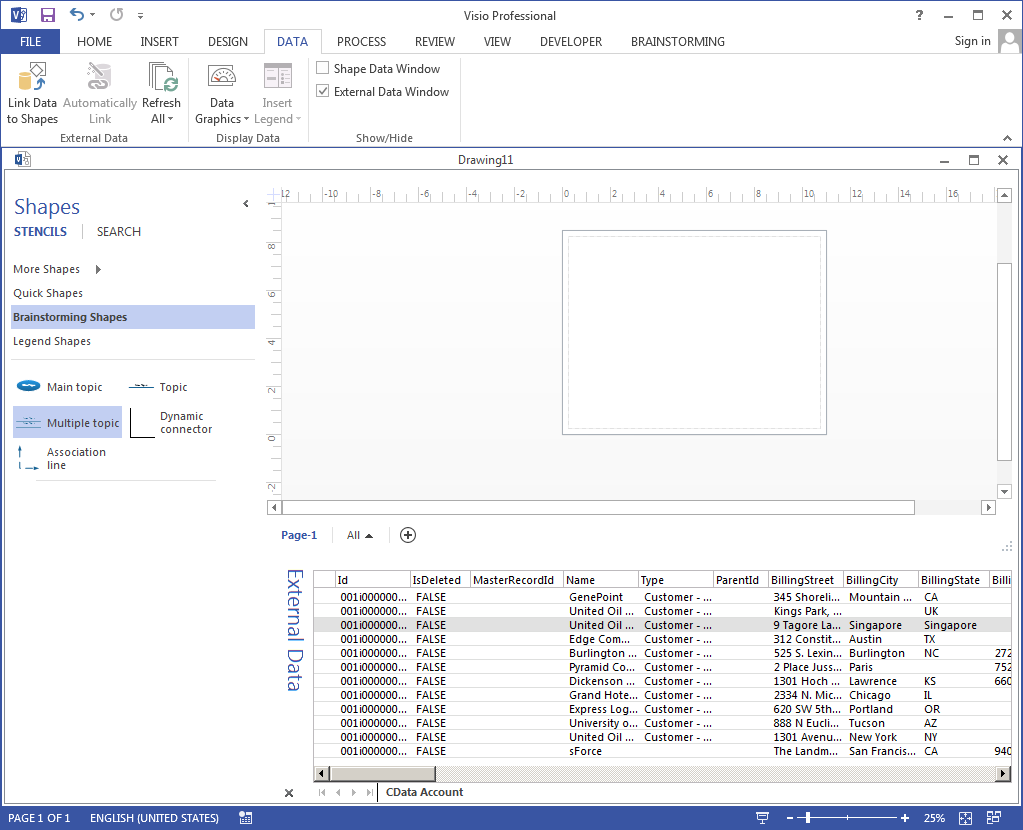
- On the Data tab, click Link Data to Shapes.
- Select the ODBC option and select ODBC DSN.
- Select the DSN for Workday, select the table you want to import, and finish the wizard. This article uses Workers as an example.

Link Workday Entities to Shapes
Follow the steps below to create a simple diagram that shows how to create shapes from your data, one of the ways to link Workday entities to shapes:
- Click Brainstorming Shapes and drag a main topic onto the drawing page. Enter Workers as the text of the main topic.
- Click Topic.
- Select a row in the External Data window and drag it onto the drawing page.
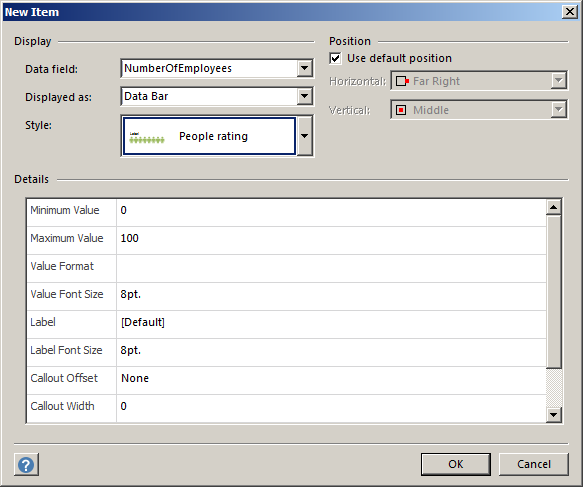
- Right-click the Topic shape and click Data -> Edit Data Graphic.
- Click New Item.
- In the Data Field menu, select a column. In the Displayed As menu, select how to display them.
![A data graphic for a column.]()
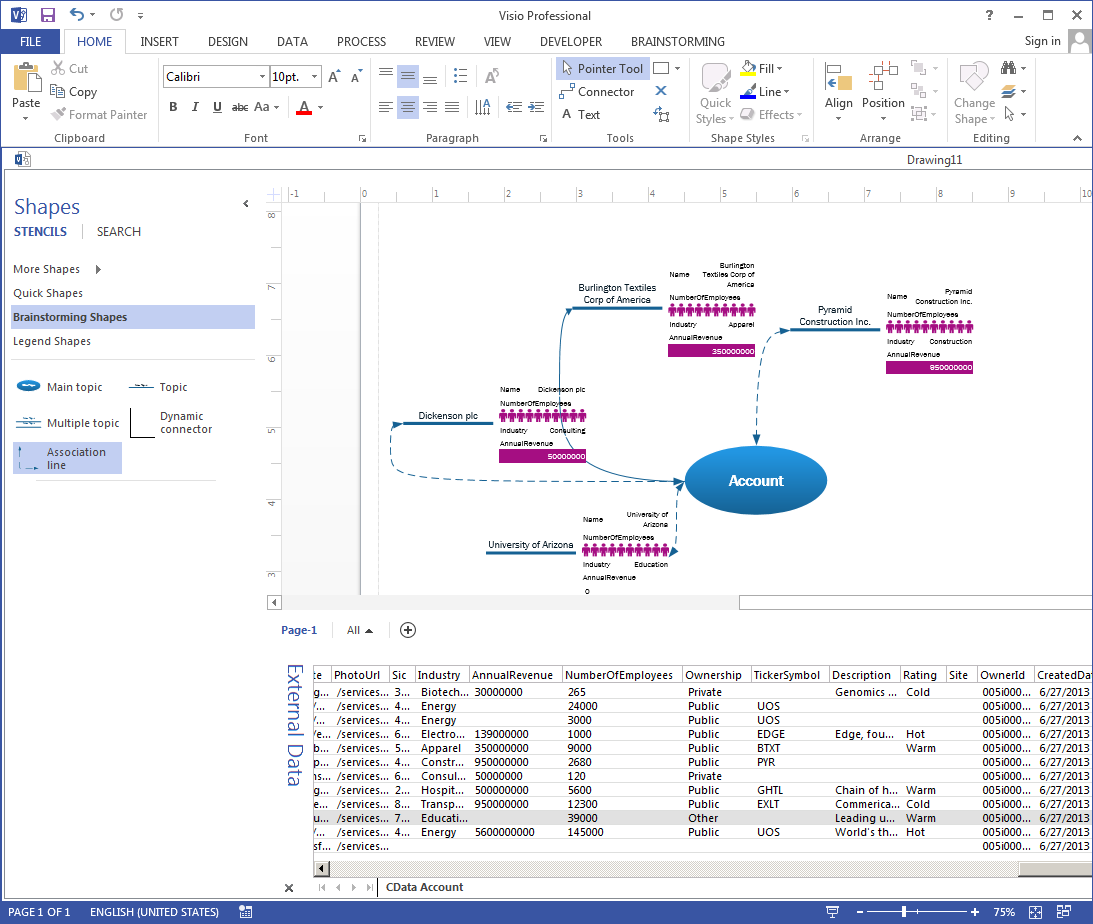
- Drag a few other Workday entities onto the drawing page and add association lines back to the main topic, Workers. New topics have the same configuration: Numeric columns displayed in data bars stand out in contrast to other Workers entities.
![Brainstorming with external data. (Salesforce is shown.)]()
You can refresh your diagram from the Data tab, synchronizing your shapes with the external Workday data.


