Model Context Protocol (MCP) finally gives AI models a way to access the business data needed to make them really useful at work. CData MCP Servers have the depth and performance to make sure AI has access to all of the answers.
Try them now for free →HCL Domino REST API Part 3: Use the REST API from Postman
In this article, the third one in the series, we continue our exploration of the HCL Domino REST API by demonstrating its practical use.
Previously, we set up our Domino environment (Part 1) and configured schema and scope settings (Part 2) to define access parameters for the Notes application, ensuring structured data retrieval and secure API interactions. Now, we will execute API requests and interact with the Domino REST API in real-world scenarios.
When testing APIs, you can use the API Reference screen or curl. However, for this demonstration, we used Postman.
What is Postman?
Postman is a powerful tool designed for API development, testing, and collaboration. It offers various features that streamline API testing and speed up the development process.
For this demonstration, we will use the desktop version of Postman. Download it in advance from the following download link:
Importing HCL Domino REST API Specifications into Postman
The HCL Domino REST API is developed in compliance with OpenAPI, and its documentation is publicly available. You can access the details from the following screen.
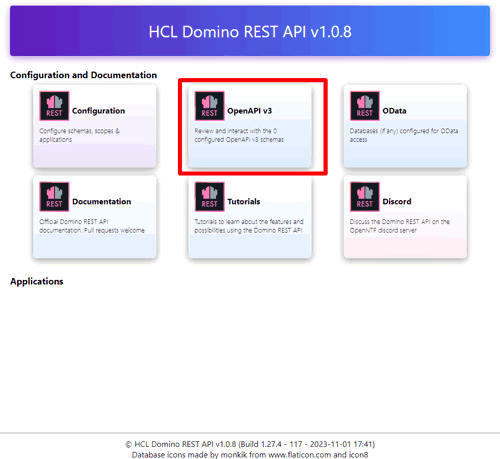
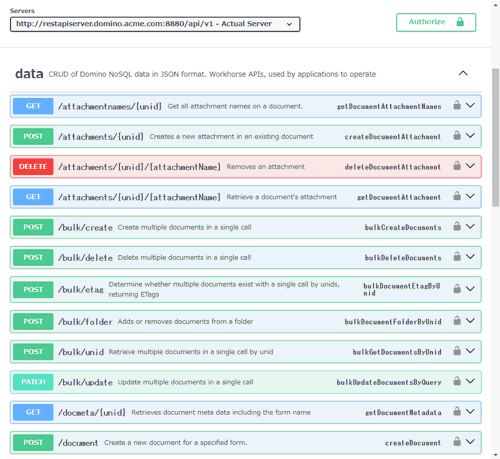
Here's how you can quickly set up API requests in Postman using the OpenAPI Spec JSON:
- Download the OpenAPI Spec JSON file, which allows easy API request verification in Postman.
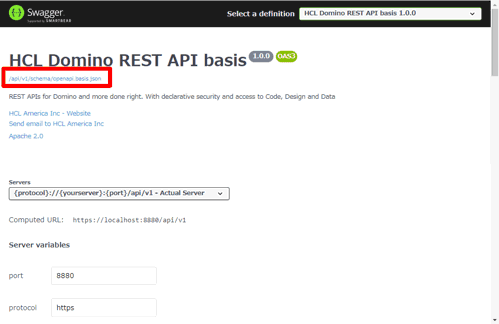
- Open Postman and click Import.
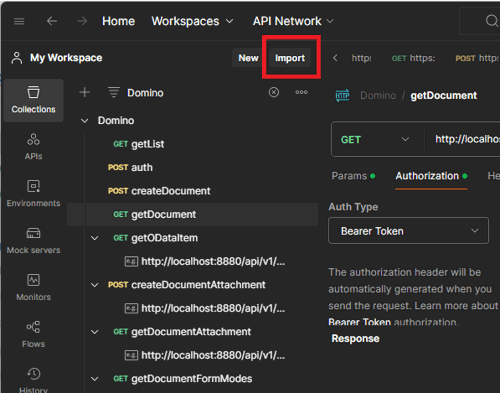
- Select and import the downloaded file.
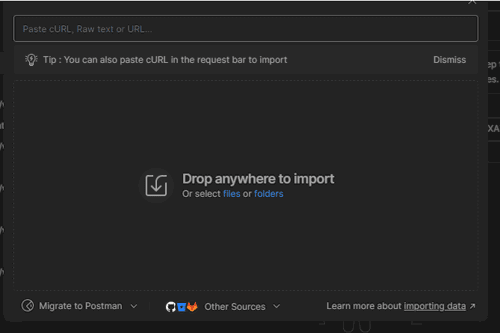
- Choose to import it as a Postman Collection.
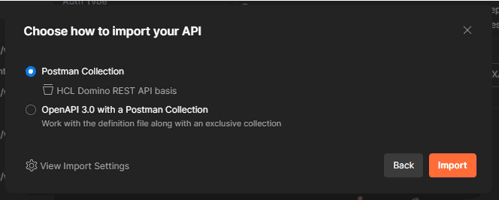
- This will automatically configure request samples in Postman based on the API specifications, allowing you to start testing right away.
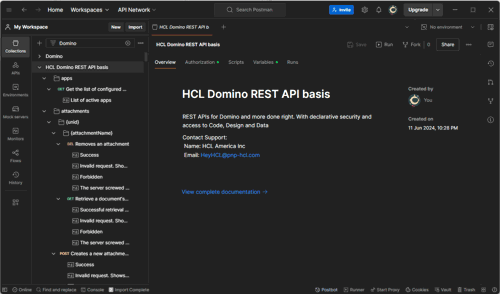
Setting Variables
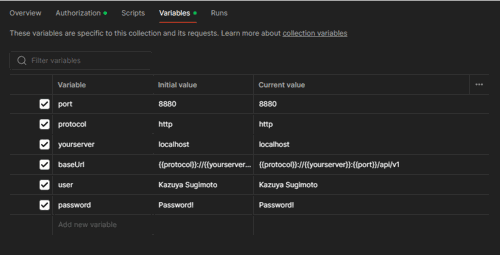
Once the Postman Collection is configured, set up the connection and login details in the Variables section. This will make it easier to reuse them in each API request later.
First, update the protocol to HTTP, as the environment is set up on localhost.
Next, add the user and password as variables for authentication.
And now, let's test the API!
Get an Access Token
Authentication and authorization are essential for accessing the HCL Domino REST API. The API supports the OAuth authentication and authorization process and connects using a JavaScript Web Token (JWT).
To obtain a JWT, you can use the authorization_code provided on the openid-configuration page:
Default localhost address: http://localhost:8880/.well-known/openid-configuration
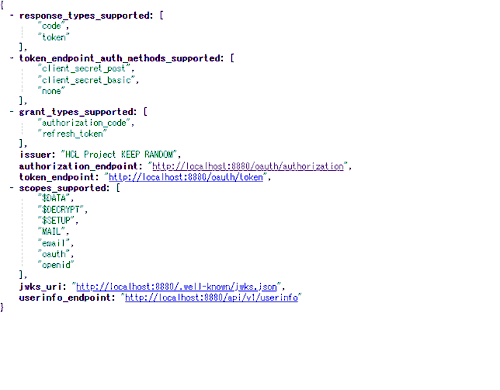
We will use this method for this demonstration as it is easier to test.
Steps to Obtain a JWT in Postman
- In Postman, navigate to auth → POST Get JWT Session in the Postman Collection.
- Modify the request body values as follows:
POST /api/v1/auth HTTP/1.1
Host: localhost:8880
Content-Type: application/json
Accept: application/json
Content-Length: 62

{
  "password": "Password!",
  "username": "Kazuya Sugimoto"
}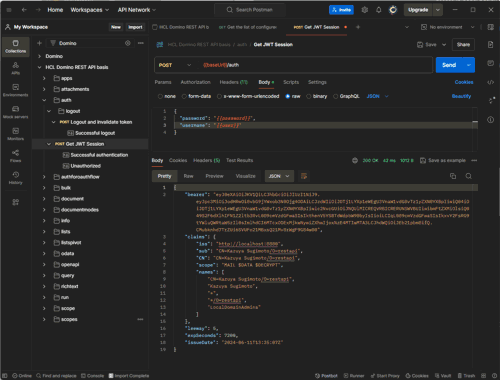
- Upon execution, the API will return a response containing:
- The Bearer Token
- Expiration date
- Username
- Scope information
Example Response
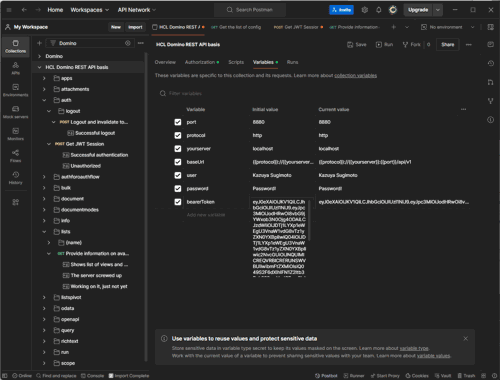
{ "bearer": "xxxxxxxxxxxxxxxxx", "claims": { "iss": "HCL Project KEEP RANDOM", "sub": "CN=Kazuya Sugimoto/O=restapi", "iat": 1718177280, "exp": 1718184480, "aud": ["Domino"], "CN": "CN=Kazuya Sugimoto/O=restapi", "scope": "MAIL $DATA $DECRYPT $SETUP Domino.user.all" }, "leeway": 5, "expSeconds": 7200, "issueDate": "2024-06-12T07:28:00Z" } - Add the obtained Bearer Token to Variables in Postman. Naming it "bearerToken" will allow it to be automatically used in subsequent API requests.
Retrieving Schema Information Included in the Scope
First, let's check the details of the pre-configured Scope and Schema.
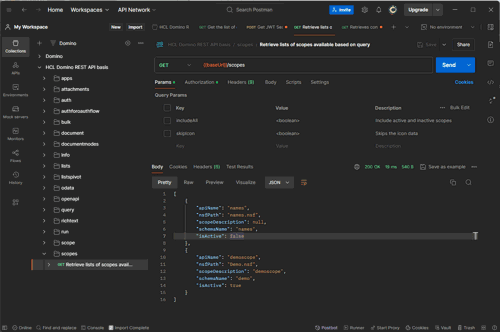
- Use scopes → GET Retrieve lists of scopes available based on query to fetch the list of available scopes.
- Include the previously obtained bearerToken in the "Authorization" header to authenticate the request.
Example Request
GET /api/v1/scopes HTTP/1.1
Host: localhost:8880
Accept: application/json
Authorization: Bearer eyJ0eXAiO
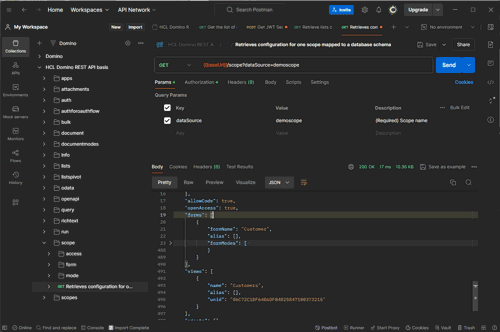
- Once you have the Scope name, you can retrieve Schema information using the dataSource query parameter.
- Schema information defines Forms and Views, which help enhance dynamic features when developing applications integrated with the REST API.
Example Request
GET /api/v1/scope?dataSource=demoscope HTTP/1.1
Host: localhost:8880
Accept: application/json
Authorization: Bearer eyJ0eXAiOiJK
Retrieving a List of Documents Using Views
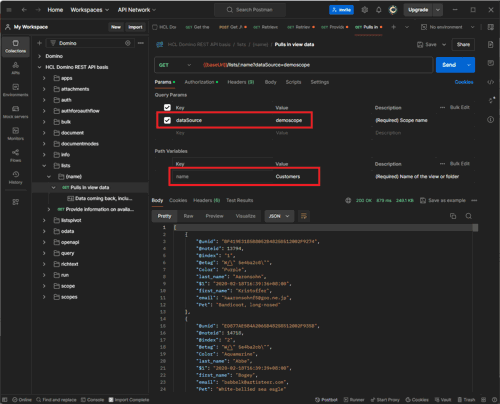
Let's retrieve actual documents using views. To do this, use lists → {name} → Pulls in view data to fetch documents via views.
The key requirement is to include both the View name and the Scope name as the dataSource query parameter in the URL.
Most endpoints for CRUD operations on documents require this dataSource query parameter, so ensure it is correctly specified.
Example Request
GET /api/v1/lists/Customers?dataSource=demoscope HTTP/1.1
Host: localhost:8880
Accept: application/json
Authorization: Bearer eyJ0eXAiOiJKV1QiLCJhbGci
Example Response
[ {
"@unid": "BF419E31B5B8052B48258512002F9274",
 "@noteid": 13794,
 "@index": "1",
 "@etag": "W/\" 5e4ba2c8\"",
 "$1": "2020-02-18T16:39:36+08:00",
 "last_name": "Aaronsohn",
 "first_name": "Kristoffer",
 "email": "kaaronsohnf5@goo.ne.jp",
 "Color": "Purple",
 "Pet": "Bandicoot, long-nosed"
},
 {
 "@unid": "ED877AE5B4A2065B48258512002F935B",
 "@noteid": 14718,
 "@index": "2",
 "@etag": "W/\" 5e4ba2cb\"",
 "$1": "2020-02-18T16:39:39+08:00",
 "last_name": "Abbe",
 "first_name": "Bogey",
 "email": "babbelk@artisteer.com",
 "Color": "Aquamarine",
 "Pet": "White-bellied sea eagle"
} ]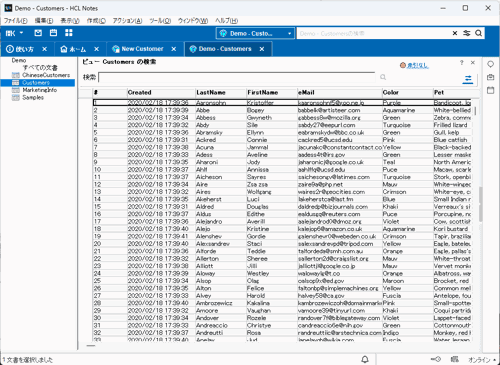
The retrieved data is displayed in the structured view above, showing details such as unique IDs, names, email addresses, and additional attributes.
Creating a Document via API
Next, let's explore how to create, update, and delete documents using the Form feature.
To create a document, use the document → POST Create a new document for a specified form operation. Ensure that you include the dataSource as a query parameter in the POST request.
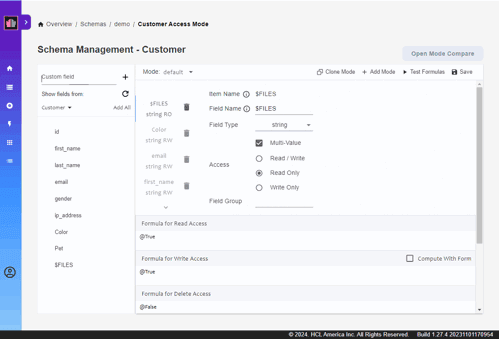
When constructing the JSON request body, refer to the items specified in the Schema Management Form settings screen. Additionally, make sure to specify the Form name in the JSON Form property.
Example POST Request
POST /api/v1/document?dataSource=demoscope HTTP/1.1
Host: localhost:8880 Content-Type: application/json
Accept: application/json
Authorization: Bearer eyJ0eXAiOiJKV1QiLCJ

{
"Form": "Customer",
 "last_name": "Hello!",
 "first_name": "Kazuya"
}
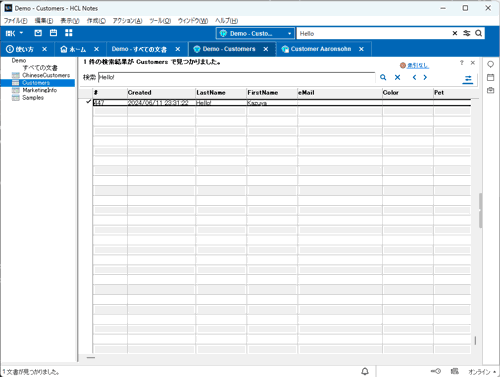
This request creates the following data:
Updating a Document via API
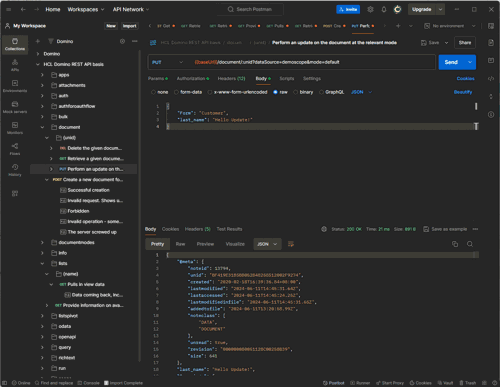
To update a document, use the following path: document → (UNID) → PUT Perform an update on the document in the relevant mode.
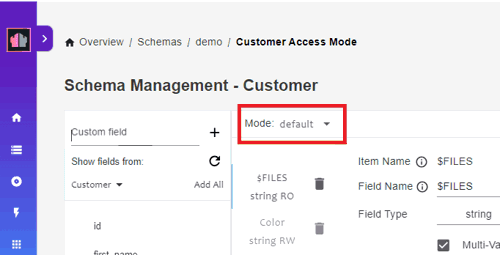
The process is similar to creating a document, but with one key difference—you must include the UNID of the document you want to update in the URI and specify the mode as a query parameter.
Mode refers to the elements defined in the Schema Management Form settings. Forms can adjust display items and Read/Write settings based on the selected mode.
Example Request
PUT /api/v1/document/BF419E31B5B8052B48258512002F9274?dataSource=demoscope&mode=default HTTP/1.1
Host: localhost:8880 Content-Type: application/json
Accept: application/json
Authorization: Bearer eyJ0eXAiOiJKV1QiL

{
"Form": "Customer",
"last_name": "Hello Update!"
}
This request updates the last_name field in the Customer form using the specified UNID and mode.
Deleting a Document via API
Deleting a document is similar to the update method but uses the DELETE request. To delete a specific document, use the following format:
Endpoint
DELETE /api/v1/document/{unid}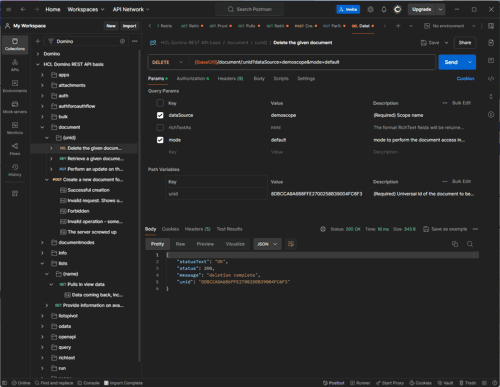
Example Request
DELETE /api/v1/document/8DBCCA8A6B6FFE2700258B39004FC6F3?dataSource=demoscope&mode=default HTTP/1.1
Host: localhost:8880
Accept: application/json
Authorization: Bearer eyJ0eXAiOiJKV1Q
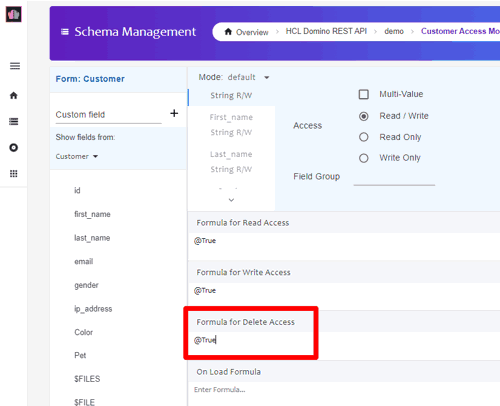
Important: Before deleting a document, ensure that the Formula for Delete Access in the target Form/Mode is set to "@True".
Querying with DQL
As a special case, let's explore querying using Domino Query Language (DQL).
DQL allows you to efficiently retrieve Domino document data using a query language similar to SQL.
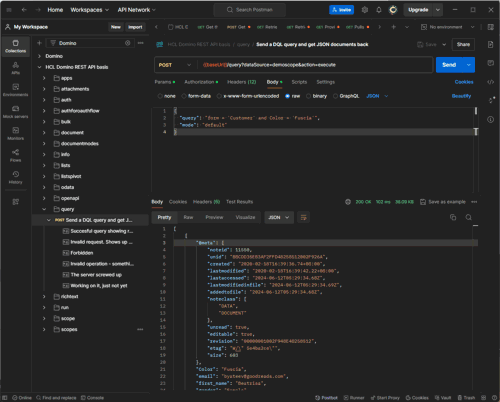
To send a DQL query and retrieve JSON documents, use the query endpoint:
POST /api/v1/query?dataSource=demoscope&action=execute HTTP/1.1
Host: localhost:8880 Content-Type: application/json
Accept: application/json
Authorization: Bearer eyJ0eXAiOiJKV1QiL

{
"query": "form = 'Customer' and Color = 'Fuscia'",
"mode": "default"
}
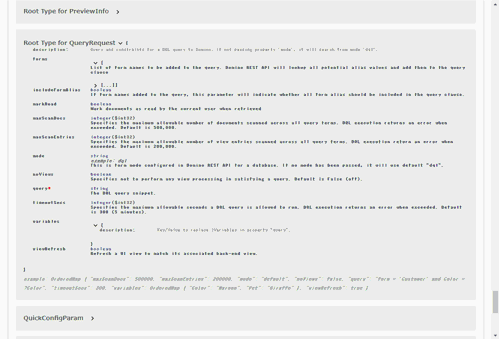
At first glance, it may not be clear which parameters can be specified in the request body. However, you can refer to the Root Type for QueryRequest section in the API documentation for detailed specifications.
Conclusion
With this, we have completed the journey from setting up the environment to using the REST API!
Did you see how simple and efficient it is?
However, when integrating the REST API with external services, you may need to build the connection from scratch. To simplify this process, you can use the CData HCL Domino Drivers which allows seamless integration with other services.
In the next and final part of this series, we will explore how to use the CData HCL Domino Driver with the HCL Domino REST API: HCL Domino REST API Part 4: Connecting from Tableau using CData Tableau Connector

