Model Context Protocol (MCP) finally gives AI models a way to access the business data needed to make them really useful at work. CData MCP Servers have the depth and performance to make sure AI has access to all of the answers.
Try them now for free →Rapidly Develop Cvent-Driven Apps with Active Query Builder
Leverage the Active Query Builder SQL interface builder and the ease of .NET data access to create data-driven WinForms and ASP.NET apps.
Write standard .NET to expose Cvent data through an SQL interface: Active Query Builder helps developers write SQL interfaces; the CData ODBC Driver for Cvent enables standards-based access to Cvent. This integration uses the Microsoft ADO.NET Provider for ODBC as a bridge between the ODBC Driver and the Active Query Builder objects to build a visual SQL composer.
Connect to Cvent as an ODBC Data Source
If you have not already, first specify connection properties in an ODBC DSN (data source name). This is the last step of the driver installation. You can use the Microsoft ODBC Data Source Administrator to create and configure ODBC DSNs.
Before you can authenticate to Cvent, you must create a workspace and an OAuth application.
Creating a Workspace
To create a workspace:
- Sign into Cvent and navigate to App Switcher (the blue button in the upper right corner of the page) >> Admin.
- In the Admin menu, navigate to Integrations >> REST API.
- A new tab launches for Developer Management. Click on Manage API Access in the new tab.
- Create a Workspace and name it. Select the scopes you would like your developers to have access to. Scopes control what data domains the developer can access.
- Choose All to allow developers to choose any scope, and any future scopes added to the REST API.
- Choose Custom to limit the scopes developers can choose for their OAuth apps to selected scopes. To access all tables exposed by the driver, you need to set the following scopes:
event/attendees:read event/attendees:write event/contacts:read event/contacts:write event/custom-fields:read event/custom-fields:write event/events:read event/events:write event/sessions:delete event/sessions:read event/sessions:write event/speakers:delete event/speakers:read event/speakers:write budget/budget-items:read budget/budget-items:write exhibitor/exhibitors:read exhibitor/exhibitors:write survey/surveys:read survey/surveys:write
Creating an OAuth Application
After you have set up a Workspace and invited them, developers can sign up and create a custom OAuth app. See the Creating a Custom OAuth Application section in the Help documentation for more information.
Connecting to Cvent
After creating an OAuth application, set the following connection properties to connect to Cvent:
- InitiateOAuth: GETANDREFRESH. Used to automatically get and refresh the OAuthAccessToken.
- OAuthClientId: The Client ID associated with the OAuth application. You can find this on the Applications page in the Cvent Developer Portal.
- OAuthClientSecret: The Client secret associated with the OAuth application. You can find this on the Applications page in the Cvent Developer Portal.
Use SQL to Interact with Cvent
Follow the steps below to create a WinForms visual query builder.
- Open Active Query Builder for .NET WinForms.
![Opening Active Query Builder.]()
- In the new Windows Forms project go to the "File" menu and click "Connect..."
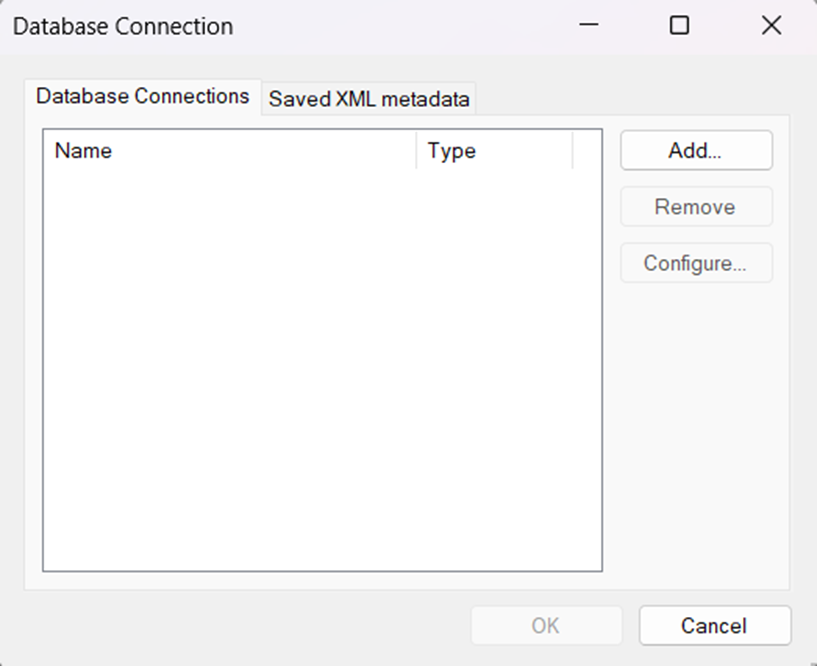
- Under Database Connections, click "Add..."
![Adding a new Connection.]()
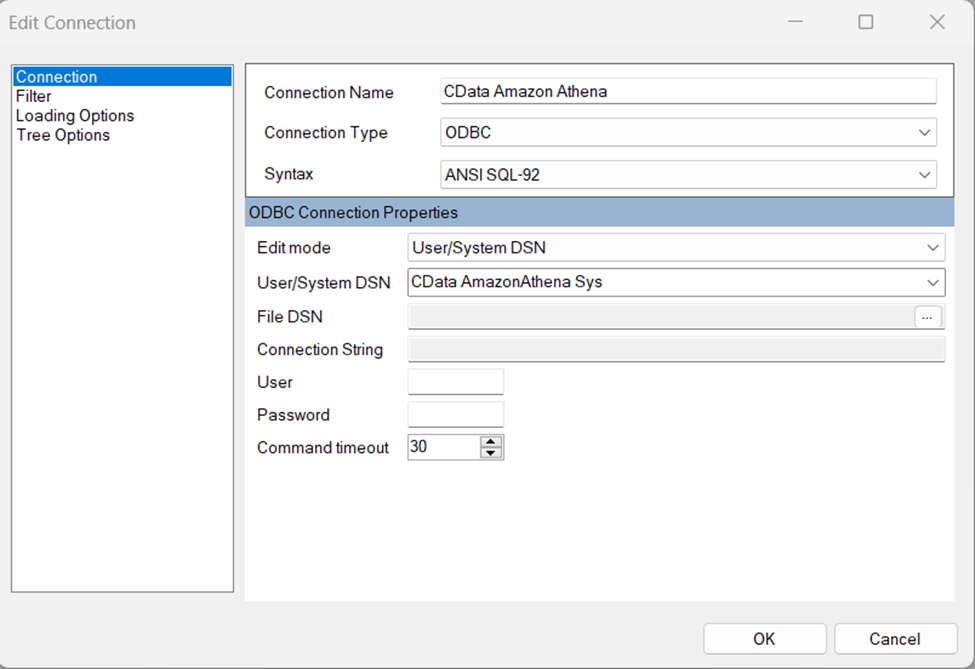
- Set your desired Connection Name (e.g. CData Cvent), set Connection Type to "ODBC" and locate your previously configured DSN in the "User/System" DSN dropdown.
![Selecting a previously configured DSN (Amazon Athena is shown).]()
- Click "OK" to save the new connection.
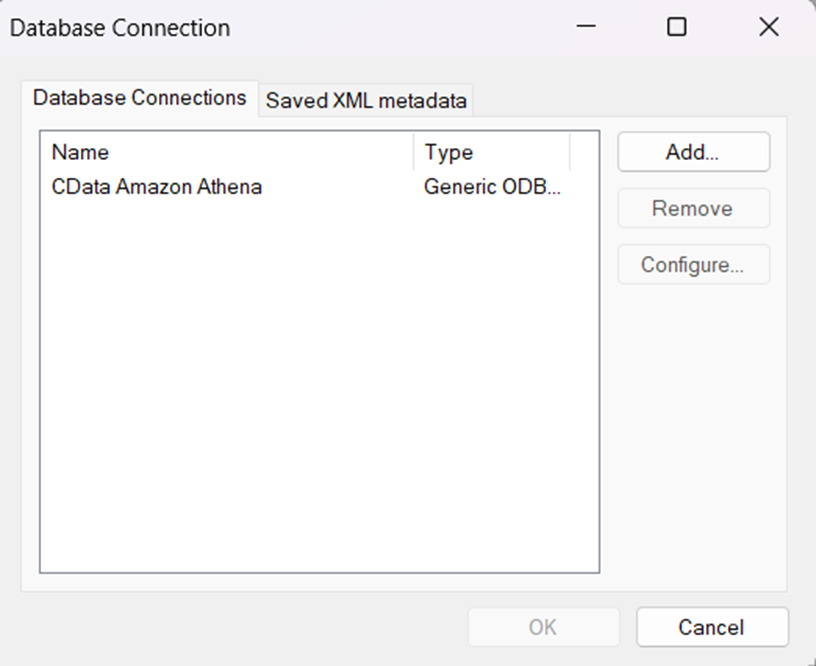
- Back in the Database Connection wizard, select the newly created connection and click "OK."
![A newly added Connection (Amazon Athena is shown).]()
- Click "File" > "New Query" to create a QueryBuilder
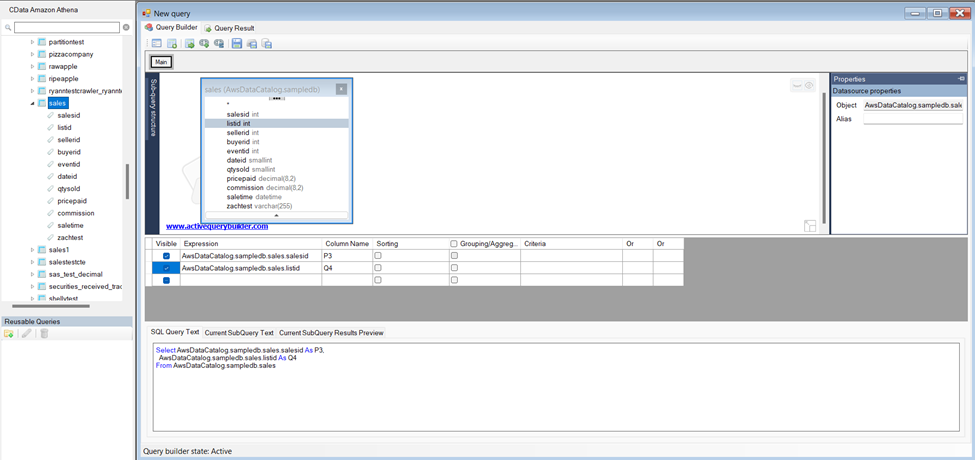
You can now build queries visually: Double-click a table in the Columns Pane Area and an entity/relationship diagram is displayed in the Query Building Area. Columns that you select in the diagram are added to the query.
