Model Context Protocol (MCP) finally gives AI models a way to access the business data needed to make them really useful at work. CData MCP Servers have the depth and performance to make sure AI has access to all of the answers.
Try them now for free →How to Connect DBeaver to MongoDB via a JDBC Driver
Manage MongoDB data with visual tools in DBeaver like the query browser.
The CData JDBC Driver for MongoDB implements JDBC standards that enable third-party tools to interoperate, from wizards in IDEs to business intelligence tools. This article shows how to connect to MongoDB data with wizards in DBeaver and browse data in the DBeaver GUI.
About MongoDB Data Integration
Accessing and integrating live data from MongoDB has never been easier with CData. Customers rely on CData connectivity to:
- Access data from MongoDB 2.6 and above, ensuring broad usability across various MongoDB versions.
- Easily manage unstructured data thanks to flexible NoSQL (learn more here: Leading-Edge Drivers for NoSQL Integration).
- Leverage feature advantages over other NoSQL drivers and realize functional benefits when working with MongoDB data (learn more here: A Feature Comparison of Drivers for NoSQL).
MongoDB's flexibility means that it can be used as a transactional, operational, or analytical database. That means CData customers use our solutions to integrate their business data with MongoDB or integrate their MongoDB data with their data warehouse (or both). Customers also leverage our live connectivity options to analyze and report on MongoDB directly from their preferred tools, like Power BI and Tableau.
For more details on MongoDB use case and how CData enhances your MongoDB experience, check out our blog post: The Top 10 Real-World MongoDB Use Cases You Should Know in 2024.
Getting Started
Create a JDBC Data Source for MongoDB Data
Follow the steps below to load the driver JAR in DBeaver.
- Open the DBeaver application and, in the "Database" menu, select the "Driver Manager" option. Click "New" to open the "Create new driver" form.
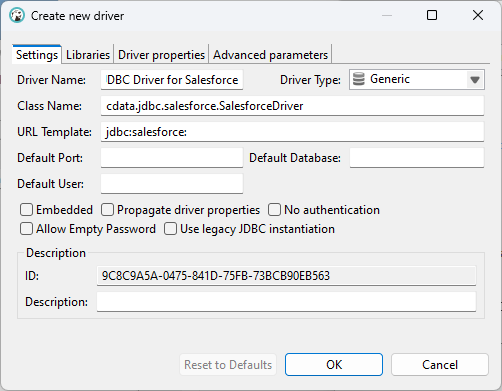
- In the Settings tab:
- Set Driver Name to a user-friendly name for the driver (e.g. CData JDBC Driver for MongoDB).
- Set Class Name to the class name for the JDBC driver: cdata.jdbc.mongodb.MongoDBDriver.
- Set URL Template to jdbc:mongodb:.
![Configure the new driver settings (Salesforce is shown).]()
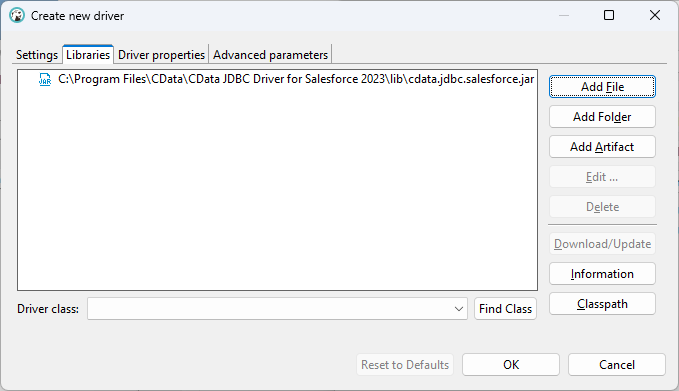
- In the Libraries tab, click "Add File," navigate to the "lib" folder in the installation directory (C:\Program Files\CData[product_name] XXXX\) and select the JAR file (cdata.jdbc.MongoDB.jar).
![Loading the JDBC JAR file (Salesforce is shown).]()
Create a Connection to MongoDB Data
Follow the steps below to add credentials and other required connection properties.
- In the "Database" menu, click "New Database Connection."
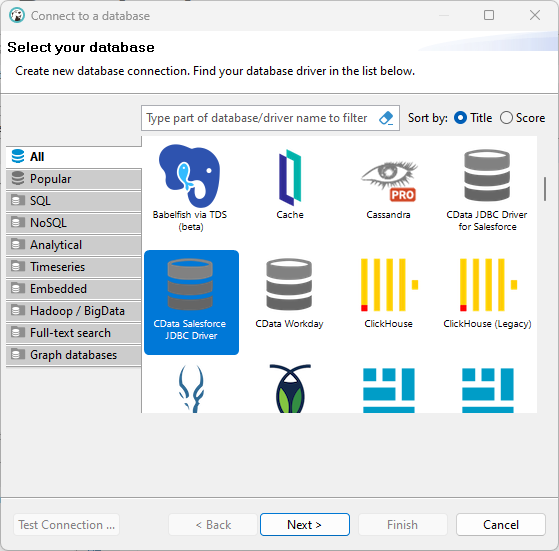
- In the "Connect to a database" wizard that results, select the driver you just created (e.g. CData JDBC Driver for MongoDB) and click "Next >."
![Selecting the driver (Salesforce is shown).]()
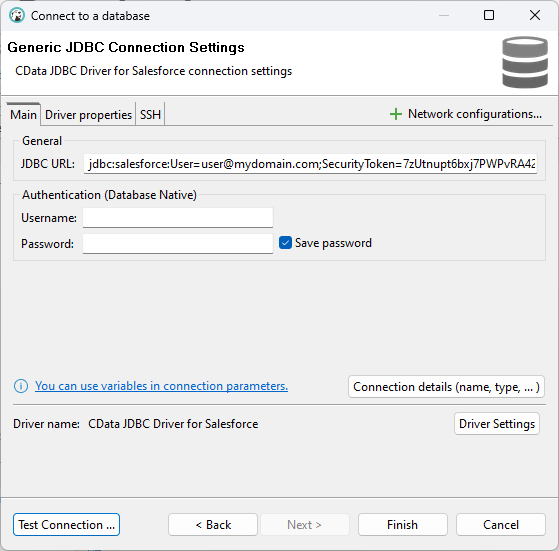
- On the Main tab of the configuration wizard, set the JDBC URL, using the required connection properties:
Set the Server, Database, User, and Password connection properties to connect to MongoDB. To access MongoDB collections as tables you can use automatic schema discovery or write your own schema definitions. Schemas are defined in .rsd files, which have a simple format. You can also execute free-form queries that are not tied to the schema.
Built-in Connection String Designer
For assistance in constructing the JDBC URL, use the connection string designer built into the MongoDB JDBC Driver. Either double-click the JAR file or execute the jar file from the command-line.
java -jar cdata.jdbc.mongodb.jarFill in the connection properties and copy the connection string to the clipboard.
![Using the built-in connection string designer to generate a JDBC URL (Salesforce is shown.)]()
Below is a typical connection string:
jdbc:mongodb:Server=MyServer;Port=27017;Database=test;User=test;Password=Password;![Configuring the JDBC URL (Salesforce is shown).]()
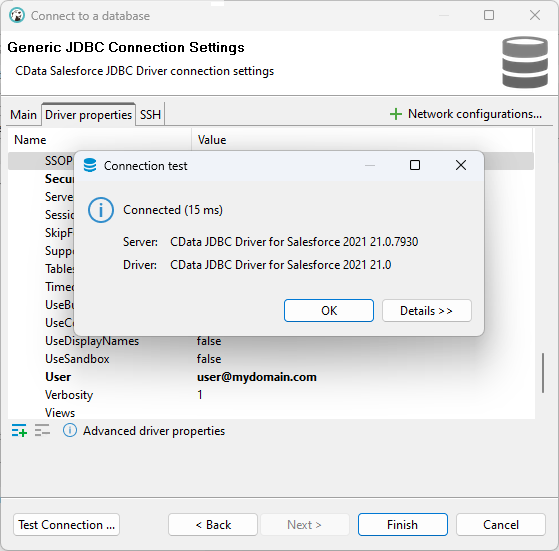
- Click "Test Connection ..." to ensure you have configured the connection properly.
![A successfully configured connection (Salesforce is shown).]()
- Click "Finish."
Query MongoDB Data
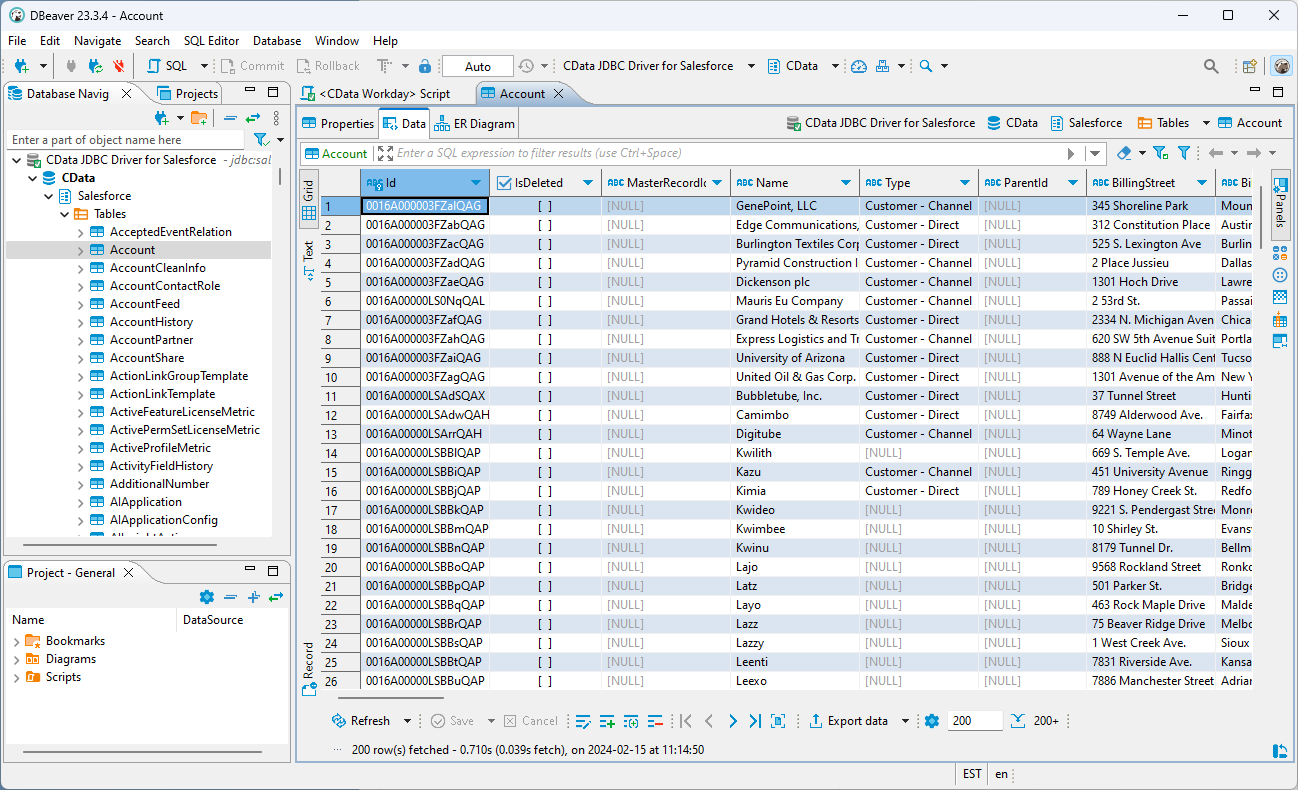
You can now query information from the tables exposed by the connection: Right-click a Table and then click View Table. The data is available on the Data tab.
