Model Context Protocol (MCP) finally gives AI models a way to access the business data needed to make them really useful at work. CData MCP Servers have the depth and performance to make sure AI has access to all of the answers.
Try them now for free →How to update NetSuite from Excel
This article explains how to transfer data from Excel to NetSuite using the Excel Add-In for NetSuite.
The CData Excel Add-In for NetSuite enables you to edit and save NetSuite data directly from Excel. This article explains how to transfer data from Excel to NetSuite. This technique is useful if you want to work on NetSuite data in Excel and update changes, or if you have a whole spreadsheet you want to import into NetSuite. In this example, you will use the SalesOrder table; however, the same process will work for any table that can be retrieved by the CData Excel Add-In.
About NetSuite Data Integration
CData provides the easiest way to access and integrate live data from Oracle NetSuite. Customers use CData connectivity to:
- Access all editions of NetSuite, including Standard, CRM, and OneWorld.
- Connect with all versions of the SuiteTalk API (SOAP-based) and SuiteQL, which functions like SQL, enabling easier data querying and manipulation.
- Access predefined and custom reports through support for Saved Searches.
- Securely authenticate with Token-based and OAuth 2.0, ensuring compatibility and security for all use cases.
- Use SQL stored procedures to perform functional actions like uploading or downloading files, attaching or detaching records or relationships, retrieving roles, getting extra table or column info, getting job results, and more.
Customers use CData solutions to access live NetSuite data from their preferred analytics tools, Power BI and Excel. They also use CData's solutions to integrate their NetSuite data into comprehensive databases and data warehouse using CData Sync directly or leveraging CData's compatibility with other applications like Azure Data Factory. CData also helps Oracle NetSuite customers easily write apps that can pull data from and push data to NetSuite, allowing organizations to integrate data from other sources with NetSuite.
For more information about our Oracle NetSuite solutions, read our blog: Drivers in Focus Part 2: Replicating and Consolidating ... NetSuite Accounting Data.
Getting Started
Establish a Connection
If you have not already done so, create a new NetSuite connection by clicking From NetSuite on the ribbon.
The User and Password properties, under the Authentication section, must be set to valid NetSuite user credentials. In addition, the AccountId must be set to the ID of a company account that can be used by the specified User. The RoleId can be optionally specified to log in the user with limited permissions.
See the "Getting Started" chapter of the help documentation for more information on connecting to NetSuite.
Retrieve Data from NetSuite
To insert data into NetSuite, you will first need to retrieve data from the NetSuite table you want to add to. This links the Excel spreadsheet to the NetSuite table selected: After you retrieve data, any changes you make to the data are highlighted in red.
- Click the From NetSuite button on the CData ribbon. The Data Selection wizard is displayed.
- In the Table or View menu, select the SalesOrder table.
- In the Maximum Rows menu, select the number of rows you want to retrieve. If you want to insert rows, you need to retrieve only one row. The Query box will then display the SQL query that corresponds to your request.
- In the Sheet Name box, enter the name for the sheet that will be populated. By default the add-in will create a new sheet with the name of the table.
Insert Rows to NetSuite
After retrieving data, you can add data from an existing spreadsheet in Excel.
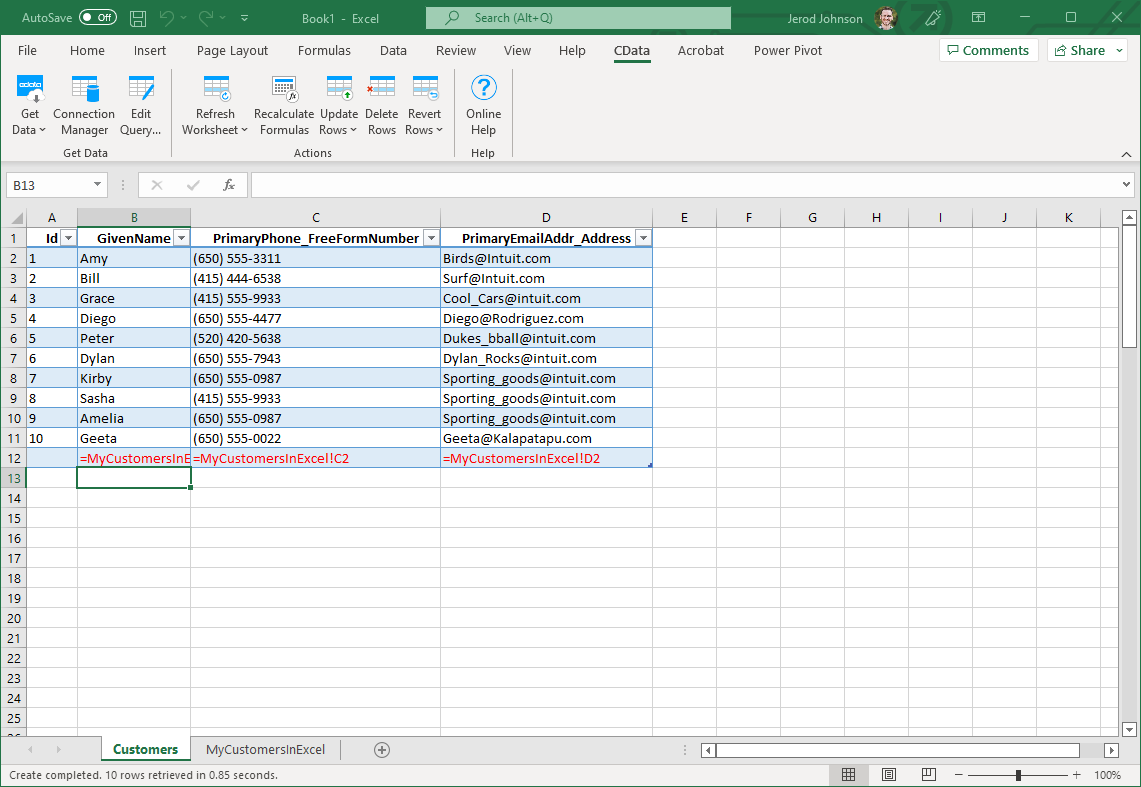
- In a cell after the last row, enter a formula referencing the corresponding cell from the other spreadsheet; for example, =MySalesOrderSheetInExcel!A1.
![A local copy of a table. One row will be inserted. (QuickBooks is shown.)]()
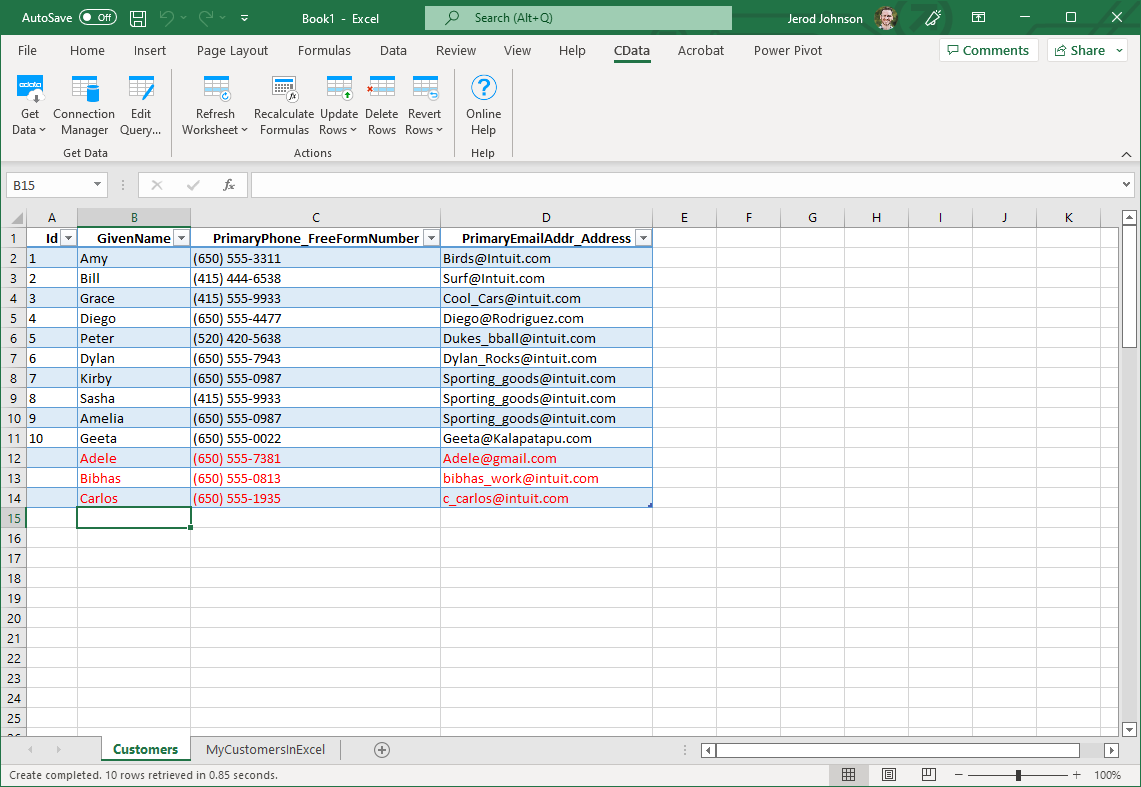
- After using a formula to reference the cells you want to add to NetSuite, select the cells that you are inserting data into and drag the formula down as far as needed. The referenced values you want to add will be displayed on
the SalesOrder sheet.
![The range of changes to update. (QuickBooks is shown.)]()
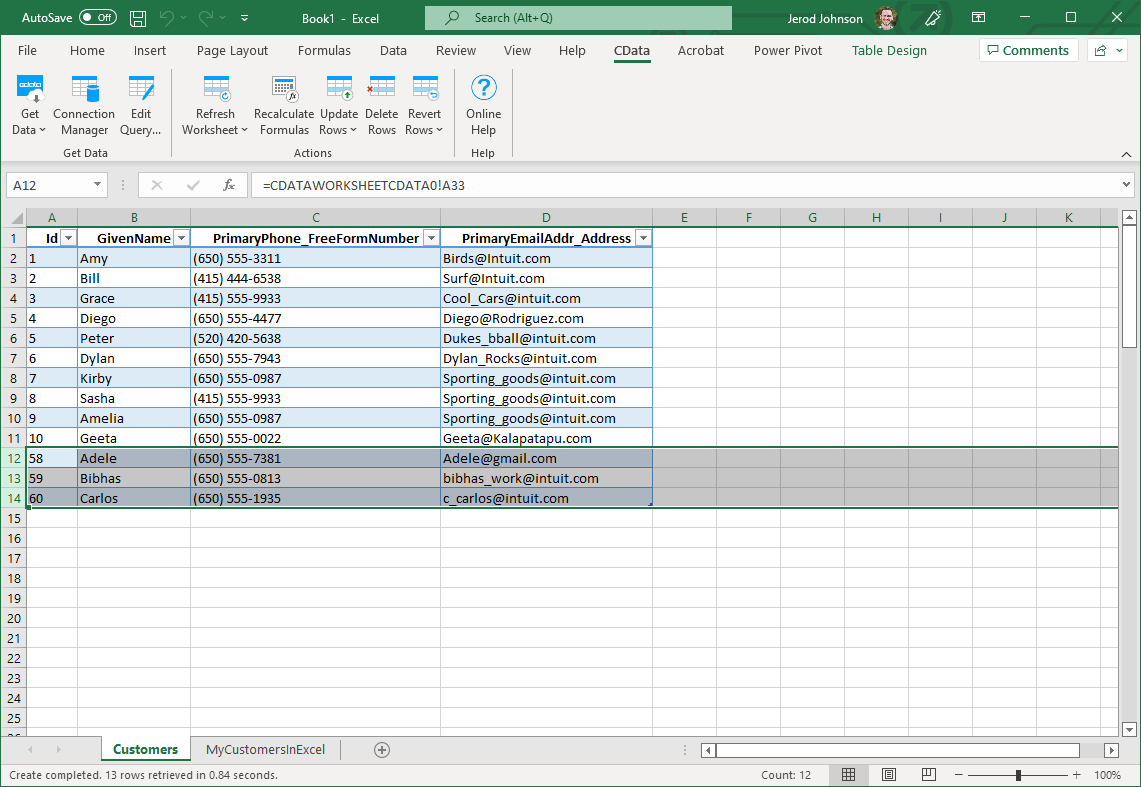
- Highlight the rows you want to insert and click the Update Rows button.
As each row is inserted, the Id value will appear in the Id column and the row's text will change to black, indicating that the record has been inserted.


