Model Context Protocol (MCP) finally gives AI models a way to access the business data needed to make them really useful at work. CData MCP Servers have the depth and performance to make sure AI has access to all of the answers.
Try them now for free →Connect to QuickBooks Data from a Connection Pool in JBoss
Integrate QuickBooks data into Java servlets: Use the Management Console in JBoss to install the QuickBooks JDBC Driver.
CData JDBC drivers can be configured in JBoss by following the standard procedure for connection pooling. This article details how to access QuickBooks data from a connection pool in JBoss applications. This article details how to use the JBoss Management Interface to configure the CData JDBC Driver for QuickBooks. You will then access QuickBooks data from a connection pool.
About QuickBooks Data Integration
CData simplifies access and integration of live QuickBooks data. Our customers leverage CData connectivity to:
- Access both local and remote company files.
- Connect across editions and regions: QuickBooks Premier, Professional, Enterprise, and Simple Start edition 2002+, as well as Canada, New Zealand, Australia, and UK editions from 2003+.
- Use SQL stored procedures to perform actions like voiding or clearing transactions, merging lists, searching entities, and more.
Customers regularly integrate their QuickBooks data with preferred tools, like Power BI, Tableau, or Excel, and integrate QuickBooks data into their database or data warehouse.
Getting Started
Create a JDBC Data Source for QuickBooks from the Management Console
Follow the steps below to add the driver JAR and define required connection properties.
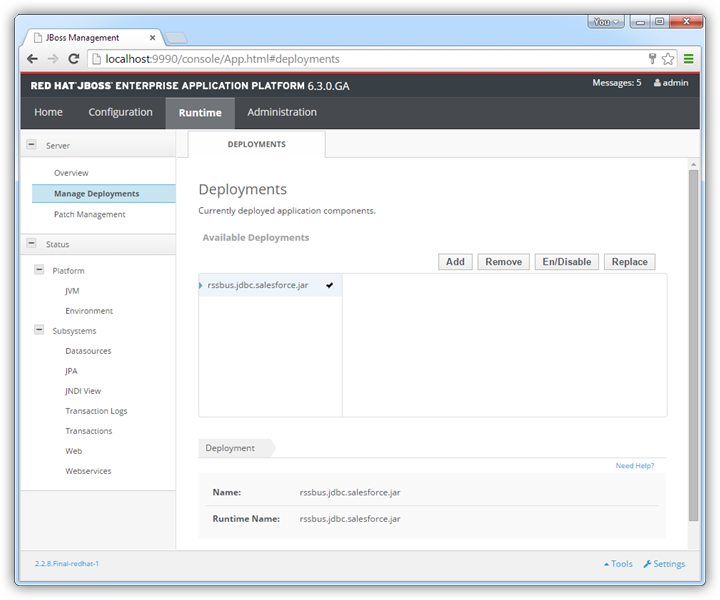
- In the Runtime menu, select the Domain or Server menu, depending on whether you are deploying to a managed domain or to a stand-alone server, and click "Manage deployments" to open the Deployments page.
- Click Add. In the resulting wizard, add the JAR file and license for the driver, located in the lib subfolder of the installation directory. Finish the wizard with the defaults, select the driver, and click Enable.
![The deployed JAR. (Salesforce is shown.)]()
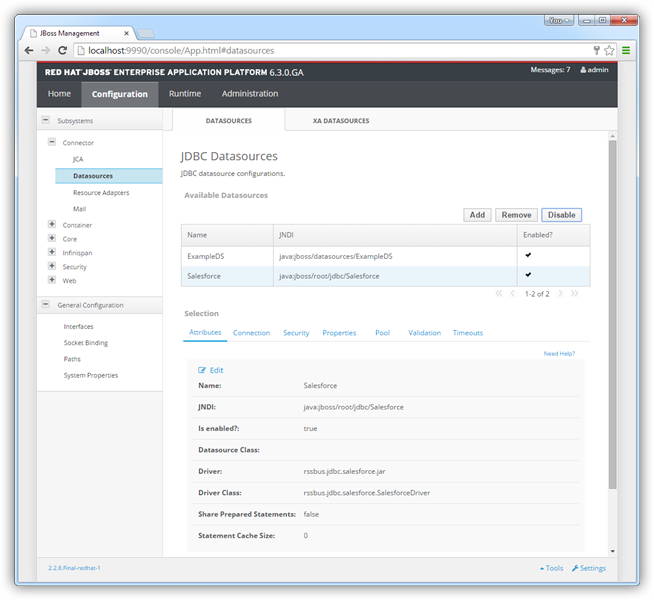
- In the Configuration menu, click Subsystems -> Connector -> Datasources. This opens the JDBC Datasources page.
- Click Add and, in the resulting wizard, enter a name for the driver and the JNDI name. For example:
java:jboss/root/jdbc/QuickBooks - Select the driver that you added above.
Enter the JDBC URL and the username and password. The syntax of the JDBC URL is jdbc:quickbooks: followed by a semicolon-separated list of connection properties.
When you are connecting to a local QuickBooks instance, you do not need to set any connection properties.
Requests are made to QuickBooks through the Remote Connector. The Remote Connector runs on the same machine as QuickBooks and accepts connections through a lightweight, embedded Web server. The server supports SSL/TLS, enabling users to connect securely from remote machines.
The first time you connect, you will need to authorize the Remote Connector with QuickBooks. See the "Getting Started" chapter of the help documentation for a guide.
Built-in Connection String Designer
For assistance in constructing the JDBC URL, use the connection string designer built into the QuickBooks JDBC Driver. Either double-click the JAR file or execute the jar file from the command-line.
java -jar cdata.jdbc.quickbooks.jarFill in the connection properties and copy the connection string to the clipboard.
![Using the built-in connection string designer to generate a JDBC URL (Salesforce is shown.)]()
A typical connection string is below:
jdbc:quickbooks:URL=http://remotehost:8166;User=admin;Password=admin123;- Test the connection and finish the wizard. Select the QuickBooks data source and click Enable.

More JBoss Integration
The steps above show how to configure the driver in a simple connection pooling scenario. For more information, refer to the Data Source Management chapter in the JBoss EAP documentation.


