Model Context Protocol (MCP) finally gives AI models a way to access the business data needed to make them really useful at work. CData MCP Servers have the depth and performance to make sure AI has access to all of the answers.
Try them now for free →Import Snowflake Data into the Power BI Service for Visualizations
Use CData Connect Cloud to connect to Snowflake Data and provide access to live Snowflake data for custom reports in the Power BI Service.
Power BI transforms your company's data into rich visuals for you to collect and organize so you can focus on what matters to you. When paired with CData Connect Cloud, you get access to Snowflake data for visualizations, dashboards, and more. This article shows how to connect to Snowflake in CData Connect Cloud, publish a dataset from Power BI Desktop to the Power BI Service and then create reports on Snowflake data in the Power BI service.
About Snowflake Data Integration
CData simplifies access and integration of live Snowflake data. Our customers leverage CData connectivity to:
- Reads and write Snowflake data quickly and efficiently.
- Dynamically obtain metadata for the specified Warehouse, Database, and Schema.
- Authenticate in a variety of ways, including OAuth, OKTA, Azure AD, Azure Managed Service Identity, PingFederate, private key, and more.
Many CData users use CData solutions to access Snowflake from their preferred tools and applications, and replicate data from their disparate systems into Snowflake for comprehensive warehousing and analytics.
For more information on integrating Snowflake with CData solutions, refer to our blog: https://www.cdata.com/blog/snowflake-integrations.
Getting Started
Configure Snowflake Connectivity for Power BI Service
Connectivity to Snowflake from Power BI Service is made possible through CData Connect Cloud. To work with Snowflake data from Power BI Service, we start by creating and configuring a Snowflake connection.
(Optional) Add a New Connect Cloud User
As needed, create Users to connect to Snowflake through Connect Cloud.
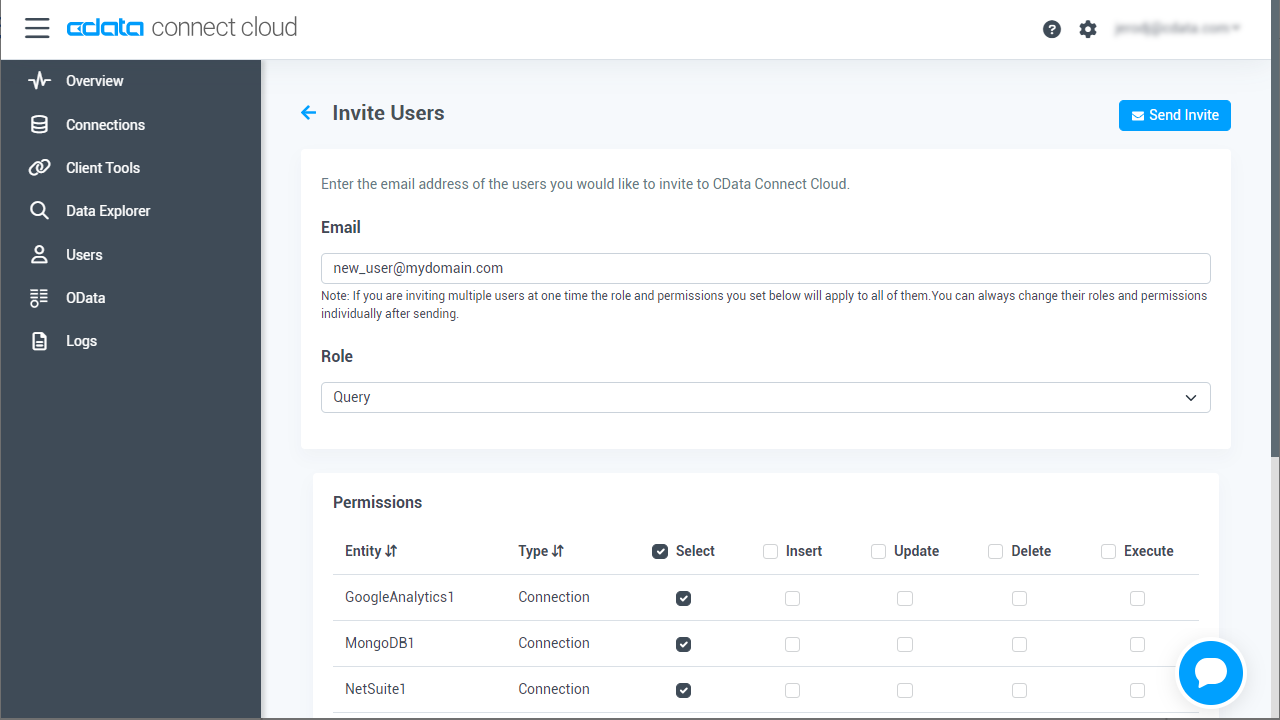
- Navigate to the Users page and click Invite Users
- Enter the new user's email address and click Send to invite the user
![Inviting a new user]()
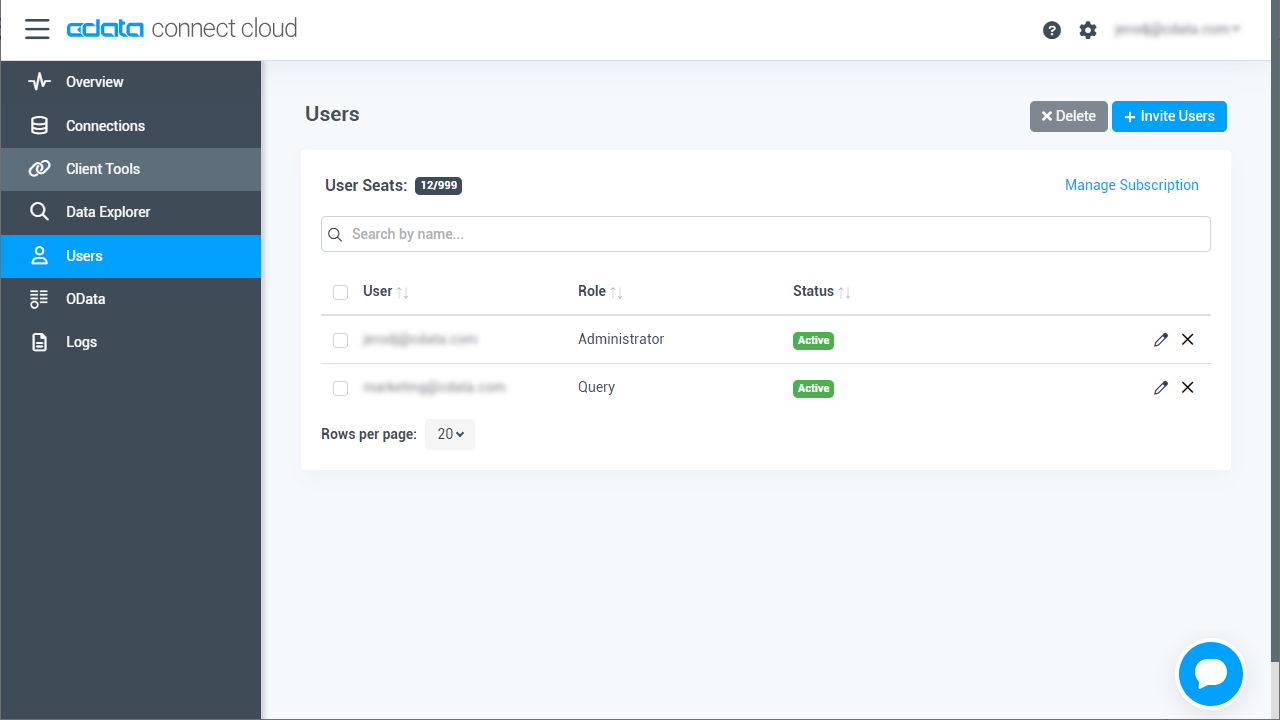
- You can review and edit users from the Users page
![Connect Cloud users]()
Connect to Snowflake from Connect Cloud
CData Connect Cloud uses a straightforward, point-and-click interface to connect to data sources.
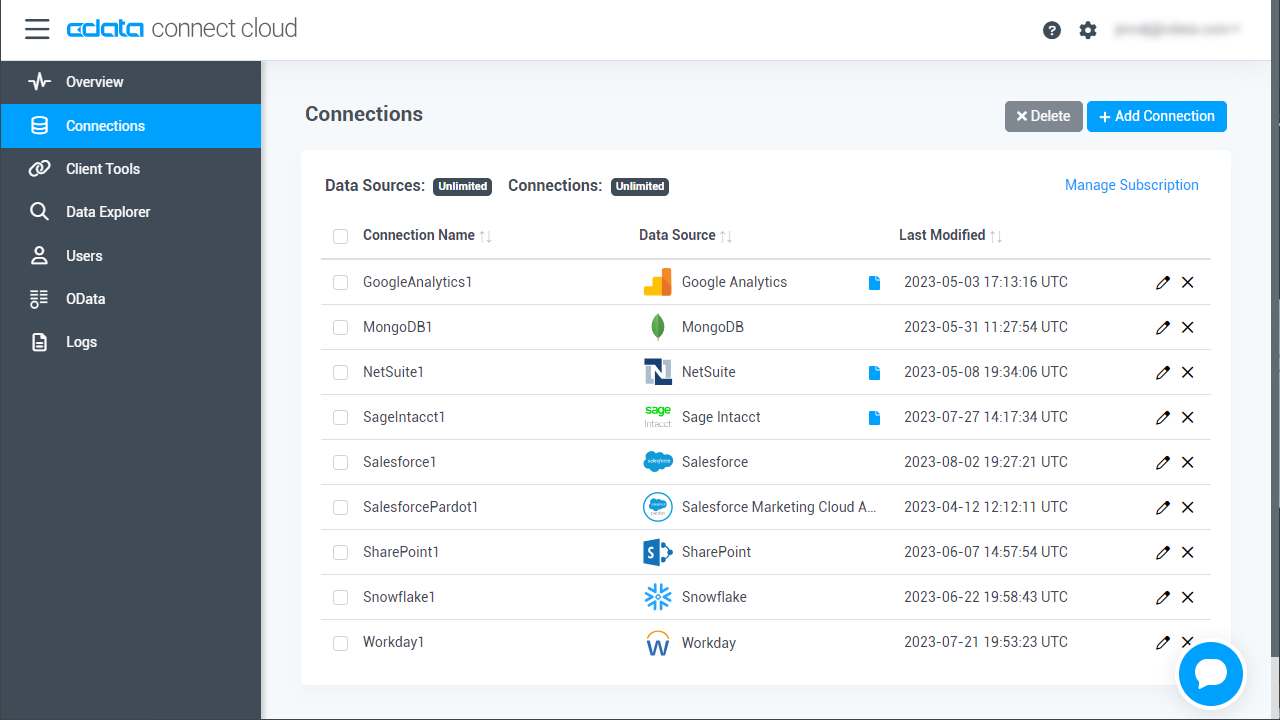
- Log into Connect Cloud, click Connections and click Add Connection
![Adding a Connection]()
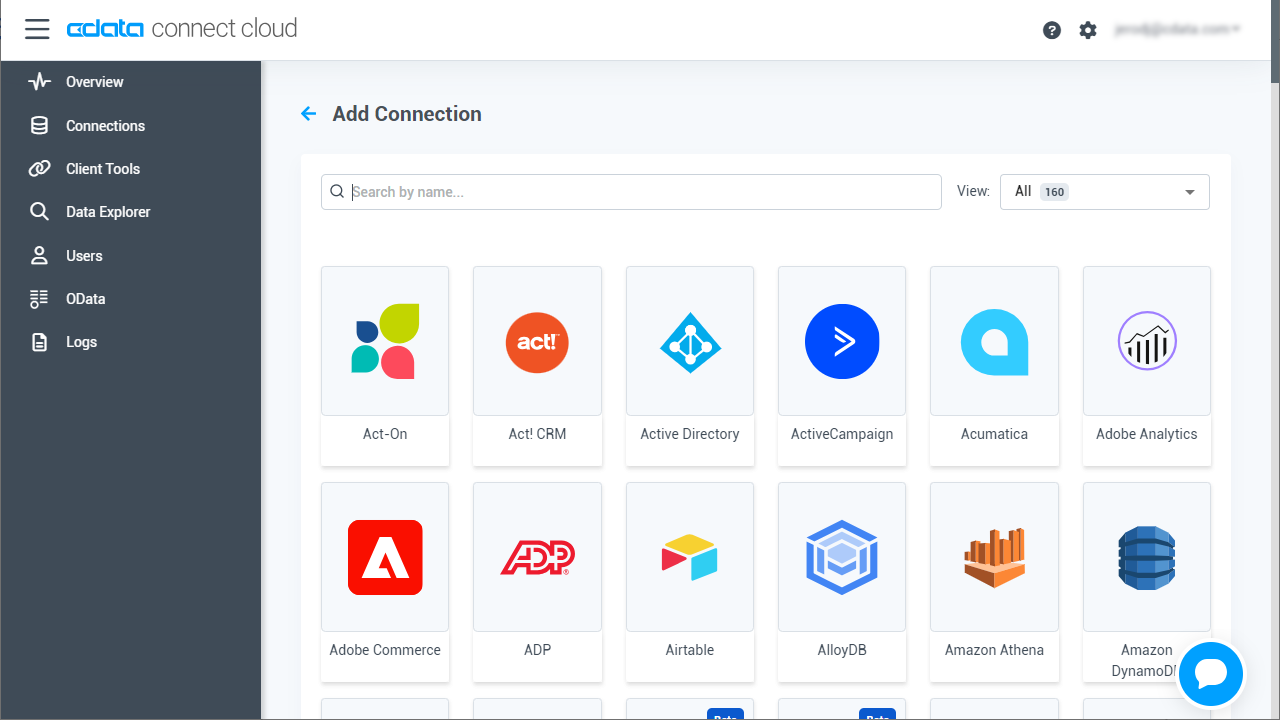
- Select "Snowflake" from the Add Connection panel
![Selecting a data source]()
-
Enter the necessary authentication properties to connect to Snowflake.
To connect to Snowflake:
- Set User and Password to your Snowflake credentials and set the AuthScheme property to PASSWORD or OKTA.
- Set URL to the URL of the Snowflake instance (i.e.: https://myaccount.snowflakecomputing.com).
- Set Warehouse to the Snowflake warehouse.
- (Optional) Set Account to your Snowflake account if your URL does not conform to the format above.
- (Optional) Set Database and Schema to restrict the tables and views exposed.
See the Getting Started guide in the CData driver documentation for more information.
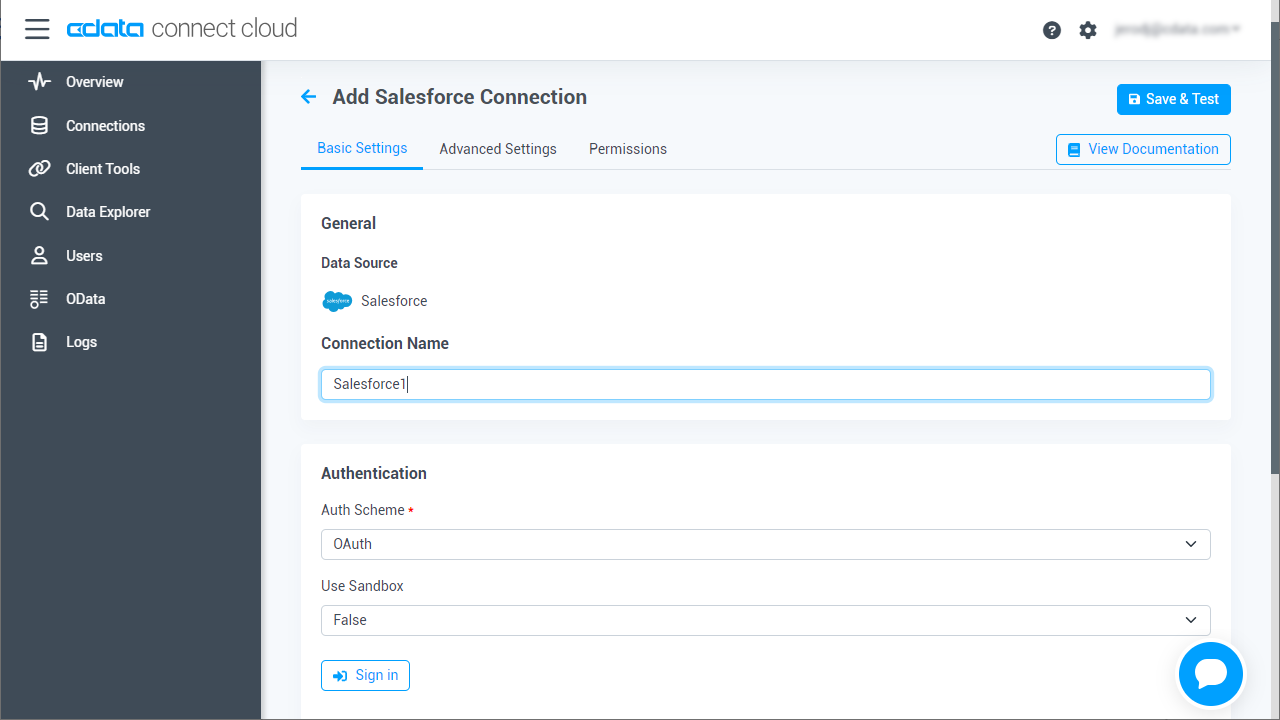
![Configuring a connection (Salesforce is shown)]()
- Click Create & Test
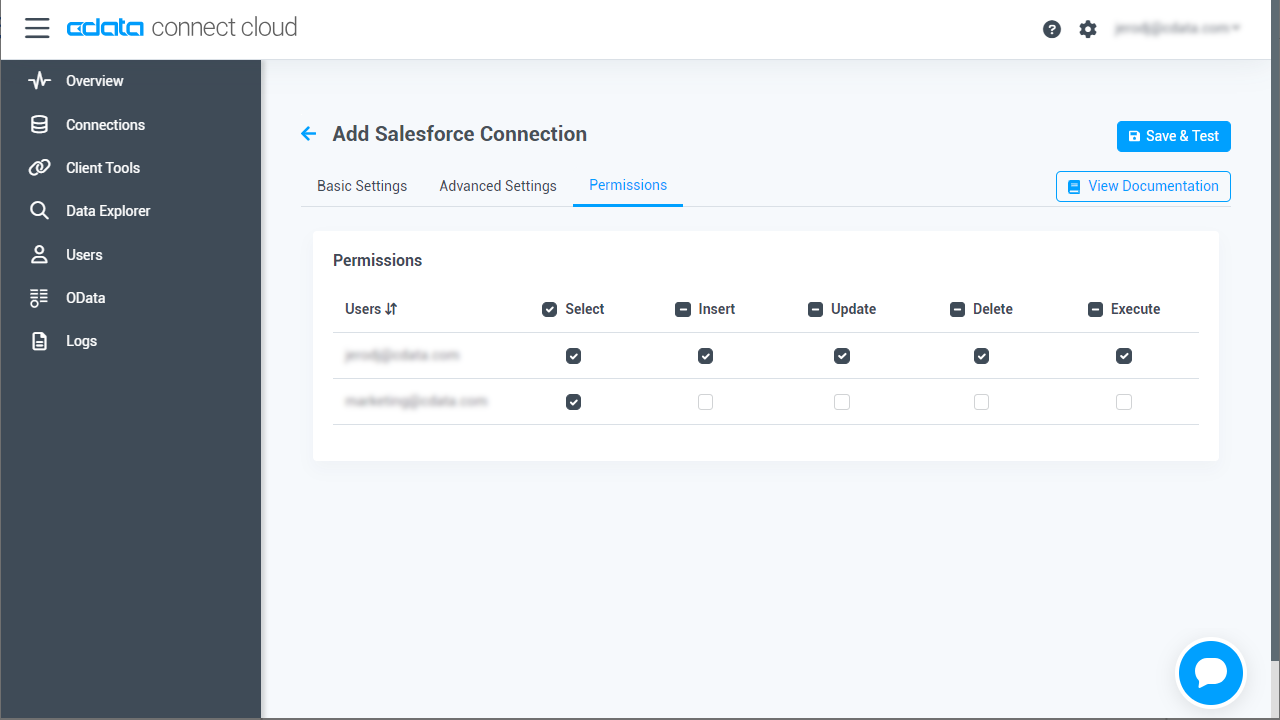
- Navigate to the Permissions tab in the Add Snowflake Connection page and update the User-based permissions.
![Updating permissions]()
With the connection configured, you are ready to connect to Snowflake data from the Power BI service.
Publish a Dataset from Power BI Desktop
Once you connect to Snowflake in Connect Cloud, you can create a dataset in Power BI desktop and publish the dataset to the Power BI service.
- Open Power BI Desktop and click Get Data -> Online Services -> CData Connect Cloud and click "Connect"
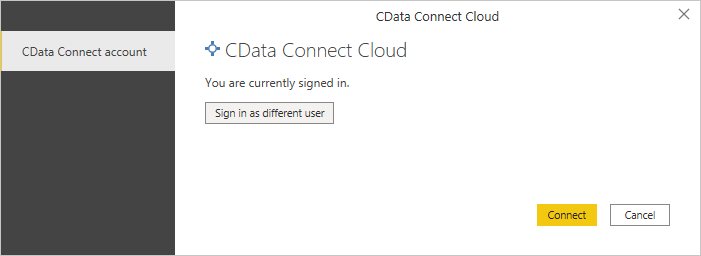
- Click "Sign in" and authenticate with your CData Connect Cloud account
![Authenticating with Connect Cloud]()
- After signing in, click "Connect"
![Connecting to Connect Cloud]()
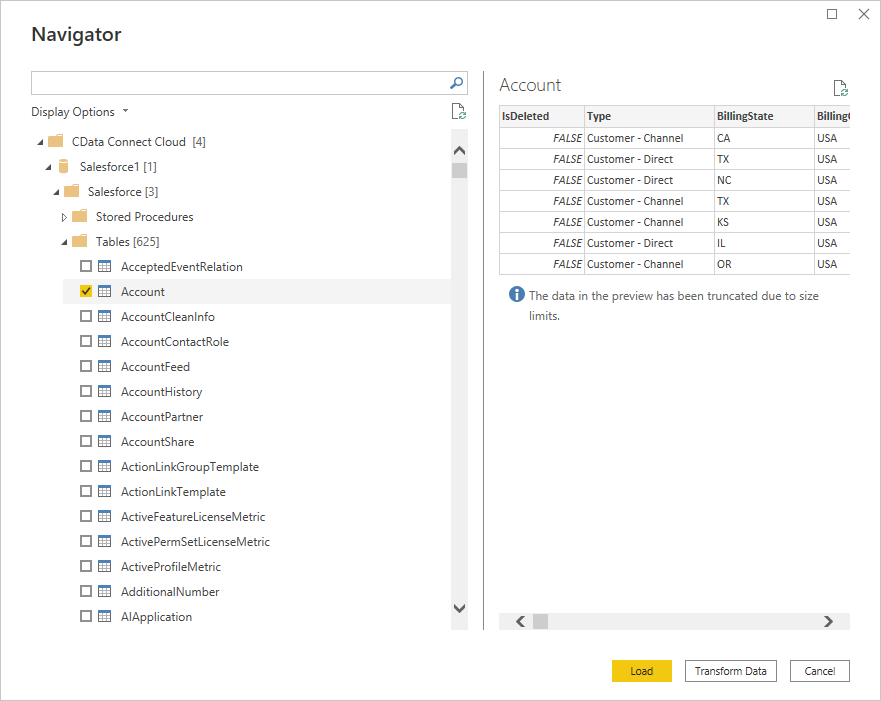
- Select tables in the Navigator dialog
![The available tables. (Salesforce tables are shown)]()
- Click Load to establish the connection to your Snowflake data from Power BI
- Define any relationships between the selected entities on the Relationships tab.
- Click Publish (from the Home menu) and select a Workspace.
Build Reports and Dashboards on Snowflake Data in the Power BI Service
Now that you have published a dataset to the Power BI service, you can create new reports and dashboards based on the published data:
- Log in to PowerBI.com.
- Click Workspaces and select a workspace.
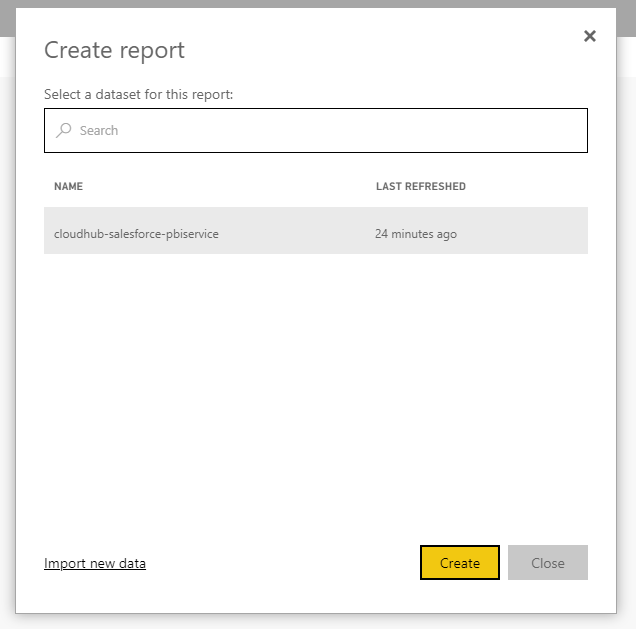
- Click Create and select Report.
- Select the published dataset for the report.
![Select a dataset]()
- Choose fields and visualizations to add to your report.
![Visualizing Snowflake data in the Power BI service]()
Live Access to Snowflake Data from Cloud Applications
Now you have a direct connection to live Snowflake data from the Power BI service. You can create more data sources and new visualizations, build reports, and more — all without replicating Snowflake data.
To get live data access to 100+ SaaS, Big Data, and NoSQL sources directly from your cloud applications, sign up for a free trial of CData Connect Cloud.

