各製品の資料を入手。
詳細はこちら →
製品をチェック
MySQL のFederated Table としてJira Service Management のデータを連携利用する
SQL Gateway とODBC Driver を使ってJira Service Management のMySQL Federated Table を構築する。
最終更新日:2022-07-18
この記事で実現できるJira Service Management 連携のシナリオ

こんにちは!ドライバー周りのヘルプドキュメントを担当している古川です。
SQL Gateway を使って、MySQL リモーティングサービスを作成し、Jira Service Management のMySQL Federated Table を構築できます。CData ODBC Driver for JiraServiceDesk のMySQL インターフェースのdeamon になります。サービス起動後、MySQL のFEDERATED ストレージエンジンを使ってサーバーおよびテーブルを作成します。Jira Service Management のデータ をMySQL テーブルのように使いましょう。
Jira Service Management のデータへの接続
If you have not already done so, provide values for the required connection properties in the data source name (DSN). You can use the built-in Microsoft ODBC Data Source Administrator to configure the DSN. This is also the last step of the driver installation. See the "Getting Started" chapter in the help documentation for a guide to using the Microsoft ODBC Data Source Administrator to create and configure a DSN.
Jira Service Management 接続プロパティの取得・設定方法
任意のJira Service Management Cloud またはJira Service Management Server インスタンスへの接続を確立できます。接続するにはURL プロパティを設定します。
- URL(例:https://yoursitename.atlassian.net)
カスタムフィールドへのアクセス
デフォルトでは、CData 製品はシステムフィールドのみを表示します。Issues のカスタムフィールドにアクセスするには、IncludeCustomFields を設定します。
Jira Service Management への認証
ベーシック認証
ローカルサーバーアカウントで認証するためには、次の接続プロパティを指定します。
- AuthScheme:Basic に設定。
- User:認証ユーザーのユーザー名に設定。
- Password:認証ユーザーのパスワードに設定。
API トークン
Cloud アカウントに接続するには、APIToken を取得する必要があります。API トークンを生成するには、Atlassian アカウントにログインして「API トークン」 -> 「API トークンの作成」をクリックします。生成されたトークンが表示されます。
データに接続するには以下を設定します。
- AuthScheme:APIToken に設定。
- User:認証ユーザーのユーザー名に設定。
- APIToken:作成したAPI トークンに設定。
ちなみに、Cloud アカウントへの接続でパスワード認証を使うことも可能ですが、非推奨となっています。
OAuth 2.0
Jira Service Management のOAuth 2.0 サポート(3LO)を活用して、ログインクレデンシャルなしでデータに接続することもできます。この場合、AuthSchemeをすべてのOAuth フローでOAuth に設定する必要があります。また、すべてのシナリオでカスタムOAuth アプリケーションを作成して構成する必要があります。詳しくは、ヘルプドキュメントの「OAuth」セクションを参照してください。
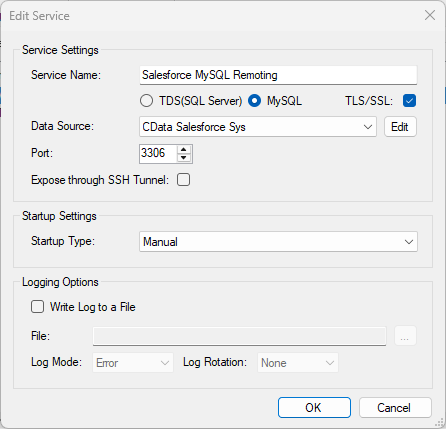
SQL Gateway の設定
See the SQL Gateway Overview to set up connectivity to Jira Service Management のデータ as a virtual MySQL database. You will configure a MySQL remoting service that listens for MySQL requests from clients. The service can be configured in the SQL Gateway UI.
Jira Service Management データ のFEDERATED サーバーおよびテーブルを作成
After you have configured and started the service, create a FEDERATED server to simplify the process of creating FEDERATED tables:
FEDERATED サーバーの作成
The following statement will create a FEDERATED server based on the ODBC Driver for JiraServiceDesk. Note that the username and password of the FEDERATED server must match a user account you defined on the Users tab of the SQL Gateway.
CREATE SERVER fedJiraServiceDesk
FOREIGN DATA WRAPPER mysql
OPTIONS (USER 'sql_gateway_user', PASSWORD 'sql_gateway_passwd', HOST 'sql_gateway_host', PORT ####, DATABASE 'CData JiraServiceDesk Sys');
FEDERATED テーブルの作成
To create a FEDERATED table using our newly created server, use the CONNECTION keyword and pass the name of the FEDERATED server and the remote table (Requests). Refer to the following template for the statement to create a FEDERATED table:
CREATE TABLE fed_requests (
  ...,
  requestid  TYPE(LEN),
  reportername  TYPE(LEN),
  ...,
)
ENGINE=FEDERATED
DEFAULT CHARSET=latin1
CONNECTION='fedJiraServiceDesk/requests';
NOTE: The table schema for the FEDERATED table must match the remote table schema exactly. You can always connect directly to the MySQL remoting service using any MySQL client and run a SHOW CREATE TABLE query to get the table schema.
クエリの実行
You can now execute queries to the Jira Service Management FEDERATED tables from any tool that can connect to MySQL, which is particularly useful if you need to JOIN data from a local table with data from Jira Service Management. Refer to the following example:
SELECT
  fed_requests.requestid,
  local_table.custom_field
FROM
  local_table
JOIN
  fed_requests
ON
  local_table.foreign_requestid = fed_requests.requestid;